Showing posts with label bag. Show all posts

Friday, February 15, 2008

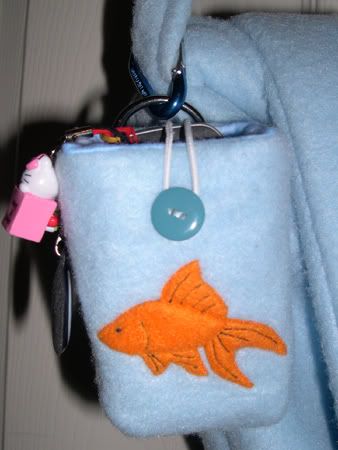
Cell Phone Holder with Fleece Applique


I just finished this fleece cell phone holder that I made to match my fleece goldfish bag. Instead of outlining the details in orange as I did on the original bag, I did them in black. Right now I can't decide whether or not that's an improvement! To attach the applique I used the same technique as the elephant pillow I made a while back, except I used a straight stitch on the edges instead of satin stitch.
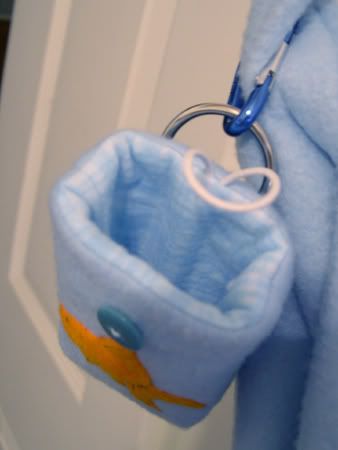

It's lined with plaid baby blue flannel and has a button and elastic loop for closure. I really like the flannel and I'm thinking about making another holder using the flannel as the background instead of the blue fleece. The problem with using fleece for an entire item is that after it gets used for a while it starts to pill. They do sell expensive no-pill fleece, but it's really meant for clothing and would probably be a waste to use on the things I make. Also, if I make any more of these I'll probably look into dying the elastic to match - I don't much care for plain white.
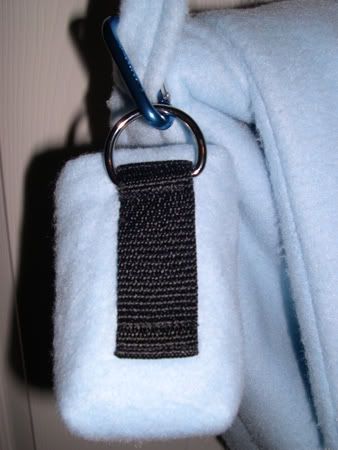

On the back I attached some strapping so that it could be attached to a belt, and I also sewed in a D-ring with a carabiner so it could be hung from a purse strap or belt loop.

Since t was a pretty quick sew, I'm thinking about trying to make some in different colors with different applique images. I'd also like to make other small items that matched them, like maybe a clutch or coin purse.

Thursday, January 10, 2008

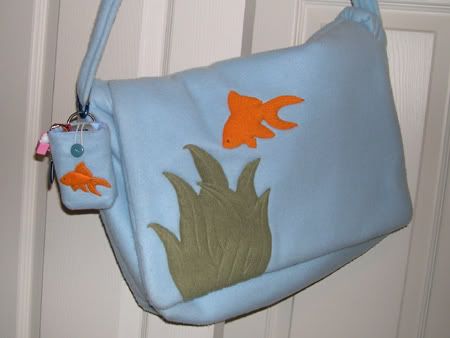
Fleece Bag with Goldfish Applique


Here's my first attempt at a full-sized bag (see my Elephant Fleece Applique Pillow post for the technique I used to attach the applique). I started it months ago but my old Singer couldn't handle the multiple thicknesses of fleece and interfacing so I had to quit. I tried again when I got my new Viking and it couldn't handle it either! So I talked my dad into letting me "permanently borrow" his 1936 direct drive Singer. He had been using it to repair flags and the guy he bought it from had used it to sew leather so it seemed like it would be able to handle a few thinknesses of fleece! I finally got around to trying it out this week and I was able to finish the bag, but there were still a few extra-thick areas that I ended up having to sew by hand. Oh well, at least it's done!

Thursday, April 12, 2007

Knitted Bag


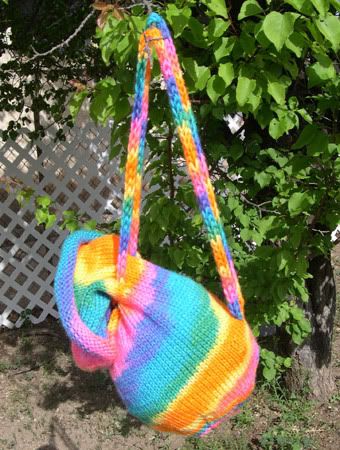
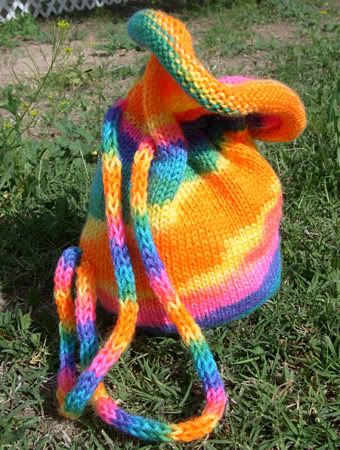
Here's my latest knitted project - a very simple bag knitted out of boredom.  Since I really didn't have any plans when I started knitting it I don't have specific instructions for it.  All I did was:

1. Cast on a bunch of stitches on a circular needle, join them and knit in the round.

2. Knit until the knitting is long enough to form the "lip" of the bag. 

3. Making the holes for the drawstring is the hardest part.  First, figure out how many holes are needed for the drawstring, and how far apart they must be to be evenly spaced.  There must be an even number of holes.  I chose 6, but I wish I had used more because there is too much space between them. 

For each hole, you will bind off a certain number of stitches on the first row, then cast on the same number of stitches in the same place in the next row.  I bound off 4 stitches for each hole, but that was really too many because it made the holes huge.  I probably should have bound off only 2 or 3 stitches. 

The hardest part of this for me was casting on the stitches in the next row.  I had never cast on in the middle of a row before.  A "backwards-loop" cast-on (also called single cast-on) is used and it took me a long time to figure out.  I had to watch the video for this technique at KnittingHelp.com several times before I could do it.  Note that the video just shows how to do the cast-on, not how to cast on in the middle of a row.

4. Continue knitting until the body of the bag is big enough.  Then begin decreasing stitches evenly until the bottom of the bag can be pulled closed (note: I decreased every other row so the bottom of the bag wouldn't get too small too fast).  Close the bottom of the bag and finish.

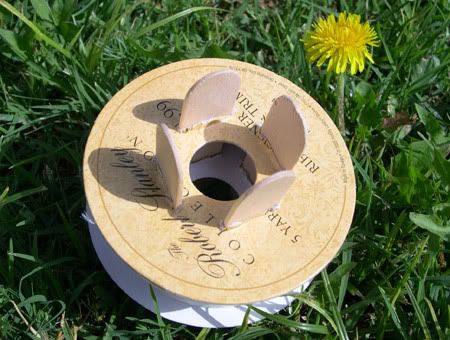
5. Knit a cord.  Mine was 3-4 feet long.  Cord can either be knitted on two double-pointed needles (called knitting "I-cord") or with a knitting spool (also called a knitting nancy).  I tried to knit my cord on the needles first, but my stitches kept falling off and I had to start over several times.  I have knitted with a knitting spool in the past so I knew how to do it, but I didn't have a spool anymore.  So instead of going to the store and buying stuff to make one properly, I fudged it:


I took a spool of ribbon and stuck four popsicle sticks in it.  It worked surprisingly well.

6. When the cord is finished, thread it through the holes in the bag.  The two long ends should exit the bag next to each other - tack each end to the side of the bag, and voila - straps!


I know this isn't the most attractively colored bag - I used a scrap ball of yarn to do it.  But I think some of my friends' children might find rainbow bags more attractive than I do, so I think I may give it to them to carry toys around in.

On another note, it looks like Kevin and I will "take posession" of our new house on April 17th.  We can't wait!

Related Posts with Thumbnails