
I haven't posted anything in the past few weeks - I went to visit my parents for a week and that threw everything off. I haven't knitted anything new, though I think I'll go online and try to find a pattern for something I can knit with the yarn I already have. I did paint two paintings, but they're pretty ugly so I don't really want to post them. I am also working on another project, an anime-inspired fleece hat, but I am stuck on that one because no one around here carries black fleece (that's the main color for the hat).
But I do have some exciting news - Kevin and I are finally buying a house! It's not as big as we would have liked and it costs more than we had hoped, but it's cute and fairly new. We are going through all the inspection and appraisal stuff right now, so we will hopefully be moving in late April. We can't wait! No more sharing walls with neighbors, no more people parking in my spot, no more going to the post office every day (because they won't deliver mail to our apartment!), and no more landlords telling us "You can't put nails in the walls!" or "You can't have pets!" or "You can't put up a satellite dish!" I know that owning a home has its own problems, but I think they'll be outweighed by its advantages. Yay!
Tuesday, March 27, 2007
We're buying a house!


Friday, March 02, 2007
Knitted Pillow Covers
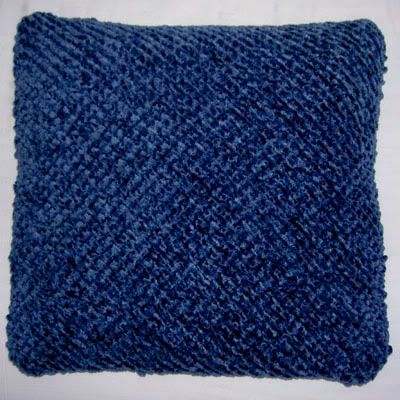
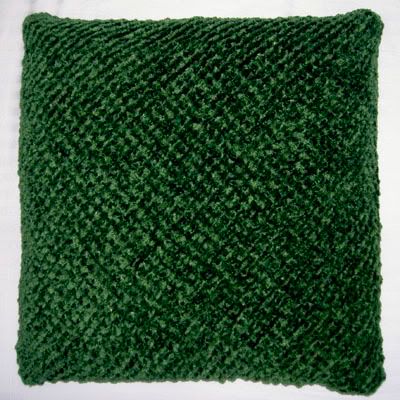
Project Name: Diagonally Knit Pillow Covers
Time Taken to Finish: 2 weeks
Type of Yarn Used: Lion Brand Chenille Thick and Quick in Periwinkle and Basil
Amount of Yarn Used: 6 skeins, 3 of each color
Needles Used: US size 11 needles
What I Liked About the Project: Easy garter stitch knitting. Since it was knit diagonally, I didn't have to worry about calculating how many stitches to cast on.
What I Didn't Like About the Project: They took way longer to knit than I had originally thought.
Here's what I did to knit them:
Cast on 3 stitches. Knit them (row 1).
Row 2 - Increase first stitch, knit second stitch, increase last stitch.
Row 3 - Knit back across without increasing.
Row 4 - Increase first stitch, knit middle stitches, increase last stitch.
Row 5 - Knit back across without increasing.
Rows 6 and onward - For even rows: increase the first stitch, knit the middle stitches, and increase the last stitch. For odd rows: knit across without increasing. Continue knitting until the triangle created is wide enough to cover half the pillow (make sure there is a little extra for a seam).
When the knitting is the correct size, note the number of stitches on the needle (I had 59 stitches). Now, begin decreasing the first and last stitches on the even rows. Continue knitting all stitches on the odd rows.
Knit until there are only 3 stitches left on the needle. Bind off these stitches.
The knitting will now be a square big enough to cover one side of the pillow. Repeat the above instructions to create a second square (be sure to increase to the same number of stitches noted in the first square). When finished, stitch the sides together and insert a pillow form.
Thursday, February 22, 2007
New Haircut

Not very exciting news, but I finally got a haircut. My hair was getting pretty long and it was taking me 10 minutes to dry it. I finally got fed up with it this morning and got it cut. I think it turned out alright. I'm not too happy with the picture (I think it looks like I'm trying too hard) but all the other photos I took make me look like a goofball. Maybe I can get Kevin to take another photo this weekend. He doesn't know that I've cut it, so hopefully he'll be surprised when he gets home!
Thursday, February 15, 2007
Knitted Tank Top
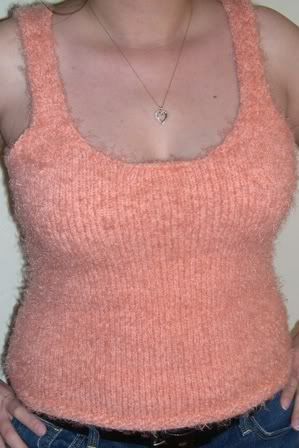
Front of Tank Top
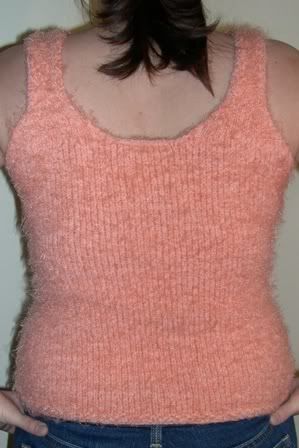
Back of Tank Top
Time Taken to Finish: 1 month (I was knitting intermittenly - I was having eye trouble and couldn't knit much some days)
Type of Yarn Used: Yarn Bee Cameo in Seashell
Amount of Yarn Used: About 2 1/2 skeins (each skein was 142 yards/3.5 oz)
Needles Used: US size 7 circular needles (36 inches long)
What I Liked About the Project: Almost all of the knitting was in stockinette stitch, which is very easy to do when knitting in the round. The tank is cute, fits well, and is very soft!
What I Didn't Like About the Project: I did not make the bottom border wide enough - it was only half an inch wide and the "curl" of the stockinette stitch causes it to flip up sometimes. Even though it's a tank top, the yarn is so heavy it will probably be too warm to wear in the summer. I'll probably end up wearing it to sleep instead. I may even make a pair of shorts to match!
Here's what I did to knit it:
1. After knitting a gauge swatch, I cast on the number of stitches I needed at my hips and joined them in the round.
2. I knit a 1/2 inch border of knit one, purl one rib. If I did it again I would knit at least a 1 inch border. If you look at the photo you will probably notice that my border doesn't look like a knit one, purl one rib. This is because I messed it up and purled one then knitted one on alternate rows.
3. I switched to stockinette stitch and began decreasing stitches evenly so that, by the time I had knitted 7 inches, I had the correct number of stitches I needed for my waist.
4. I then began increasing stitches so that, by the time I had knitted another 7 inches (for a total of 14 inches,) I had the correct number of stitches I needed for my bust.
5. I bound off the arm holes and the neck hole (front and back) and knit the four straps individually (right front and back straps, left front and back straps).
6. I used Kitchener stitch to connect the front and back straps, and then weaved in all loose ends. Done!
By the way, I'm re-reading all the Harry Potter books in preparation for this July! With the new movie and the final book due then, it promises to be an exciting month!
Wednesday, February 07, 2007
Yum! Melba Toast
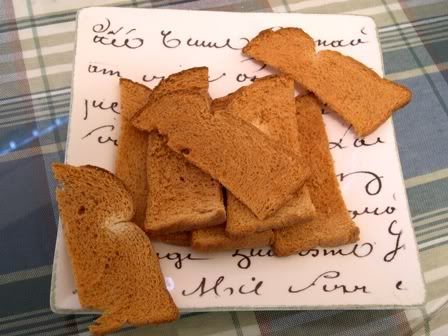
Melba Toast Recipe
- First, preheat your oven to 350 degrees F.
- Next, toast your bread. It should be as well-browned as you can get it without burning it - I usually use a toaster oven. Keep in mind that you will get four pieces of Melba toast for every slice of bread you use.
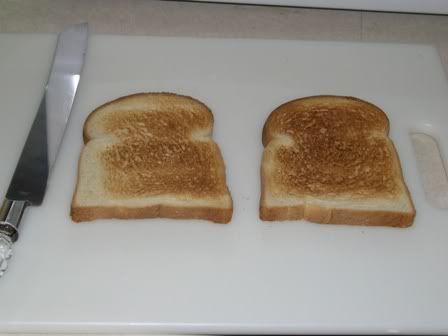
Toasted slices of bread
- Now, cut each slice of bread in half lengthwise (see photo below).
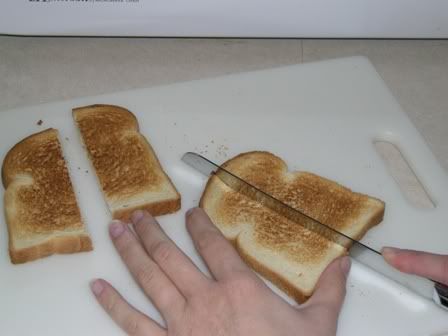
Cutting toast in half
- Standing the half of toast on end, split it through the middle (see photo below). You should now have two quarters of toast, each untoasted on one side.
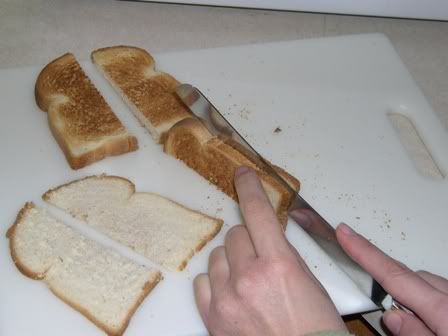
Making toast quarters
- Arrange all the toast quarters on a baking sheet with the untoasted sides facing up (see photo below). Place baking sheet in oven on center rack.
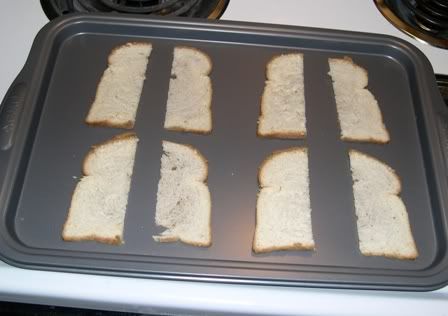
Toast quarters on baking sheet
I love eating Melba toast with fancy cheeses, but it is also good as a side dish with soups and pasta. You can make it out of any type of bread you like, including french bread. I personally think that, for Melba toast, white bread tastes better that wheat. I like to use light Wonder bread, which only has 40 calories per slice, so only 80 calories for 8 pieces of Melba toast. Yum!
Strange Coincidences
I wanted to mention two strange coincidences that happened to me this morning...
Kevin and both got up early today to take my truck into the shop for a "check-up." Even though the shop did not open until 8 am, we had to leave the truck there before 7 am so Kevin could get to work on time. We wrote all our contact information on an envelope the shop provided, then dropped the keys in the envelope and put the envelope in a mail slot. Kevin dropped me off at home and asked me to call the shop around 9 am to make sure that they got the keys. I took a short nap and woke up at almost precisely 9 am. I picked up the phone to call the shop but strangely there was no dial tone. I hung it up and tried again but there was still no dial tone! However, while I was listening for the dial tone the second time I realized that I was not hearing "dead air" - I was hearing scuffling noises on the line! I started to freak out, thinking that someone was tapping my line or something. I was trying to be quiet and listen to see if I could figure out what was happening when I heard Kevin's voice say "Hello?" It turns out that he had called me just as I picked up the phone to call the car shop. The phone never even rang! I can only think of one other time in my life when that has happened - it was when I was in elementary school and I picked up the phone to call a friend just as she called me. I'm sure it probably happens to people all the time but I still find it pretty astonishing!
The second coincidence was even more odd - Kevin was calling because the auto repair guy had been calling him at his office all morning, even though my name was on the envelope and the only numbers we provided were our home phone and my cell phone! We were scratching our heads trying to figure out how they knew to call Kevin and how they figured out where he worked. When I hung up with Kevin, I called the repair guy back to make sure he was going to change our windshield wipers. While we were on the phone I asked him how he knew to call Kevin and where he got his work number. It turns out that they still had records for my truck in their computer system from when I had it checked out the last time I lived here in 2004. I wouldn't have thought that they could have made the connection since I now have new license plates and a new last name, but they use the VIN number to track vehicles so they were able to look me up! The repair guy said that he hadn't even looked at the numbers on the envelope we gave them - he had just called the number in their system...which was my old work number. And since Kevin now works at the same place, somehow the call managed to get transferred to him! Funny, huh?
Tuesday, January 23, 2007
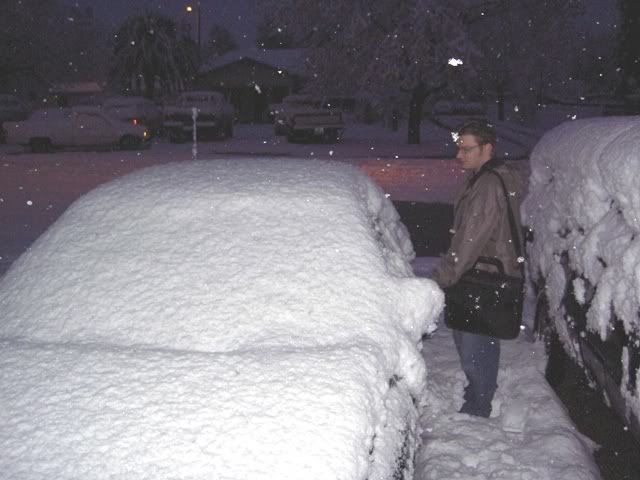
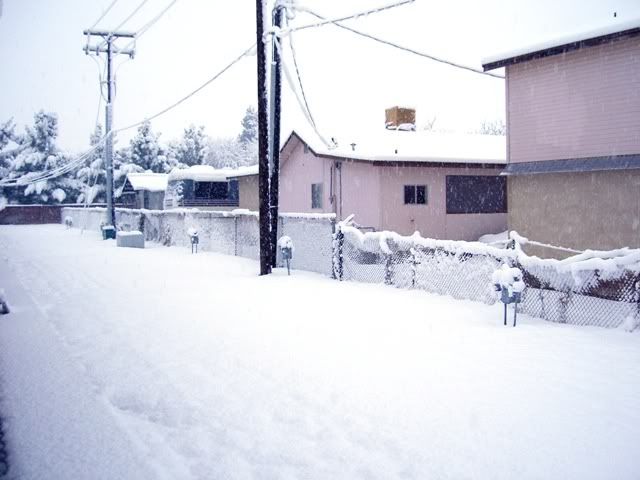
Seven Inches of Snow!!!
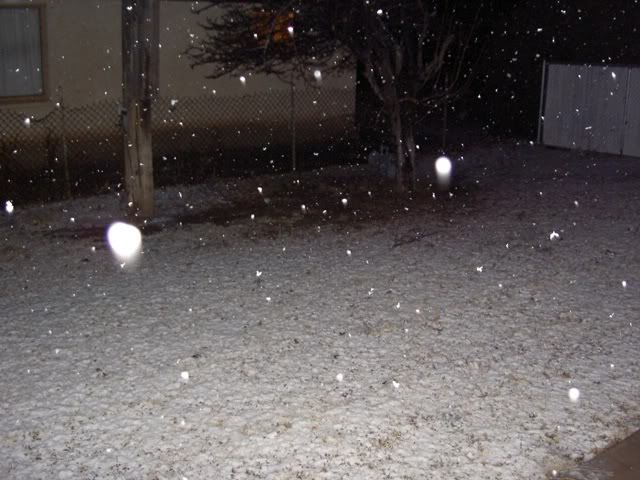
I was so excited that I went into the back yard in the dark and made a tiny snowman (he's about a foot tall). I wanted to make sure that I got a chance to play in the snow before it all melted away.
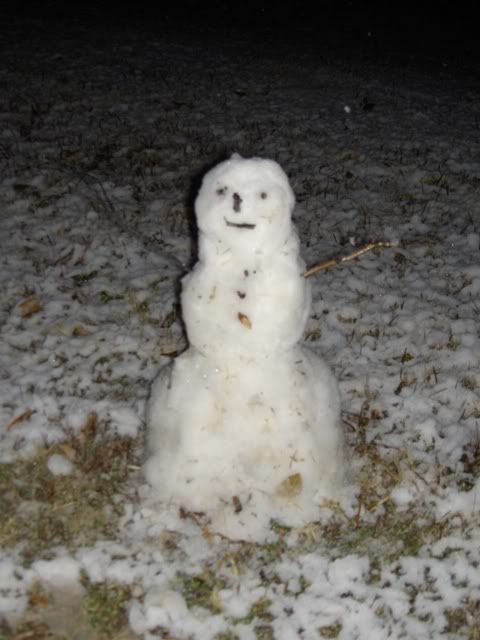
I needn't have worried though, because by the next morning my tiny snowman looked like this:
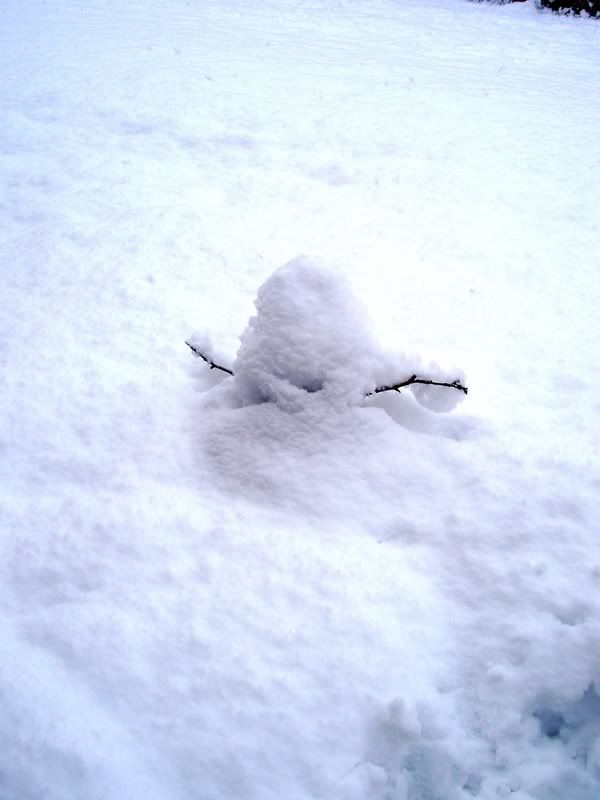
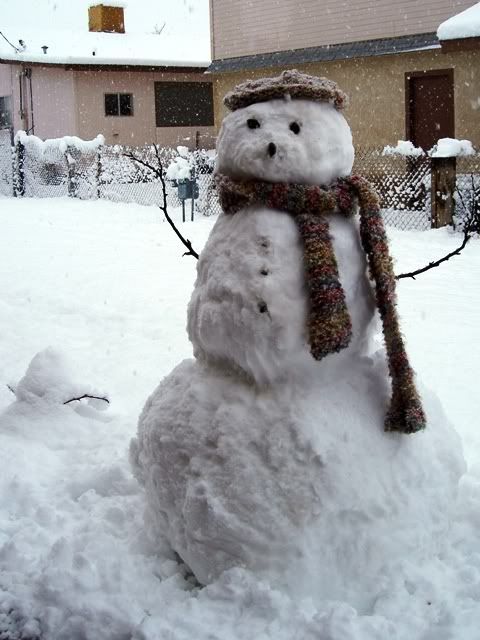
My big snowman (with the tiny one in the background)
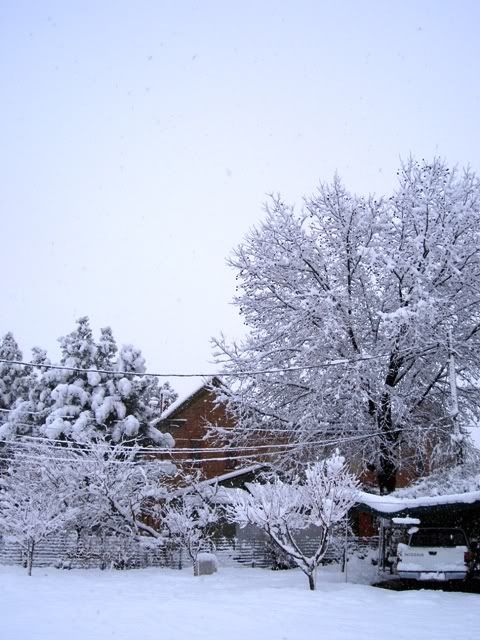
Snow in a neighbor's yard
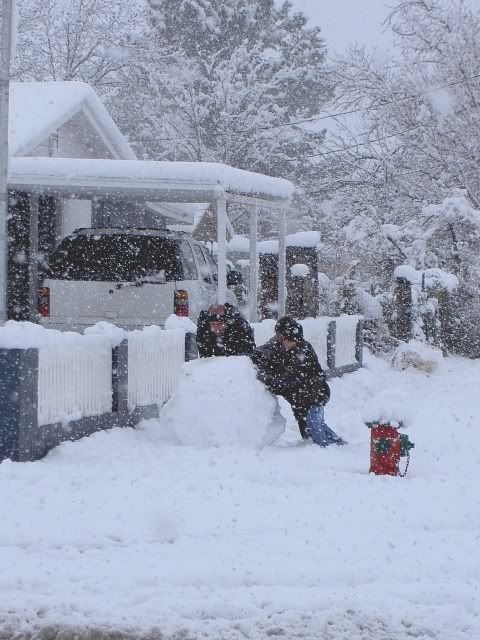
Neighbors making a snowman

Snow on nearby mountain
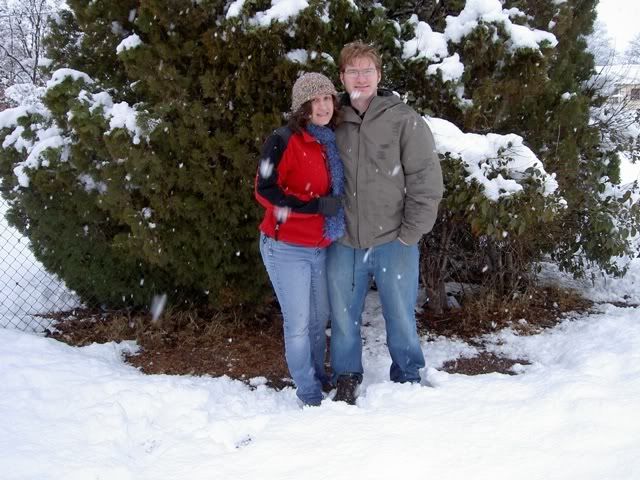
Us in the snow!
Thursday, January 04, 2007
Camo Hat and Tea Cozy
Camouflage Hat
I'm back from vacation and I thought I'd do a little write-up on the projects I knitted as Christmas gifts. The first was a camouflage hunting hat for my brother John:

This hat was knit following the directions for Crazy Aunt Purl's Roll-Brim Hat. I've knitted with this pattern before to make a roll-brim hat for myself (see November 17, 2006 blog entry). This time was a little different since I was knitting with a lighter weight yarn and smaller needles. The yarn I used was Bernat Camouflage in Renegade (medium weight) with a size 8 circular needle. I cast on 80 stitches (my gauge was about 3.5 stitches per inch - the hat was about 23 inches in circumference), knitted until the hat was about 7 inches long, then decreased my stitches until the hat was small enough to close. At the last possible moment (when I could no longer use the circular needle) I put the stitches on size 10 double-pointed needles since I didn't have any size 8. There was no noticable difference in stitch size since I only used the double pointed needles for a few rows.
Tea Cozy
After finishing the hat, I began searching for a pattern for a tea cozy for my father. He sent me a photo of the teapot and its dimensions for me to work from - I also had a teapot of my own that was similar in size (about 5 inches tall and 20 inches in circumference). I found a lot of patterns online for tea cozies, but none that I thought I could manage with my limited experience. I tried to start one or two, but became very frustrated with trying to determine what size to make and how to do the fancy stitches needed.
I then had a eureka moment! I pulled out the roll-brim hat I had just knitted for my brother - if the hat had two slits going up the sides and opposite each other, it would make a perfect cozy for my dad's teapot! So I modified Crazy Aunt Purl's Roll-Brim Hat design and made this:
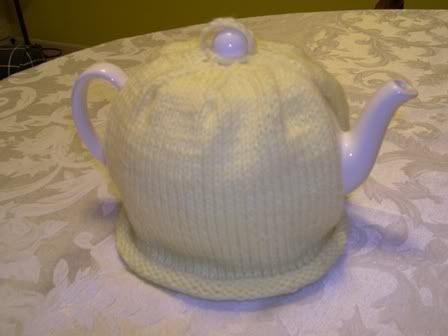
1. Cast on 80 stitches. This is the same number of stitches as the camo hat I knit, and with my gauge on size 8 needles (about 3.5 stitches per inch) this gives a final product with about a 23 inch circumference. This is 3 more inches that the circumference of the teapot to give a little room to put the cozy on. Also remember that the slits let the cozy stretch a bit in the middle as well. Refer to Aunt Purl's instructions to get the correct number of stitches to cast on for your gauge or teapot size.
2. Knit in the round for 10 rows using a regular knit stitch. This brought the knitting to the bottom of the handle of the teapot. Remember to let the brim of the cozy roll when you are measuring it, since it will be rolled in the final product.
3. Now split the stitches half and half. Leave 40 stitches on the needle, and put the other 40 on a stitch holder. Be sure to split the stitches starting from the beginning of your round. The stitches that you leave on the needle should include the last stitch you knitted (so it has the yarn going to the ball coming from it). This split will be the start of the slits in the sides of the cozy. You will knit the two sets of stitches separately and then joint them back together at the top of the slits.
4. This is the tough part - at least it was for me! Knit the first 40 stitches back and forth for 30 rows in a stockinette stitch (knit one row, purl one row). You are no longer knitting in a circle - you are now knitting the first of two flat panels. You may need to knit more rows if your teapot is bigger, or fewer if it is smaller - knit until the panel is long enough to go over the handle and spout. Just make sure to do an even number of rows and to write down how many rows you did so that you can do the same on the other panel.
Technically you do not have to knit in a stockinette stitch if you don't want to. If you use a regular knit stitch instead, the only difference will be that the stitches in your 30 rows in the flat panels will look differently than the stitches in the circularly knitted rows. No big deal!
If you do decide to use a stockinette stitch, make sure that the first row you knit flat is done with the opposite stitch used in the last row knitted circularly. So if the last row knitted circularly was with a purl stitch, the first row knitted flat should be with a regular knit stitch (and vice versa). If you can't tell the difference between a knit stitch and a purl stitch after they've been knitted (like me!), just do a couple of stitches with the knit stitch and see if the look of those stitches matches the look of the stitches in the circularly knitted rows. If they do, you need to knit the rest of the row. If they don't, you need to undo those stitches and purl the row instead. Write down whether you knitted or purled the first flat row so you don't have to figure it out again with the next panel! And if you can't figure it out at all, just use a knit stitch for the whole thing.
5. After you have knitted the 30 rows in the first flat panel, transfer those stitches to a new stitch holder. Cut the yarn off at the end of the stitches, but leave a long tail so the stitches will not come unraveled while you are knitting the other panel.
6. Transfer the 40 stitches from the original stitch holder back on to your needle. You will then need to join the yarn from the ball to these stitches so you can knit them. This part can also be difficult. Here's how I did it:
a. Leaving a tail of about 5 inches, knit (or purl, depending on what your first row of stitches will be) the first stitch.
b. For the second stitch, instead of knitting (or purling) with the yarn from the ball, take the tail you left and knit (or purl) it into the second stitch.
c. From the third stitch on, go back to knitting (or purling) with the yarn from the ball.
This method of joining keeps the tail of the yarn from hanging out at the end of the row (I think I saw someone do this on the TV show Knitty Gritty). Once you have knitted several rows, you can go back and use a yarn needle to tie off the tail on the inside of the cozy.
7. Knit the second panel until you have the same number of rows as the first panel. Don't cut your yarn!
8. Transfer the 40 stitches for the first panel from the stitch holder to the needles. You should now have all 80 stitches on your circular needle. Make sure that the last stitch you knit on the second panel is at one end of the circular needle (the last stitch will have the yarn from the ball going from it). At the other end of the circular needle should be the stitches from the first panel. Make sure nothing is twisted, then join the two panels together - using the yarn coming from the last stitch of the second panel, knit the first stitch of the first panel on the other end of the circular needle. Knit the entire row circularly, stitching the other slit togther in the same manner when you come to it.
9. At this point my cozy was tall enough for me to start decreasing. To decrease (when you have 80 stitches), you can knit 8, then knit two together. On the next row, knit 7 then knit two together. Then knit 6, knit two together. Continue decreasing until you have 8 stitches left on the needles (you may need to switch to double-point needles before you can get to this point).
10. Close off the stitches by cutting off the yarn and using a yarn needle to thread it through the remaining stitches. If your teapot has a knob on the top, you might leave room for it to stick through the top (like I did). Tie off the yarn on the inside of the tea cozy. Also, go back and tie off the yarn that was left hanging from the top of the first panel. Weave in all the loose tails of yarn into the inside of the cozy. And, if you'd like, you can attach a loop to the top of the cozy for easy removal.
I know it sounds pretty complicated, but for me it was a much easier way to create a tea cozy than any of the other knitting patterns I could find!
Tuesday, December 12, 2006
Snowmen Ornaments
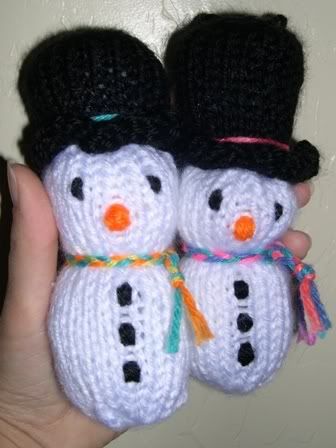
I have been knitting quite a few things lately, but as most of them are gifts I am reluctant to post them until they've been given! I can post a picture of these snowmen ornaments I've been working on. I'm making them for the kids of my friends. So far these two are the only ones I've finished. I hope to make a total of at least seven - now that I've gotten the pattern down, I'm going to knit all the pieces first and then assemble them all at once. I got the pattern from Knit List here: Snowman Ornament Pattern. One change I made to the pattern was to not knit the colored stripe on the hat - instead I knitted the whole thing in black and then tied a piece of yarn around the base. I also knitted the ornament with size 10 needles, making it larger than it would have been with size 7.
I'll be knitting like crazy this week so I can finish all my gifts soon!
Sunday, December 03, 2006
Baby Blanket
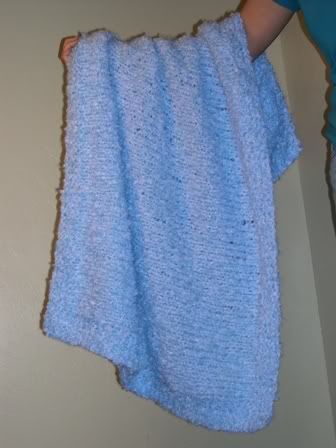
Unfortunately, I did not follow the directions very well. For some reason I decided that casting on 75 stitches was not enough, so I cast on 90 instead. This made the blanket very very wide - about 49 inches. I then knit 102 rows, which made it 34 inches long. I had been hoping for a finished blanket that was square, but by the time I got near the end of my third ball of yarn I could see that if I did make it square it would be gigantic so I stopped.
The hardest part of this blanket was alternating knitted rows with purled rows. It seems to take me twice as long to purl a row than to knit one. I probably could have finished it a lot faster if I had just knit the whole thing.
It may not be the prettiest blanket ever, but hopefully my friend (and her baby!) will like it.





 Posts
Posts


