Friday, May 23, 2008

Master and Commander Movie Costumes

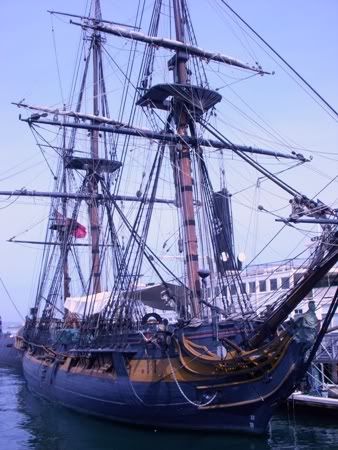
This past weekend we took a little trip over to San Diego. Because of my obsession with Master and Commander: The Far Side of the World I couldn't miss the HMS Surprise at the Maritime Museum! I wasn't too sure what sort of exhibits they had on the Surprise but I had my fingers crossed that they would have some costumes from the movie. I got lucky! Behind Plexiglas in a tiny room they had four uniforms, belonging to Jack Aubrey, Mowett, Blakeney, and a marine. Sadly they seemed a little forgotten. There weren't any signs or labels to indicate that they were from the movie and they were all crowded in a corner. Jack's costume was hidden behind all the others; all that could be seen was his hat and collar!
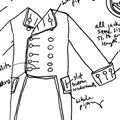
I took advantage of the opportunity and spent about an hour sketching what I could see of each costume. I also took a few photos but the glare on the Plexiglas kept them from turning out very well. I thought I'd post my photos and sketches here in case anyone needs some reference material when trying to make their own costume. FYI, I've left all of my notes on the sketches including my spelling mistakes and some stuff that's unrelated (like the names of the guns on the Surprise!). If you need me to translate any of my writing please let me know.
(By the way, if you're serious about making costumes from the Master and Commander movie, you need to buy The Making of Master and Commander by Tom McGregor. I just bought it and I wish I had it when I made my Jack Aubrey costume because it has lots of great reference photos! *See the update at the bottom of the page for another great reference book.
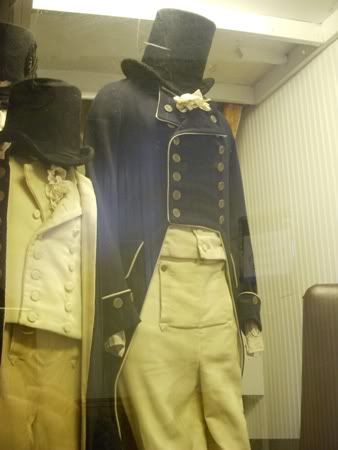
Second Lieutenant Mowett Uniform
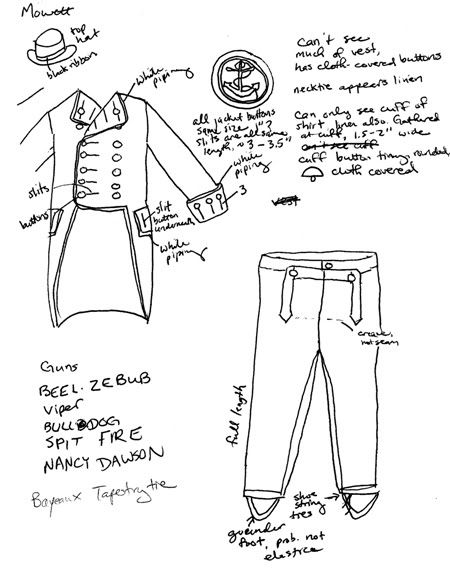
This appears to be a Lieutenant's uniform, and I decided it was Mowett's because he's the only Lt. I remember that wears a top hat. You can see a photo of Mowett in hat and uniform on page 102 in the Making of M&C book.
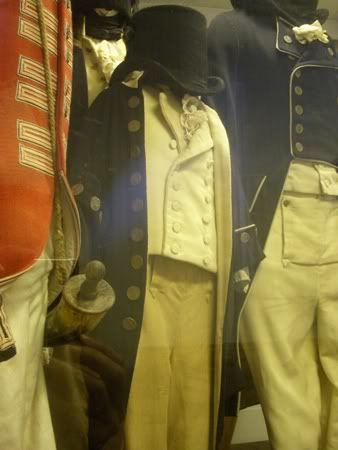

Midshipman Blakeney Uniform
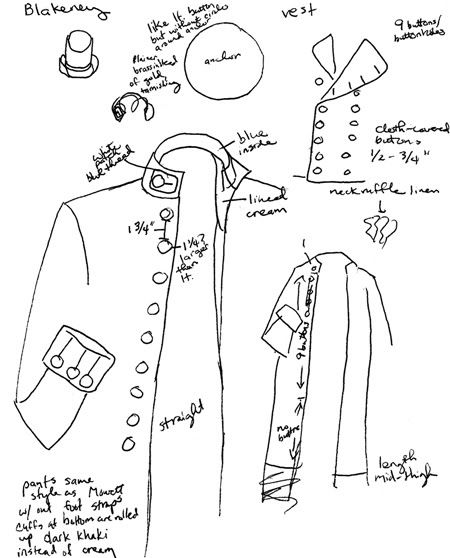
Since this midshipman's uniform had the right arm pinned up it could only be Lord Blakeney's!
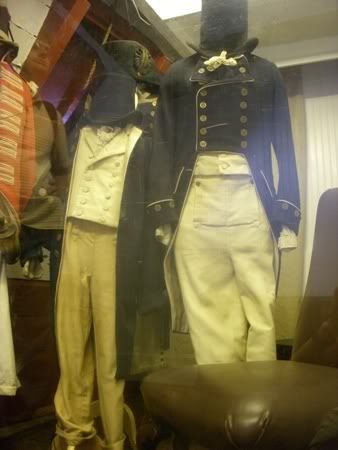

Blakeney and Mowett Uniforms
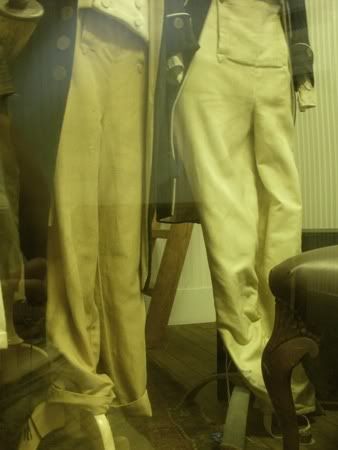
Blakeney and Mowett Trousers. Mowett's have stirrups at the bottom (you can see them better in my sketch).
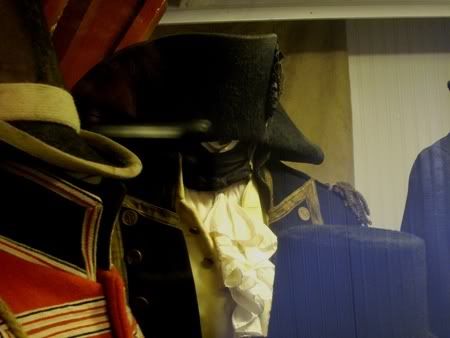

All that can be seen of Captain Aubrey's Uniform
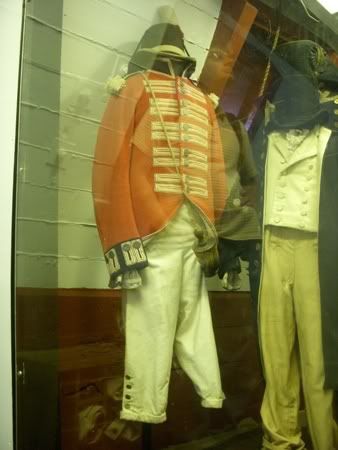
Royal Marine Uniform
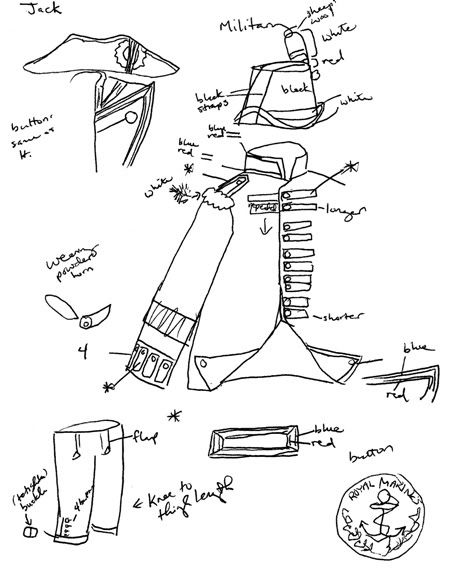
Unfortunately the hat is about the only thing that can be seen in detail on Jack Aubrey's uniform. I don't know which character wore this Marine's uniform. It's not Captain Howard because he wears a different hat. The edging on the Marine's uniform is cool, it's white with a red stripe and a blue stripe (I put asterisks on the sketch to mark where this edging was used). There's a good photos of a bunch of Marines in uniform on page 86 of the Making of M&C book.
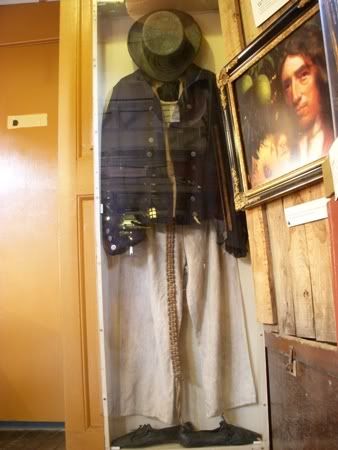

Sailor's Outfit
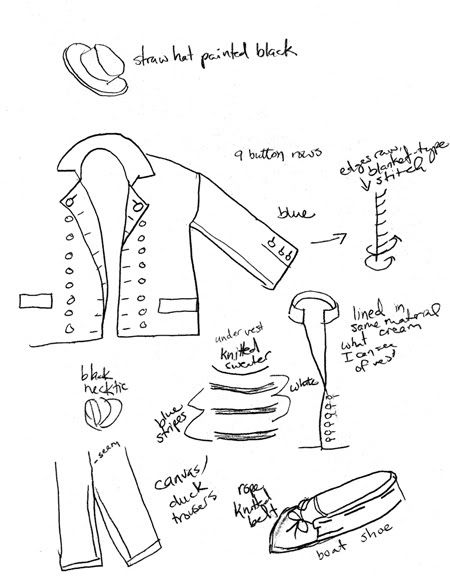
This sailor's outfit was not in the same room as the other costumes. I don't recognize it so it might not be from the movie (it could be a real antique outfit for all I know!). I thought it was interesting that the edges of the jacket weren't turned under and hemmed. Instead they've completed all the edges with an oversewing stitch (I couldn't think of what it was called when making my sketch so I called it a blanket stitch).

*Update 7/12/09: When visiting the National Maritime Museum in Greenwich this summer, I ran across this amazing book: Dressed to Kill: British Naval Uniform, Masculinity and Contemporary Fashions, 1748-1857. It's written by Amy Miller who is a curator at the NMM. The book describes a number of uniforms in the museum's collection with front, back, and detail photos of each as well as line drawings showing their pattern construction. I remember seeing it on the internet while researching my Jack Aubrey costume but there was no indication in the very brief Amazon description that it contained all these amazing reference photos and drawings. If you are interested in making an authentic Royal Navy uniform you definitely need this book!


Update 8/16/11: I was checking the Amazon link for Dressed to Kill and saw that it is out of print, with resale copies going for over $400. Ouch! Same thing over at Amazon UK. The price I bought it at was £15 (so about $30). It is still listed at that price on the National Maritime Museum's list of publications but with no option to buy. If you are desperate to have it but can't pay the insane resale price, my only suggestion would be to contact the museum to see if they still have any copies.


(Oh and thanks, Amazon, for offering to buy back my copy of Dressed to Kill for $5.52 so you can resell it at $424.99. That sounds like a great deal!)

Monday, May 12, 2008

PB&J Jell-O Shots


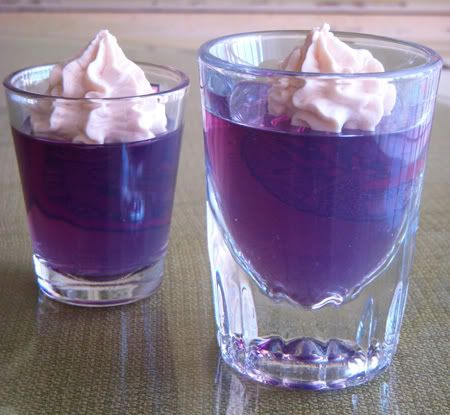
What's a PB&J Shot? It's a grape Jell-O shot topped with a peanut butter whipped cream. If you're feeling adventurous you might want to give it a try!

Cathy's PB&J Jell-O Shots

Ingredients
- grape Jell-O
- boiling water
- cold water
- vodka (optional)
- heavy cream
- peanut butter (soften by stirring quickly)
- powdered sugar

1. Make Jell-O according to package directions. For alcoholic shots, substitute vodka for half of the cold water.

2. Pour Jell-O mixture into small plastic Jell-O shot cups. Chill in fridge until firm.

3. Beat 1 cup heavy cream with beaters until soft peaks form. Fold in 3 tablespoons softened peanut butter and 1 1/2 tablespoons powdered sugar. Beat a few more seconds until well mixed. Give it a taste, if it's not sweet enough add some more powdered sugar.

4. Top firm Jell-O shots with a dab of peanut butter whipped cream. Serve.

(This recipe was created in honor of Pam Beesly and Jim Halpert from NBC's "The Office." Their nickname as a couple is "PB&J"!)

Wednesday, May 07, 2008

Behind the Scenes: "That One Night" Music Video

I took a few pictures before I dismantled the sets from my "That One Night" video that I thought I might share. If you have questions about anything feel free to leave me a comment!

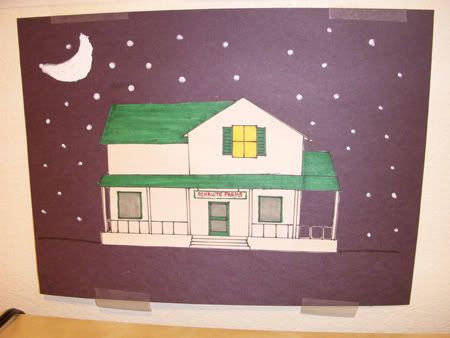
This is the drawing I made of Schrute Farms (at nighttime, hence the pathetic-looking moon!). I based this drawing on what I could see of the farmhouse during the episode "Money" so I probably didn't get everything right. I drew the house on a white sheet of paper, colored it, then cut it out and pasted it onto black construction paper.


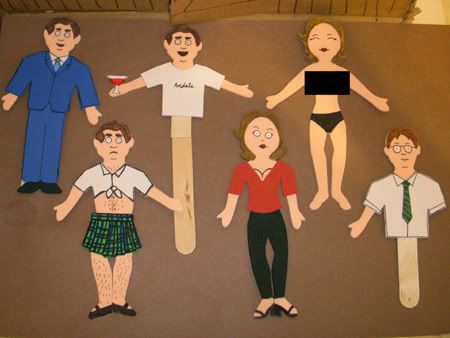
Here are all the puppets I made. It took me a long time to create each one so I cut corners when I knew a body part wouldn't be in the shot (Sandals Michael's legs, Dwight's left arm). The Jan puppets were the hardest to make because both their fronts and backs were appearing on screen so both sides had to look good. On the other puppets I was able to glue everything to popsicle sticks on the back which made it a lot easier. If you're wondering about Jan's censor box, there isn't actually anything under there (she's not anatomically correct, as they say). It just felt wrong to post a picture of her topless!


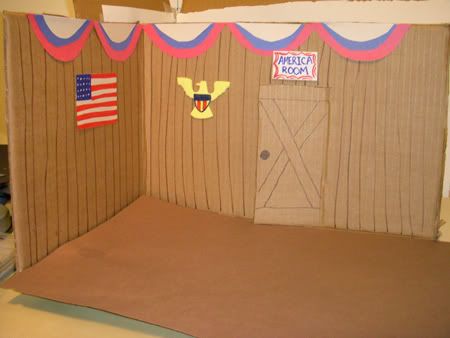
The America room at Schrute Farms. I randomly picked this room for Michael to stay in (we had already seen Irrigation in "Money" and Nighttime sounded a little dull). I was so excited to learn in a deleted scene from "Chair Model" that he actually did stay there! The bed is missing in this photo but it was the same one that appears in the next photo, just with a different bedspread.


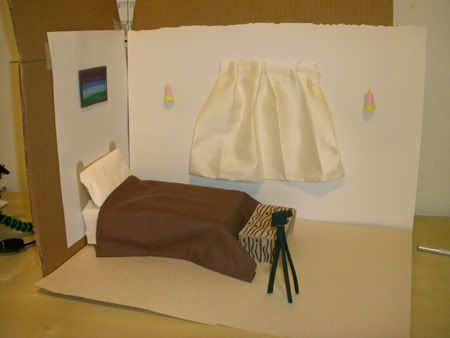
Michael and Jan's bedroom. The bed is a stack of books, covered with a facial tissue and a square of brown fabric. The pillow is made of folded facial tissue too. The bench, camera, candles, and picture are all craft foam and the curtain is ivory fabric.

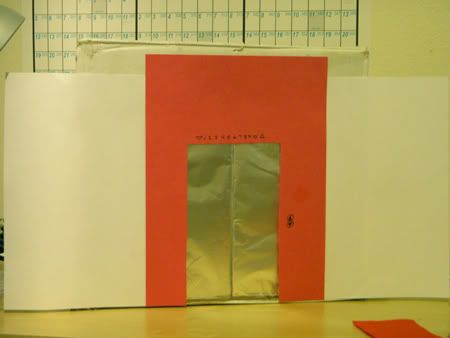
The front of the elevator set. Only the red portion made it into the shot.


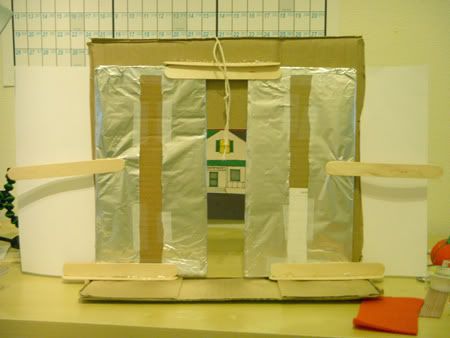
The back of the elevator. This was the most complicated set to build and shoot in because of the sliding doors. I made tracks out of popsicle sticks to keep the doors in place but they didn't slide very smoothly. It took lots of practice to get them to close at the same speed (and without hitting the Michael puppet!).

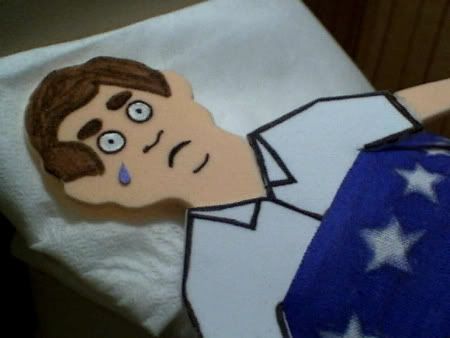
The other difficult scene to film was Michael crying in bed. I started out trying to drip water on his face to make a tear but the drop would either just sit there in the middle of his face or it would fall off too quickly. So I switched to a construction paper tear and used stop-motion animation to make it appear to move. It was frustrating because every time I tried to scoot the tear into the next position with tweezers I would push too hard and the tiny piece of paper would fly off of his face! I then had to hunt it down and start the animation all over again.

Favorite Craft Projects

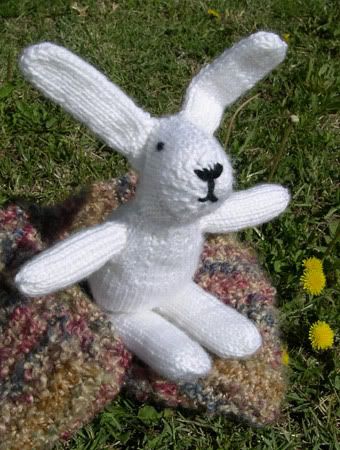
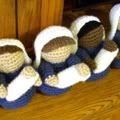
Just a quick post to highlight some of my favorite craft projects from the past few years:

Tuesday, May 06, 2008

Update: My Video in "The Office" Contest

Unfortunately my video didn't win, but thanks to everyone who voted for it! I am pleased to report that my video is one of four "runner-ups" that are featured alongside the winning video on the official Office website. Being picked as one of the top 5 out of 134 makes me pretty happy!

Update 2/17/11: I've removed all the links to the videos that were here because NBC took them down. You can still watch my video here.

Wednesday, April 30, 2008

My Video in "The Office" Contest


I entered this video in a contest sponsored by NBC's "The Office" and I've been chosen as one of the finalists!  I made all the sets and popsicle stick puppets from scratch - it took me 3 days to make and film everything.  If you like it, please vote for it here!  You don't have to join or anything, just click on the "vote for this entry" button.  But hurry, the deadline to vote is Thursday May 1st at 3pm Pacific, 6pm Eastern!

Friday, April 25, 2008

Blue Jean Windsock


My second entry for "Ugliest Craft I've Ever Made"! In case you're curious, the first entry was the Ugly Blanket I knitted last year.

I decided to make this windsock because we've been having a problem with birds flying into our sliding glass patio door. After we moved in last summer, I put out feeders in the backyard. I had a ground feeder with mixed seed, a hanging feeder with sunflower seed, a hanging finch feeder with thistle seed, and a hummingbird feeder. Originally I had all the feeders at the edge of the patio but when I discovered that some of the doves were flying into the glass I moved everything except the hummingbird feeder out into the yard. Unfortunately that didn't solve the problem so I got rid of the feeders that the doves could use (the ground feeder and the hanging sunflower seed feeder). However that hasn't completely stopped them - they still show up every day and pick at the seeds dropped from the thistle feeder!

So instead of trying to keep the doves out of the yard I thought I'd try to keep them from approaching the glass by hanging a windsock in front of it. I've had little luck finding windsocks locally (not fashionable anymore, I guess) and even if they were available I doubt that cheap nylon would last long with the strong Arizona winds. My grandmother has made windsocks out of old blue jeans before so I thought that would be my best bet.

Project Name: Blue Jean Windsock
Time Taken to Finish: 2 hours
Materials Used:
-old pair of blue jeans
-matching thread
-plastic cylinder 3-4 inches tall, about same circumference as the upper thigh of one leg of the jeans (maybe an empty bleach bottle or 2-liter soda bottle with the top and bottom removed)
-1/4" metal eyelets
-reflective decorations
-fishing line
-fishing snap swivel
Special Tools Used:
-sewing machine
-eyelet tool
-drill
What I Did:
-Cut one leg of the jeans off, perpendicular to the outside hem and as close to the crotch as possible.
-Drilled 4 holes in the plastic cylinder for the eyelets (didn't put them in yet).
-Placed the cylinder inside the jeans leg, folded the fabric over the plastic cylinder, and then hemmed the cylinder inside the jeans.
-Cut holes in the jeans to correspond with the eyelet holes in the cylinder. Attached eyelets.
-Cut the rest of the leg into ~1" strips, stopping about 2 inches away from the hemmed-in plastic cylinder.
-Sewed reflective decorations onto every other strip and in the space between the bottom of the cylinder and the top of the strips.
-Tied one end of 4 lengths of fishing line into each eyelet and attached the other ends to the fishing snap swivel.
-Tied a longer length of fishing line to the other end of the snap swivel. Put a hook in the patio ceiling and hung up the windsock.
What I Liked About the Project: It was easy and will hopefully save some birds.
What I Didn't Like About the Project: Not the prettiest thing to look at, but it's in my backyard so no one's going to see it!


A hummingbird visiting my feeder

Tuesday, April 15, 2008

Charcoal Scarf, Home Library, and "The Office"

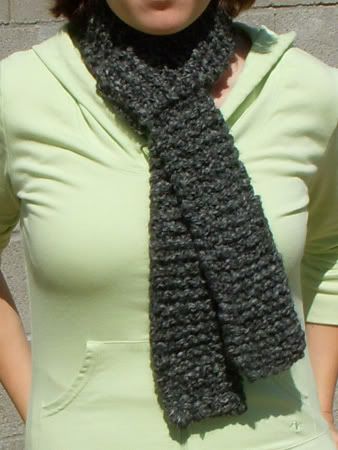
I've been busy lately but not doing a whole lot of crafting.  I finally managed to finish a charcoal scarf my mom requested:


It's just a basic garter stitch scarf, knit with double-stranded Lion Brand Homespun yarn on size 13 needles (the color is "Edwardian").  My mom has asked that I knit 3 more as gifts and she's even offered to pay me for them (*gasp* my first commission!).

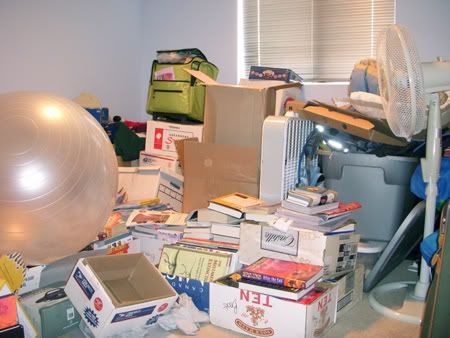
I have also been working on our spare room, aka "the junk room" as evident in this photo:


About 70% of the junk is boxes of books and about 9/10ths of those books are mine (I have a book problem).  We would really like this room to be a library as well as a guest bedroom.  We've found some bookshelves at IKEA but it's going to be a pain to get them here from the Phoenix store.  The boxes containing the shelves are too big to fit in my truck so we'll have to rent a trailer (buying them online is out of the question - the shipping charges are more than the price of the shelves!).

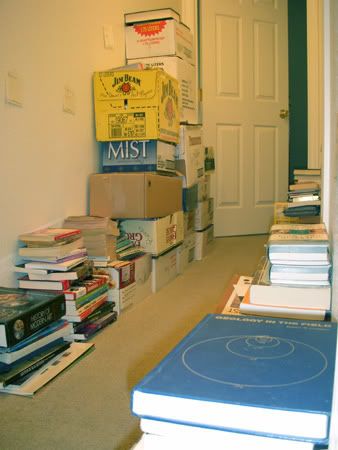
With the way the room is now there would be no where to put them!  So unfortunately I have to clean it out before we can buy anything.  My first task was to drag out all the books and sort them by genre.  I made a lot of piles in our hall:


There were so many books that I decided it would be a good idea to catalog them.  To make it easier, I signed up with an online home library website called GuruLib.  I picked them over other similar websites because they're free and they have a cool feature that lets you scan in UPC codes with a webcam.  The UPC feature was really helpful though it only works on newer books and it requires a high-quality webcam.  So far I've added 642 books to my online library and I still have more to do!

The other thing that's been eating up my time is this website: dundermifflininfinity.com.  It's an online game created by NBC to promote their show, "The Office."  You play as an employee of the online company Dunder Mifflin Infinity (DMI) and you do different tasks (usually related to that week's episode) to earn fake money.  The DMI employees are divided up into different teams called "branches."  Each branch is based in a real town and is led by another employee who is called the Regional Manager. 

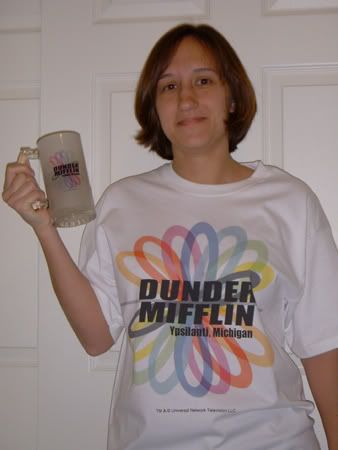
Well, I recently got elected as the Regional Manager of the Ypsilanti, Michigan branch.  Consequently I've been spending a lot of time on DMI.com fulfilling my managerial duties.  I'm probably taking my job too seriously (Kevin thinks so) but I can't help it when I know that other people are relying on me.  Here's me with a shirt and mug with our branch logo on it:


It's not all work though.  I've been having a lot of fun getting to know the other employees - we all love "The Office" so it's fun to geek out about it!  If you're interested in joining please drop me a line.  I'd love to have you in our branch!

Monday, March 31, 2008

Pretzel Day!


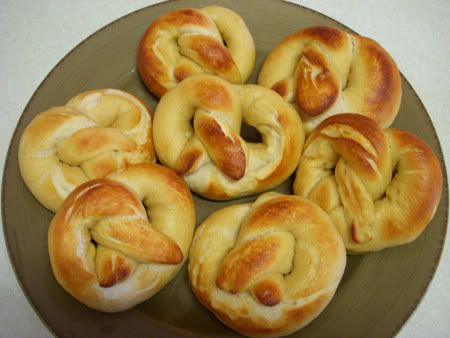
I've been craving a soft pretzel for weeks now! I've always been too afraid to attempt making them myself - having to "use yeast" and "boil dough" seemed intimidating. But last night we caught a pretzel episode of Throwdown with Bobby Flay on the Food Network and it really didn't look all that scary. I hunted down a recipe online (from the illustrious Alton Brown, no less) and made my attempt. It wasn't as hard as I thought! Using yeast was easy (just a lot of waiting, basically) and boiling the dough wasn't any more difficult that boiling pasta. Unfortunately we couldn't find any pretzel salt to go on top so we used table salt which didn't taste quite right. I also wish that I had made them thinner so they wouldn't be as doughy in the middle. Anyway, they tasted pretty good for a first attempt and I also got to use the stand mixer I received for Christmas. Win-win!

Tuesday, March 18, 2008

Recovering Deleted Photos from Memory Cards

I neglected to mention in my previous post that I had a crisis when I returned home from my trip to the Arizona Renaissance Festival and tried to use Picasa (Google’s photo management software) to upload my photos. Picasa was supposed to copy the photos from my memory card, paste them into a folder on my computer, and then delete the photos from my memory card. Instead, it copied and pasted nothing, then deleted my photos anyway! Let me tell you, when I realized my photos were gone there were a few tears and a lot of yelling (aimed at my poor husband, who had the bad luck to be calling me at the time). I’m not sure whether I should place the blame on Picasa or my memory card, which every once in a while has given me a read error (but nothing that couldn’t be solved by taking the card out and putting it back in again). Regardless of who’s to blame, I know that from now on I’m not going to let Picasa automatically delete my stuff anymore!
To attempt to fix this, I first tried to get ahold of my computer-genius brother (doesn’t everyone have one?). But due to some St. Patrick’s Day partying he was not available so I resorted to Google. It took me a while to sort through all the recovery programs out there and I found that most of them weren’t free or looked untrustworthy. Finally I ran across an article in the New York Times that recommended a free downloadable program called PC Inspector Smart Recovery. It’s just for recovery from memory cards though the company, Convar, also offers other file recovery programs. I was a little worried about some of the poor English in the instructions (the company is based in Germany) but I tried it out anyway and it was able to recover all but one of my 40 photos!
I was so pleased that I then went on to see what pictures I could recover from the memory cards belonging to my husband’s camera. We lost all our photos from our Galveston, Texas honeymoon in a laptop crash over a year ago and I was hoping that some of them might still remain on the memory cards. I got lucky and did find a couple, though they were mostly blurry fish from Moody Gardens and moon rocks from NASA - unfortunately not the ones I really wanted. But they’re better than nothing!
The one key thing to keep in mind if you accidentally delete photos from a memory card is to not save any new photos on that card until you have done your recovery. With most memory cards the data from the photos is still there after you delete them. It’s only permanently gone when new data is written over the old data. So if we had tried this recovery soon after we lost our honeymoon photos we probably would’ve found more, but instead we waited until we had taken lots of new photos which overwrote the old ones. :( Oh well, I’m working on recovering the data from the crashed laptop’s hard drive so maybe I’ll get my pictures back that way!


Related Posts with Thumbnails