Friday, August 22, 2008

Crochet Pattern: Amigurumi Wolf


I've created my first original amigurumi pattern - a wolf. I wanted to crochet a wolf for a friend who was going off to school at the University of Nevada - Reno (their mascot is the wolfpack). But I couldn't find a wolf pattern online that I liked, so I decided to write my own.
Coming up with my own pattern was easier than I thought it would be - I just started crocheting and if I didn't like the way the it was going I just ripped the stitches out and started again. As I crocheted I kept a log of how many stitches I used in each round and made notes if I used any special increases or decreases. This type of pattern was easy for me to read, but when it came time to post it online I realized that many crocheters would have no idea what to do with my crazy list of numbers!
To find out how an amigurumi pattern should be written, I looked online at other free patterns created by bloggers and picked the three that I thought were easiest to understand: Ana Paula's, Planet June's, and Nimoe's. I then used the writing style of these patterns as a guide to how mine should be written. After writing up my pattern properly I tested it by using it to create another wolf.
I hope you enjoy this pattern and I'd love to see photos of any wolves you make using it. If you have any questions or find any errors please let me know in the comments section.
Update 8/16/09: Cissi of Amigurumi på svenska has translated this pattern into Swedish!


Wolf Amigurumi Pattern
Notes on this pattern:
  • My patterns are free and may not be sold. Please do not reproduce or repost patterns or instructions from CraftyCattery.com without my permission. For information on selling items created from my patterns, please view the FAQ.
  • Probably the most complicated parts of this pattern are the muzzle and tail. The head and body are the typical amigurumi "mushroom" shape and the paws and ears are pretty simple to crochet.
  • The finished size of the wolf is about 5 inches sitting, 7 inches standing.
Materials needed:
  • Bulky weight yarn in grey, white, and black (I used Bernat Softee Chunky)
  • Size H (5.00 mm) crochet hook
  • Yarn needle
  • Optional: Safety eyes and nose (if the item is intended for children over 3 years)
Abbreviations used in this pattern:
  • Rnd = round
  • sc = single crochet
  • st = stitch
  • sts = stitches
  • ch = chain
  • sc2tog = single crochet two stitches together, aka a decrease. (I recommend using falwyn's invisible decrease.)
The pattern:
Muzzle
Using white:
Rnd 1: 6 sc in magic ring (6 sts).
Rnd 2: 2 sc in each st around (12 sts).
Rnd 3: [2 sc in next st, sc 3] three times (15 sts).
Rnd 4: sc around (15 sts).
Rnd 5: sc around (15 sts).
Rnd 6: sc around (15 sts).
Rnd 7: [sc2tog, sc 3] three times (12 sts).
Rnd 8: [sc2tog, sc 2] three times (9 sts).
Bind off, leaving yarn tail to sew muzzle to head.

Blaze
The blaze is crocheted flat. Using grey:
Row 1: ch 2, 2 sc in second chain from hook, ch 1 turn (2 sts).
Row 2: sc across, ch 1 turn (2 sts).
Row 3: 2 sc in each st, ch 1 turn (4 sts).
Row 4: sc across, ch 1 turn (4 sts).
Row 5: 2 sc in 1st st, sc next two st, 2 sc in 4th st, ch 1 turn (6 sts) .
Row 6: sc across, ch 1 turn (6 sts).
Row 7: sc across, ch 1 turn (6 sts).
Bind off, leaving tail to sew blaze onto muzzle.

Sew blaze on top of muzzle, with short end of blaze positioned just above the point of the muzzle. Use black yarn to embroider nose over end of blaze or attach plastic safety nose. Stuff the muzzle.

Blaze - short end at the right

Blaze sewn to muzzle

Nose embroidered on muzzle
Ear
Make two using grey:
Rnd 1: 4 sc in magic ring (4 sts).
Rnd 2: [2 sc in next st, sc 1] two times (6 sts).
Rnd 3: [2 sc in next st, sc 2] two times (8 sts).
Rnd 4: [2 sc in next st, sc 3] two times (10 sts).
Rnd 5: [2 sc in next st, sc 4] two times (12 sts).
Rnd 6: [2 sc in next st, sc 5] two times (14 sts).
Bind off, leaving long tail. Use tail to sew open end of ear together so it is flat (do not stuff). Leave excess tail to sew ear to head.

Head and Body
Using grey:
Rnd 1: 6 sc in magic ring (6 sts).
Rnd 2: 2 sc in each st around (12 sts).
Rnd 3: [2 sc in next st, sc 1] six times (18 sts).
Rnd 4: [2 sc in next st, sc 2] six times (24 sts).
Rnd 5: [2 sc in next st, sc 3] six times (30 sts).
Rnd 6: sc around (30 sts).
Rnd 7: sc around (30 sts).
Rnd 8: sc around (30 sts).
Rnd 9: sc around (30 sts).
Rnd 10: sc around (30 sts).
Rnd 11: sc around (30 sts).
Rnd 12: [sc2tog, sc 3] six times (24 sts).
Rnd 13: [sc2tog, sc 2] six times (18 sts).

Sew the ears and muzzle to the head, using grey yarn to attach the ears and top of the muzzle and white yarn to attach the lower part of the muzzle. Embroider or attach plastic safety eyes. Stuff head then continue crocheting:

Rnd 14: [sc2tog, sc 1] six times (12 sts).
Rnd 15: [sc2tog] six times (6 sts).
Rnd 16: sc around (6 sts).
(Optional - Rnd 16a: sc around (6 sts). If you’d like a floppy head, do this extra row. If you don’t want a floppy head, leave this row out.)
Rnd 17: [2 sc in next st, sc 1] three times (9 sts).
Rnd 18: [2 sc in next st, sc 2] three times (12 sts).
Rnd 19: sc around (12 sts).
Rnd 20: sc around (12 sts).
Rnd 21: [2 sc in next st, sc 3] three times (15 sts).
Rnd 22: sc around (15 sts).
Rnd 23: [sc2tog, sc 3] three times (12 sts).
Rnd 24: [sc2tog] three times (6 sts).

Stuff body. Bind off and close hole.

Front Paw
Make two using grey:
Rnd 1: 6 sc in magic ring (6 sts).
Rnd 2: 2 sc in each st around (12 sts).
Rnd 3: sc around (12 sts).
Rnd 4: sc around (12 sts).
Rnd 5: [sc2tog, sc 2] three times (9 sts).
Rnd 6: sc around (9 sts).
Rnd 7: [sc2tog, sc 1] three times (6 sts).
Rnd 8: sc around (6 sts).
Rnd 9: sc around (6 sts).
Bind off, leaving long tail to sew paw to body. Stuff paw and sew opening shut.

Back Paw
Make two using grey:
Rnd 1: 6 sc in magic ring (6 sts).
Rnd 2: 2 sc in each st around (12 sts).
Rnd 3: [2 sc in next st, sc 3] three times (15 sts).
Rnd 4: sc around (15 sts).
Rnd 5: sc around (15 sts).
Rnd 6: [sc2tog, sc 3] three times (12 sts).
Rnd 7: sc around (12 sts).
Rnd 8: [sc2tog, sc 2] three times (9 sts).
Rnd 9: sc around (9 sts).
Rnd 10: sc around (9 sts).
Rnd 11: [sc2tog, sc 1] three times (6 sts).
Rnd 12: sc around (6 sts).
Bind off, leaving long tail to sew paw to body. Stuff paw and sew opening shut.

Tail
Note: The tail is crocheted with most of the increases on one side of the tail and most of the decreases on the other so that it will have a curve.
Rnd 1: 4 sc in magic ring (4 sts).
Rnd 2: sc across (4 sts).
Rnd 3: [2 sc in next st, sc 1] twice (6 sts).
Rnd 4: 2 sc in next st, sc 1, sc2tog, sc 2 (6 sts).
Rnd 5: 2 sc in next st, sc 5 (7 sts).
Rnd 6: 2 sc in next st, sc 6 (8 sts).
Rnd 7: 2 sc in next st, sc 2, sc2tog, sc 3 (8 sts).
Rnd 8: 2 sc in next st, sc 2, sc2tog, sc 3 (8 sts).
Rnd 9: 2 sc in next st, sc 2, sc2tog, sc 3 (8 sts).
Rnd 10: 2 sc in next st, sc 7 (9 sts).
Rnd 11: 2 sc in next st, sc 8 (10 sts).
Rnd 12: 2 sc in next st, sc 3, sc2tog, sc 4 (10 sts).
Rnd 13: 2 sc in next st, sc 3, sc2tog, sc 4 (10 sts).
Rnd 14: [sc2tog, sc 3] two times (8 sts).
Bind off, leaving long tail to sew tail onto body. Stuff tail.

Sew front paws on to body below the head. Sew back paws near the bottom of the body. Sew the tail on the back side of the body between the back paws. If wanted, use black yarn to embroider claws on to each paw.

My test wolf (left) and my prototype wolf (right - smaller because he was made with a lighter-weight yarn)

Tuesday, August 12, 2008

"The Office" Charity Fundraising Video


The United Way and DunderMifflinInfinity.com (aka DMI, NBC's online game for "The Office") are running a Summer Fundraising Initative to help bring in donations to a number of worthy charities.
Each branch of DMI is sponsoring a charity - my branch, Ypsilanti Michigan, has chosen St. Jude's Children's Research Hospital. St. Jude's is a world leader in researching and treating cancer and other diseases in children, so I think it's a charity that everyone can get behind (that's what she said!).
I made the above video hoping to inspire people to give as generously as they can. If you'd like to give to St. Jude's through our fundraiser, you can DONATE HERE. Thanks for your support - every little bit helps!

Monday, July 14, 2008

Chiltepin Plants Update


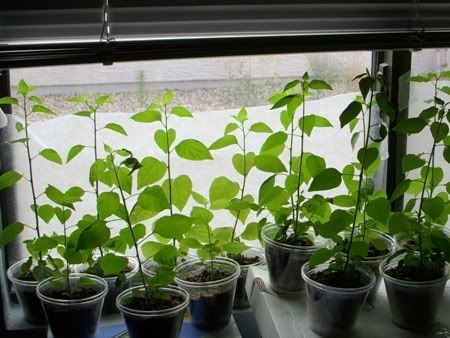
My chiltepin plants are doing surprisingly well! Out of the 32 I planted so far I've only lost one. Now some of them are outgrowing their tiny potting cups so I'm starting to replant them into large containers. Pots are expensive! I went to every garden center I could find to try to buy large containers that were less than $1 a piece but no luck. I was hoping someone would sell the cheap plastic pots that the nurseries use but I couldn't find them anywhere. I ended up having to order them online from GreenhouseMegaStore.com - they had a bundle of thirty 2.5 gallon containers for $17. Plus $15 shipping that ended up being $32, a little more than $1 a piece.
So far I've replanted eleven of the chili tepin plants in the 2.5 gallon containers today. Right now they're sitting inside my patio door - hopefully they'll get enough sun there. They probably would get more sun outside, but it's the monsoon season here in Arizona. So in addition to surviving the desert heat the plants would also have to make it through the strong winds and heavy rain of the monsoon storms. I think I'll try to keep them inside as long as I can so they can grow big and strong!

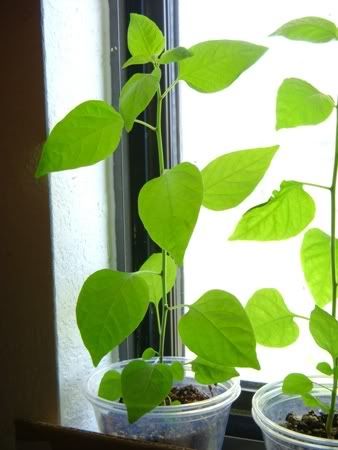
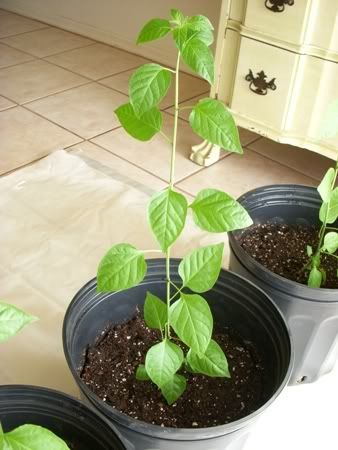
Here are some photos I took about once a week of one of the chiltepin plants to track it's growth:


May 31st


June 3rd


June 11th


June 21st


June 30th


July 9th (in the new big pot!)


Update 1/15/09: Unfortunately I had to leave my chiltepin plants outside while I was gone for two weeks over Christmas. We had several hard freezes (and one snow!) while I was away and since I wasn't able to cover them up, they didn't make it. I'm still watering them, hoping maybe they can be revived but it's probably a lost cause. :( I'll just have to start over once it gets warm.

Friday, July 11, 2008

Two More Amigurumi Bears

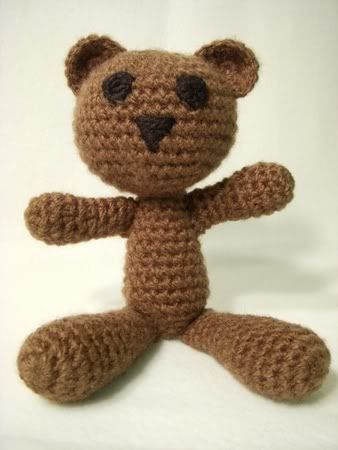
I've crocheted two more Beary Jackson amigurumi bears. They're so cute! You can see the first Beary I made here and you can find the pattern at Rheatheylia.com.


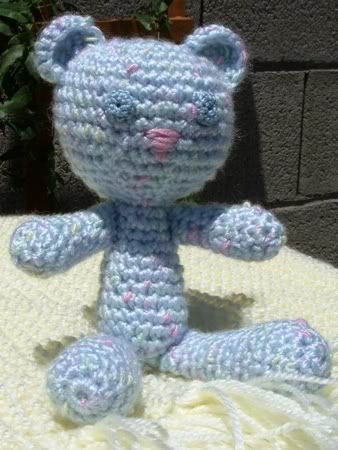
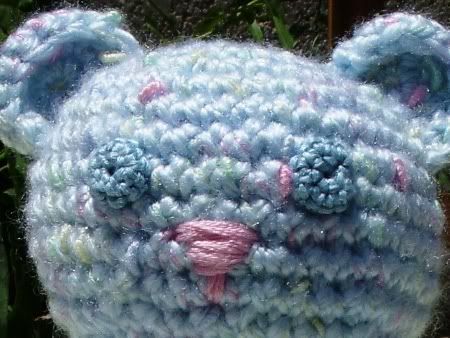
I crocheted this blue Beary Jackson as a baby gift. The pretty yarn (Caron Simply Soft Baby in Powder Blue) was originally used during the mother-to-be's baby shower to play the game, "How Big Is Mommy?" (each guest cuts a piece of yarn that they think is the diameter of the mother's belly; the closest to the real thing wins). I acquired the leftover yarn and used it to make Beary!


I made this Beary for a friend who fell in love with the first Beary I crocheted. The yarn used was Lion Brand Jiffy in Caffe.


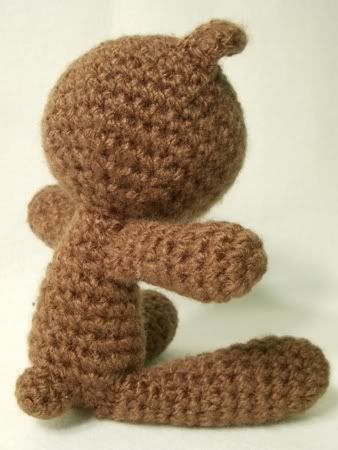
From the back view you can see that I've been adding tails to my Bearys (they're not in the original pattern). His head is pretty big and makes him unbalanced so the tail makes it easier for him to sit without falling over. Here's the pattern for the tail piece for a small Beary:

Tail
Round 1: crochet 4 stitches in a ring (4)
Round 2: increase every stitch (8)
Round 3: stitch across (8)
(If you want the tail to be a little longer you can stitch across another round)
Stuff and sew to Beary.


Since the bears are going to be around small children I decided to make the eyes and nose out of yarn (or embroidery floss for the smaller blue bear). For the eyes, I crocheted little circles then sewed them on; for the nose I just did a little bit of embroidery.

Wednesday, July 09, 2008

Garter Stitch Baby Blanket


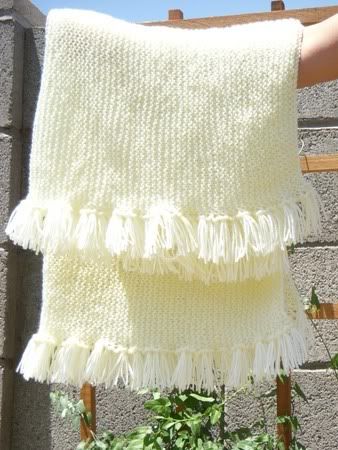
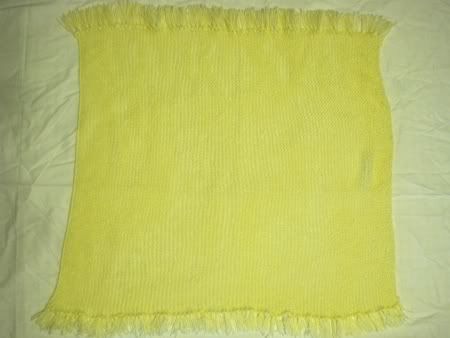
I just finished knitting this baby blanket for a friend who's expecting. It was simple garter stitch, but man, it seemed to take forever! This is my third baby blanket, you can see the first here and the second here.

Project Name: Garter Stitch Baby Blanket
Time Taken to Finish: 2 months
Finished Size: 27 inches by 33 inches (not including fringe)
Type of Yarn Used: Red Heart Soft Baby in Powder Yellow
Amount of Yarn Used: 1 skein (I needed a little extra for the fringe)
Needles Used: US size 10.5 needles
What I Liked About the Project: Since it was garter stitch the knitting was easy.
What I Didn't Like About the Project: It seemed to take forever to knit - I think it was because I was using such thin yarn (it was sport weight). For my previous two baby blankets I used bulky weight yarn which obviously knitted up much faster.

Instructions: Cast on 100 stitches. Knit all stitches until blanket is as long as you'd like (I stopped at 33 inches). Add fringe to two sides - there's a good tutorial for adding fringe at Fiber-Images.com.
Here's a photo of the finished blanket, spread out so you can see the whole thing:

Thursday, June 26, 2008

Beef Stroganoff Recipe


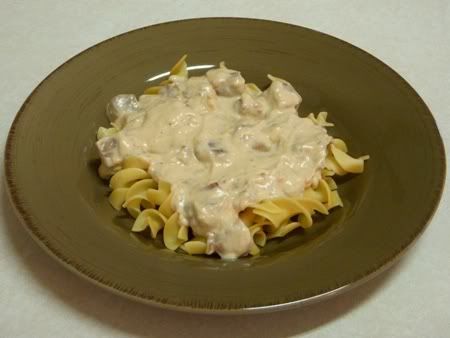
I made beef stroganoff for the first time last night.  It was yummy and very filling - I could barely finish my plate!  I got the recipe from my mom and it wasn't too hard to follow.  The only problem I ran into was when I was at the store trying to buy the ingredients.  The recipe called for 1/2 pint of sour cream but ounces were the only measurement listed on the sour cream tub.  I had no idea how many ounces were in a pint so I ran around the store trying to find something that had both pint and ounce measurements on it.  After looking through what felt like half the aisles I finally found a pint can of beer labeled 16 ounces.  That meant that I needed 8 ounces of sour cream.  It wasn't until I got home and started to cook that I remembered the old saying "A pint's a pound the whole world round."  Wish I had thought of that earlier!
Beef Stroganoff
Serves 2-3

- 1 pound round steak cut into 3/4 inch pieces (you can substitute 1 pound of ground beef if you'd like, I think it would still taste pretty good)
- 2 Tbsp shortening
- 1/2 cup chopped onions
- 1 clove minced garlic
- 1-6 ounce can mushrooms (I couldn't find a can that was exactly 6 ounces, I just got the closest I could)
- 1-10 3/4 ounce can cream of mushroom soup
- 1 Tbsp Worcestershire sauce
- 6 drops Tabasco sauce
- 1/2 tsp salt
- 1/8 tsp pepper
- 1/2 pint (8 ounces) sour cream
- flour for coating meat
- egg noodles or rice to serve with the stroganoff

Dip meat into flour and brown in hot shortening.  Add onion, garlic and mushrooms.  Cook until onions are transparent.  Add all other ingredients EXCEPT sour cream.  Simmer on low until meat is tender, about 1 hour, stirring occasionally (if the sauce gets too thick while simmering you can add a small amount of water).  Add sour cream just before serving.  Serve over egg noodles or rice.

Wednesday, June 18, 2008

Amigurumi: My First Attempts at Crochet

I haven't tried very hard to learn to crochet in the past, but last week I discovered something that made me want to pick it up: amigurumi! Amigurumi is the Japanese word for knitted or crocheted stuffed animals. I LOVE me some stuffed animals and they're great gifts for kids but I've only knitted one before and it was a pain. But it didn't seem like it would be that hard to use crochet to make an animal so I though I'd give it a try.


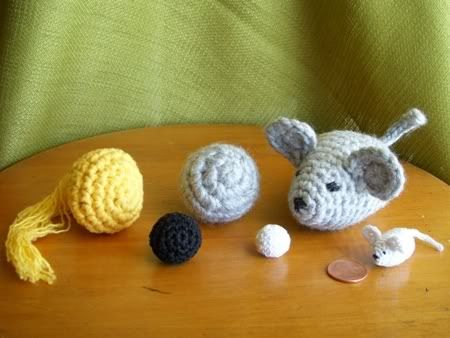
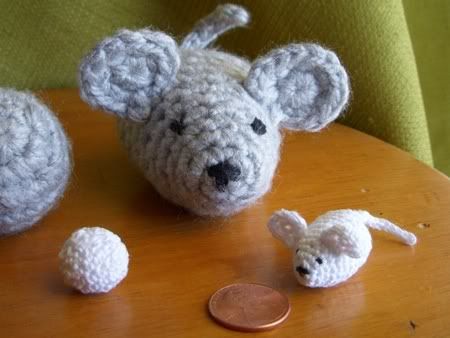
These are my first attempts. I started out crocheting plain balls using the instructional videos at hookandneedles.com. I experimented with different weights of yarn and various hook sizes. Next I tried my hand at following an animal pattern: a mouse designed by KristieMN of the Crochetville.org forums. I successfully made a large grey mouse and a tiny white mouse:


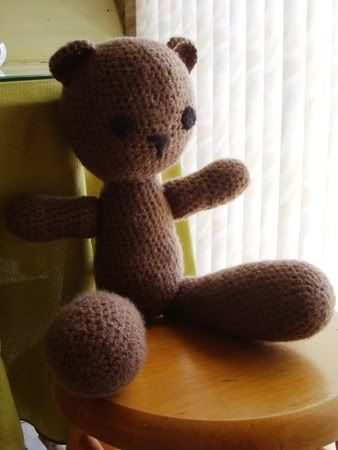
I was going to continue making little animals but I got an invitation in the mail to a first birthday party for the son of one of my friends. Ambitiously I thought I'd try to crochet him a teddy bear. It was a lot of work but I managed to finish it (about an hour before the party!). The pattern I used was the adorable Beary Jackson at Rheatheylia.com. But since that bear was only about 6 inches tall sitting, I decided to try an enlarged version of the pattern that the creator posted on craftster.org. Here's the result:


I was pretty happy with how he turned out! The only thing I didn't really like was the size of his legs - if I crocheted him again I would make them a little shorter and skinnier. I also had a problem with huge holes appearing where I did normal decreases (mainly around the bottom of his head). I solved this by using an invisible decrease that I learned from a tutorial created by a helpful blogger named falwyn. I can't wait to make some more amigurumi! :)

***

On a different note, there have been a ton of summer projects that have been floating around in my mind lately. I want desperately to start on one of them but sadly there are always other activities that have a higher priority. To keep myself motivated I'm going to list some of them here. Hopefully I can get to everything before fall!

Summer Project List
- Make some of my old t-shirts into tank tops. I live in Arizona so my required summer uniform is a tank top and shorts - otherwise I'd be sweating all day! I have a ton of old t-shirts that I hardly ever wear so I'm hoping that if I can make them into tank tops then they'll get more use. I'd like to find a free pattern that shows how to finish the cut edges so they don't roll (which t-shirt fabric always does).

- Make black-out curtains for our bedroom. Perhaps to give us more time to be out of doors during the cool morning hours, Arizona has decided not to observe Daylight Savings Time. Unfortunately this means that in the summer it starts to get light about 4:30 AM, making it really hard to get enough sleep! I made curtains for the bedroom last winter but they aren't much help since they aren't lined. Right now we are making due with heavy blankets thrown over the curtain rods but we really need some black-out fabric!

- For one week, design a new craft item each day and then blog about it. I've been making things but not designing much of my own stuff lately, plus I'd like to see how hard it is to do a blog entry every day.

- Make another puppet video for The Office. I'm hoping I can get the help of my DunderMifflinInfinity.com branch with this because I am fresh out of story ideas!

- Paint our guest bathroom. I'm thinkin' orange. This probably won't happen because I'm too chicken to commit to any color but white!

***

Finally, for those of you who managed to read all the way to the bottom, here's a funny video I recorded of my cat reacting to my attempts to play the ocarina. Enjoy!

Tuesday, June 10, 2008

My First Commission: Three Knitted Scarves


I knitted these three scarves for my mom - she's going on a trip to England and will be staying with some friends for a few days so she wanted to give them a gift.  I guess the scarves aren't technically a commission because she's not paying me with money.  Instead she's promised to get me an awesome souvenir - I can't wait to see what she picks out! :)

Project Name: Simple Scarves
Time Taken to Finish: about 2 hours each
Materials Used: 1 ball each of Lion Brand Homespun Yarn in: Barley, Granite, and Edwardian (left to right in the photo)
Special Tools Used: Size 13 knitting needles
What I Did: Cast on 10 stitches.  Knitted until scarf was about 5 feet long.  Cast off stitches and weaved in ends.
What I Liked About the Project: I love projects that only use knit stitch, I can just knit without having to count or think about it.
What I Didn't Like About the Project: I can't think of anything, it was easy and fun! :)

Thursday, May 29, 2008

Quail Nest and Chiltepin Seedlings

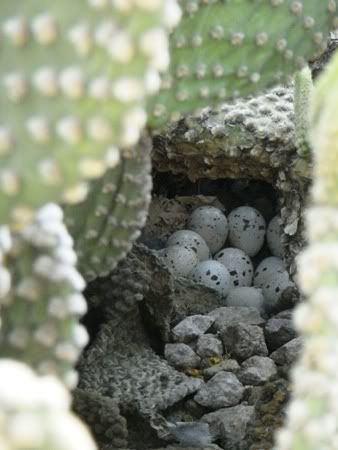
I was very excited to discover that quail have built a nest in the middle of a cactus in our yard!


They chose a good spot! It would be impossible for a cat or dog to get through cactus that encircles the nest. It took me a long time to get a good photo of the nest because the mother quail is usually sitting on the eggs and all you can see is a few feathers. I can't wait to see the chicks; hopefully she'll take good care of them and keep them out of the street!

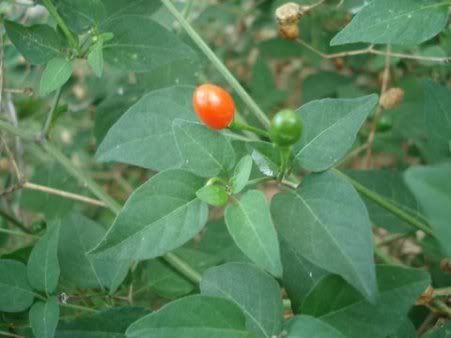
I've been on the hunt for chiltepin plants (aka chili tepin). It's a chile plant that has tiny little peppers that are super-hot and can grow year-round in the right conditions. My parents have had one in their backyard for years and I thought it would be nice to have my own. I especially like that it can survive during the winter since I'm not too keen on having to re-plant vegetables every year!


The chiltepin plant is very similar to the chili pequin so initally I wasn't sure which one this was. The only difference I can see between the two is that the chiltepin peppers are round while the chili pequin peppers are elongated. Since the peppers on my parents' plant are round, I'm assuming that it's a chiltepin.

I stole a few peppers from my parents' plant a year ago and, after drying them out, spent a week attempting to sprout the seeds from one pepper but had no luck. I then tried to find the plant at a local nursery but no success there either. Finally I sat down, did some research and discovered that the seeds can take up to 12 weeks to sprout! I decided to try again since I hadn't given them enough time during my first sprouting attempt.

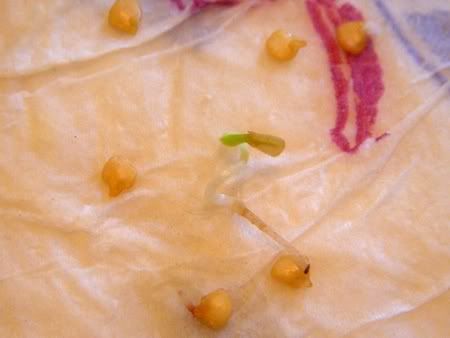
On April 30th I cut open one of the peppers and soaked the seeds in water overnight. On May 1st I put all the seeds (there were more than 30!) between two damp paper towels in a plastic container. I sprayed the paper towels daily with water to keep them moist. Nothing happened until May 20th - I got home from a short vacation and found that several of the seeds had sprouted!


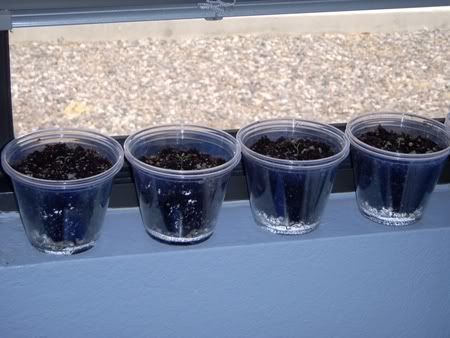
Once the seedlings were free of the seeds, I planted them in plastic cups. I used two cups for each seedling, one inner cup with holes punched in the bottom and an outer cup to catch any drained water. I put a thin layer of pebbles at the bottom of the cup and filled the rest with a 4 to 1 mixture of potting soil and perlite.


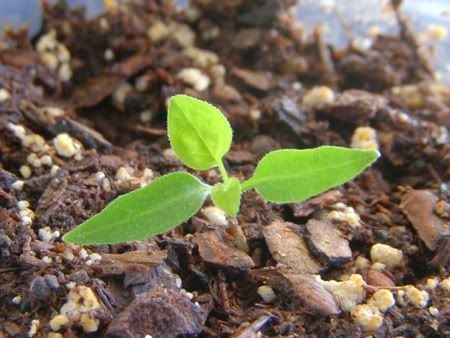
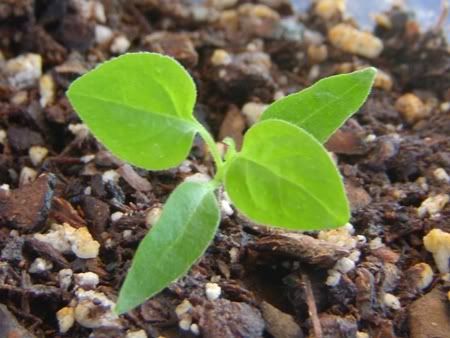
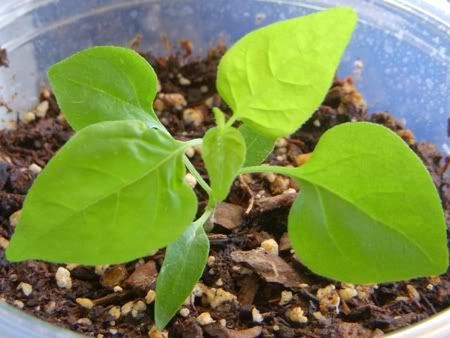
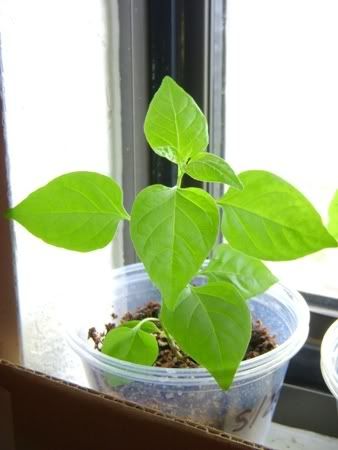
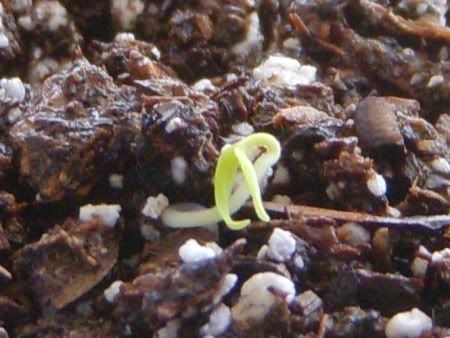
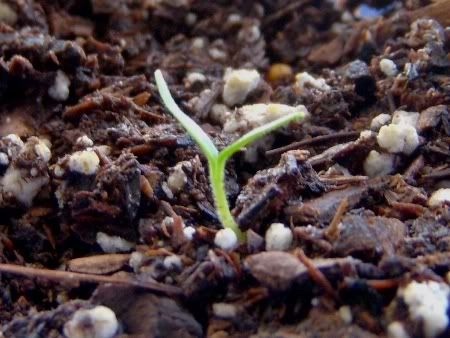
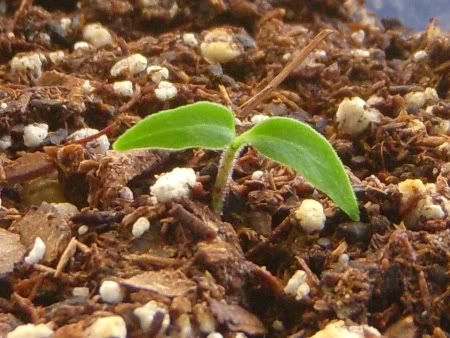
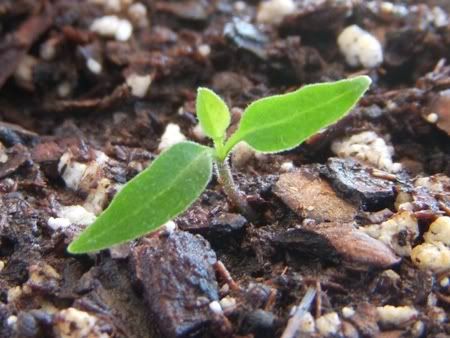
I've been planting 2-3 seedlings a day since May 20th and I now have 17! They seem to be pretty slow growers so I'm guessing they won't be big enough to have peppers until next year. Here are some photos I took of one of the first plants to show its progress:

May 20th:

May 21st:

May 23rd:

May 29th:
You can see more "growth" photos of my chiltepin plants here: Chiltepin Plants Update

Friday, May 23, 2008

Master and Commander Movie Costumes

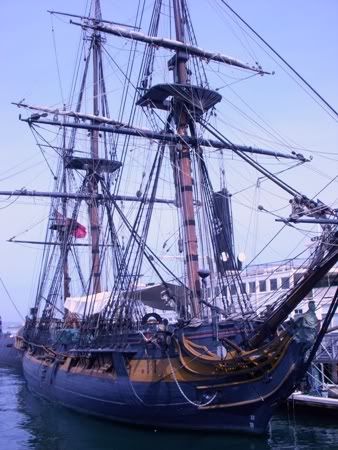
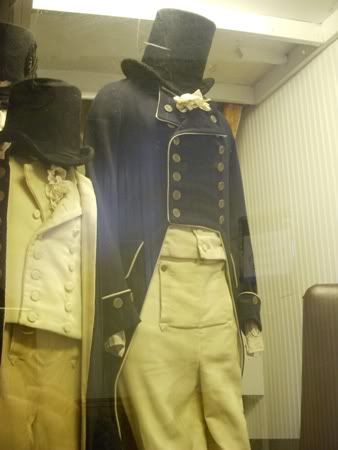
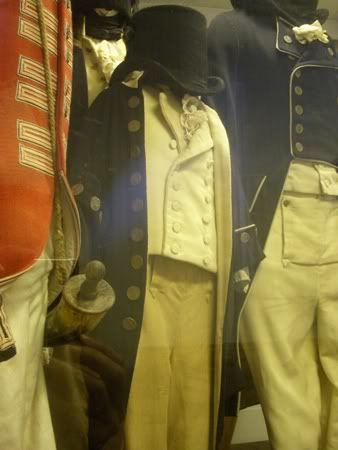
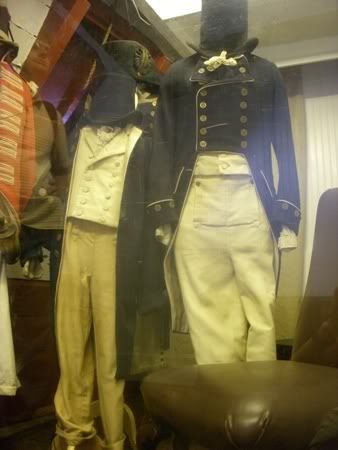
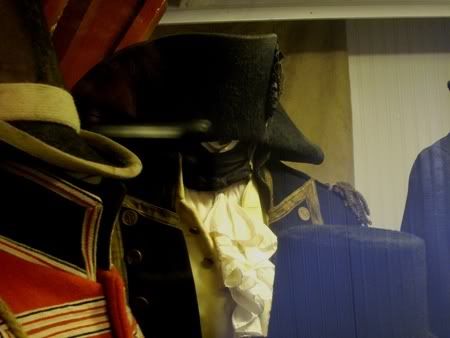
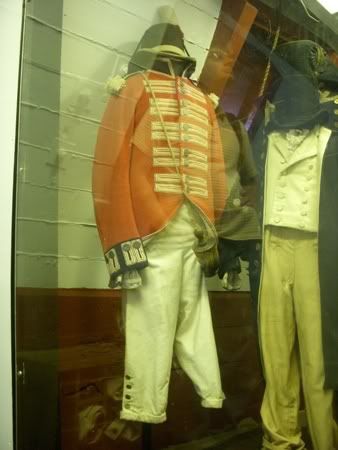
This past weekend we took a little trip over to San Diego. Because of my obsession with Master and Commander: The Far Side of the World I couldn't miss the HMS Surprise at the Maritime Museum! I wasn't too sure what sort of exhibits they had on the Surprise but I had my fingers crossed that they would have some costumes from the movie. I got lucky! Behind Plexiglas in a tiny room they had four uniforms, belonging to Jack Aubrey, Mowett, Blakeney, and a marine. Sadly they seemed a little forgotten. There weren't any signs or labels to indicate that they were from the movie and they were all crowded in a corner. Jack's costume was hidden behind all the others; all that could be seen was his hat and collar!
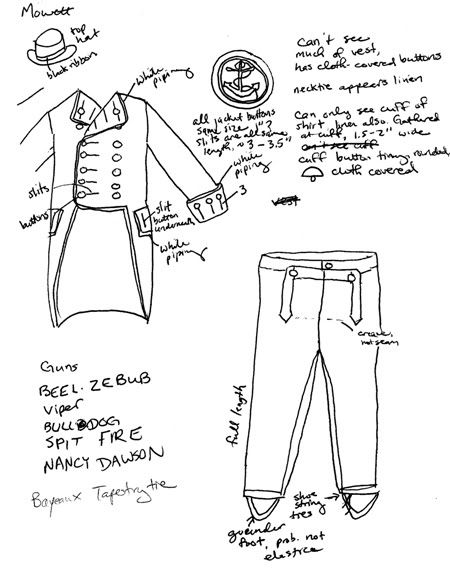
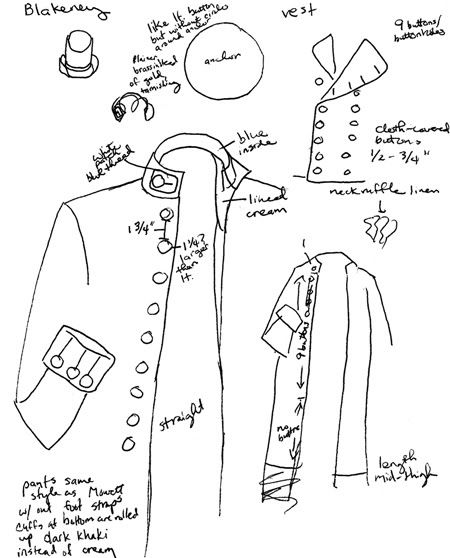
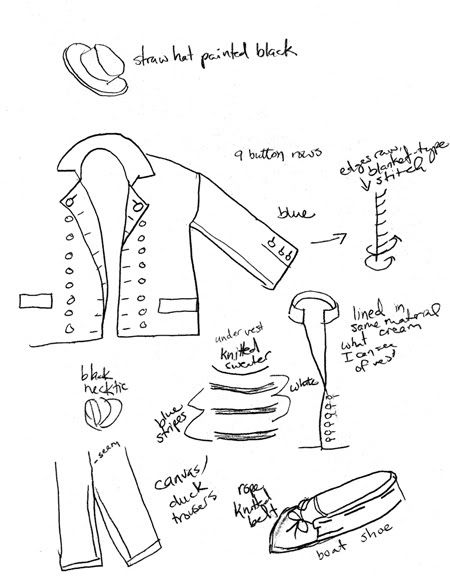
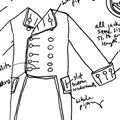
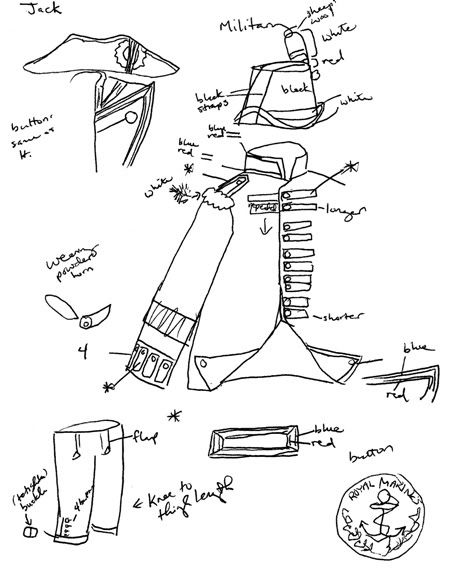
I took advantage of the opportunity and spent about an hour sketching what I could see of each costume. I also took a few photos but the glare on the Plexiglas kept them from turning out very well. I thought I'd post my photos and sketches here in case anyone needs some reference material when trying to make their own costume. FYI, I've left all of my notes on the sketches including my spelling mistakes and some stuff that's unrelated (like the names of the guns on the Surprise!). If you need me to translate any of my writing please let me know.
(By the way, if you're serious about making costumes from the Master and Commander movie, you need to buy The Making of Master and Commander by Tom McGregor. I just bought it and I wish I had it when I made my Jack Aubrey costume because it has lots of great reference photos! *See the update at the bottom of the page for another great reference book.

Second Lieutenant Mowett Uniform
This appears to be a Lieutenant's uniform, and I decided it was Mowett's because he's the only Lt. I remember that wears a top hat. You can see a photo of Mowett in hat and uniform on page 102 in the Making of M&C book.


Midshipman Blakeney Uniform
Since this midshipman's uniform had the right arm pinned up it could only be Lord Blakeney's!


Blakeney and Mowett Uniforms

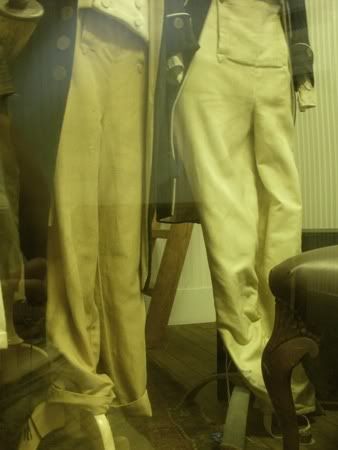
Blakeney and Mowett Trousers. Mowett's have stirrups at the bottom (you can see them better in my sketch).


All that can be seen of Captain Aubrey's Uniform

Royal Marine Uniform
Unfortunately the hat is about the only thing that can be seen in detail on Jack Aubrey's uniform. I don't know which character wore this Marine's uniform. It's not Captain Howard because he wears a different hat. The edging on the Marine's uniform is cool, it's white with a red stripe and a blue stripe (I put asterisks on the sketch to mark where this edging was used). There's a good photos of a bunch of Marines in uniform on page 86 of the Making of M&C book.


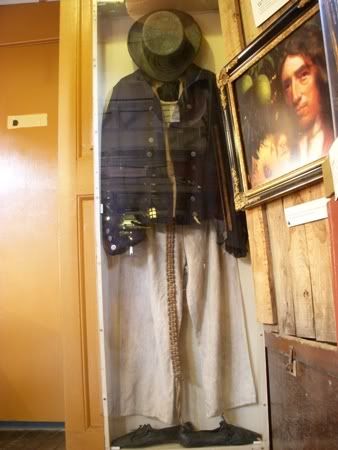
Sailor's Outfit
This sailor's outfit was not in the same room as the other costumes. I don't recognize it so it might not be from the movie (it could be a real antique outfit for all I know!). I thought it was interesting that the edges of the jacket weren't turned under and hemmed. Instead they've completed all the edges with an oversewing stitch (I couldn't think of what it was called when making my sketch so I called it a blanket stitch).

*Update 7/12/09: When visiting the National Maritime Museum in Greenwich this summer, I ran across this amazing book: Dressed to Kill: British Naval Uniform, Masculinity and Contemporary Fashions, 1748-1857. It's written by Amy Miller who is a curator at the NMM. The book describes a number of uniforms in the museum's collection with front, back, and detail photos of each as well as line drawings showing their pattern construction. I remember seeing it on the internet while researching my Jack Aubrey costume but there was no indication in the very brief Amazon description that it contained all these amazing reference photos and drawings. If you are interested in making an authentic Royal Navy uniform you definitely need this book!


Update 8/16/11: I was checking the Amazon link for Dressed to Kill and saw that it is out of print, with resale copies going for over $400. Ouch! Same thing over at Amazon UK. The price I bought it at was £15 (so about $30). It is still listed at that price on the National Maritime Museum's list of publications but with no option to buy. If you are desperate to have it but can't pay the insane resale price, my only suggestion would be to contact the museum to see if they still have any copies.


(Oh and thanks, Amazon, for offering to buy back my copy of Dressed to Kill for $5.52 so you can resell it at $424.99. That sounds like a great deal!)

Related Posts with Thumbnails