Monday, March 02, 2009

"The Office" Paper Dolls


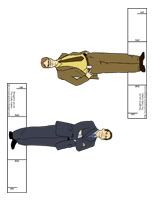
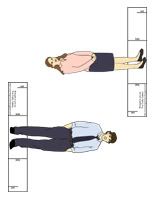
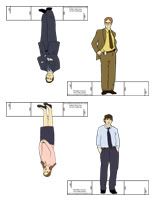
"The Office" Paper Dolls - Dwight, Michael, Pam & Jim (Dundie in the background for scale)

My friends at the Ypsilanti branch of Dunder Mifflin Infinity (an online game based on "The Office") recently held a Regional Manager Appreciation Day for me. They even had our "Office" Christmahanukwanzakah poem printed up in a book and sent it to me. Aren't they awesome? :)

As a way to show my appreciation for them, I made these paper dolls based on Dwight, Michael, Pam and Jim from NBC's "The Office."  Well, I guess they're not really paper dolls since you can't change their clothes but I'm not sure what else to call them. Mini standees, maybe? Anyhoo, my friends on DMI really seemed to enjoy them so I thought I would share them with you all. Update: I've added three more dolls with accessories and changeable outfits: Creed Bratton, Kelly Kapoor and Michael Scott with his desk.

Here's how to get the dolls on this page:

1. Open the PDF file containing the paper dolls (see below) and print each page out (the stiffer the paper the better - cardstock would be the best).
2. Cut along the outline of the stand and around each paper doll (you may have to use an X-acto knife to get all the details). Cut two slits in the stand along the lines that say "cut".
3. Fold the stand back along both lines that say "fold" then slide the two slits into each other.
4. Stand the paper doll up. You may have to gently bend the figures and the stand so they'll stand upright.


4 Inch Paper Dolls (PDF)


5.5 Inch Paper Dolls - Michael and Dwight (PDF)


5.5 Inch Paper Dolls - Jim and Pam (PDF)


Enjoy, and let me know if you have any problems downloading the files or printing the dolls. :)

Friday, February 20, 2009

White Chocolate Recipes


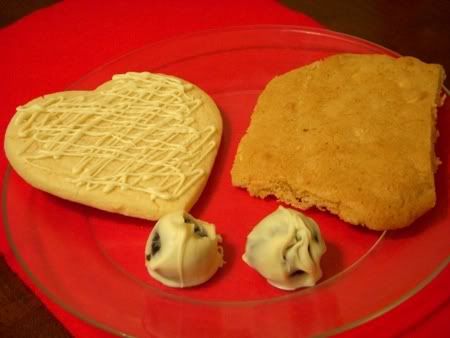
The husband and I usually don't spend much on Valentine's day since February is the month of the Tucson Gem and Mineral Show and we blow all our money there. So this year I decided to save money and surprise him by making three different cookies using his favorite sweet, white chocolate. I made Oreo balls dipped in white chocolate, sugar cookies with white chocolate icing, and white chocolate chip cookies (which turned out oddly shaped since I didn't space them out enough). I made them early, the Thursday before Valentine's, so he could take the extras to work on Friday.

Kevin's favorite were the white chocolate chip cookies. The recipe I used was from FoodNetwork.com (Emeril Lagasse). It was supposed to be a giant cookie cake (I left out all the nuts and bittersweet chips and put in extra white chocolate chips) but it was so thick that it didn't get cooked in the middle so I had to start over. I decided not to risk under cooking them again so I just made small cookies.

My favorite were the sugar cookies. The recipe was also from FoodNetwork.com (Alton Brown this time). I had to bake them slightly longer than the time given in the recipe but I took them out when the edges were just barely brown and they were perfect - soft and not overly sweet. I melted white chocolate, put it in an icing bag and drizzled it over the top of the cookies.

The Oreo balls were also good, though I think that dipping regular, non-balled Oreos in to white chocolate would taste just as good. And since they have cream cheese in them that means you have to keep them refridgerated which was a hassle. The recipe I used was from Allrecipes.com.

Monday, February 02, 2009

Party Recipes

DMI Ypsilanti Party Recipes (PDF File)

I thought I'd share some party recipes that my team at Dunder Mifflin Infinity Ypsilanti came up with to help us celebrate the Superbowl. I arranged all the recipes in a PDF file so you can just print them all out at once. Each recipe is in it's own 4x6 box so you can also cut them out if you'd like. We had a vote to pick the top 3 recipes - the winners are indicated by a "1st", "2nd" or "3rd" place graphic next to the name of the recipe.

Here are all the recipes included in the PDF file:

Bar-B-Que Smoked Sausage
Buffalo Chicken Wings
Chips and Salsa
Cream Cheese Salsa Dip
Deviled Eggs
Guacamole
Ham Delights
Man Meat Minis
Quick and Easy Brownies
Sherbet Fruit Punch
Snickers Pie
Spicy Cheese Dip
Tater Tot Casserole
Tomato-Basil Tart

I made the "Man Meat Minis" (lil smokies wrapped in bacon w/ brown sugar) for a Superbowl party yesterday and they were a hit!

Monday, January 12, 2009

'Twas The Night Before Christmahanukwanzakah: A Poem

For over a year now, I've been involved in an online game sponsored by NBC's "The Office" (previous posts here and here). I'm the Regional Manager of the Ypsilanti, Michigan branch of Dunder Mifflin Infinity, which basically means I'm the leader of a group of about 100 fans (most of whom are from the Michigan area). We play the game together and compete against 99 other teams from different parts of the country. As you can probably imagine, with that many competitors it's hard to win, but last week we finally managed to make it happen!

We were competing in a contest to submit the best idea for a holiday party and to include photos and descriptions of the location, food, activities, etc. for the party. To make our party idea stand out we decided to make it into a poem we titled "'Twas The Night Before Christmahanukwanzakah". It describes a party that Michael Scott from "The Office" throws to celebrate all 3 major holidays (Christmas, Hanukkah, and Kwanzaa). You can read the entire poem (with illustrations) here.

Amazingly, our poem was picked by NBC as one of the top 16. The top 16 were then put up to be voted on by people world-wide and, even more amazingly, our poem won the vote! We got twice as many votes as the first runner-up so it was a landslide. And while there isn't any "real-world" prize for winning (it would have to be split between all 100 people in my branch!), I'm still ecstatic to know that we were able to come up with something that so many people enjoyed. :)

Tuesday, December 02, 2008

Wrap-around Bookcases


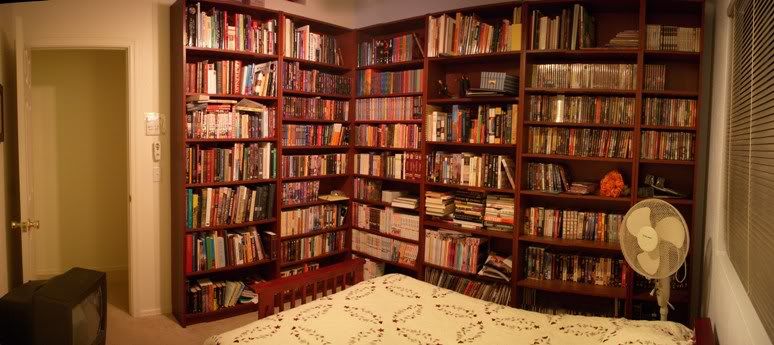
Just a quick post to show off the bookcases we finally put up in our spare room. You might remember this room from this post I made back in April - at the time I was attempting to sort all my books and make room so we could install the shelves. Well, it took more that 9 months but we did it! We even moved my futon and my old dorm TV in so it's really a guest room now. If you were wondering, the shelves are the Billy system from IKEA.

I'm going to be pretty busy this month so I can't promise that I'll get to post. I still have my dad's cowboy costume to sew and I've agreed to make several more of my Advent calendars. Fun fun!

Monday, November 17, 2008

Halloween Update 2: Saloon Girl, Bar Maid, and Chef Gordon Ramsay

This is my second post about the Halloween costumes I made this year - you can see my first post about the Witch, Princess Leia, and Jedi costumes here.

...


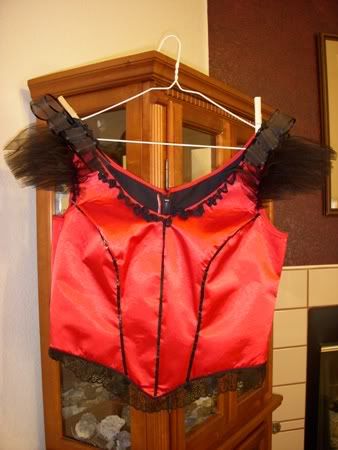
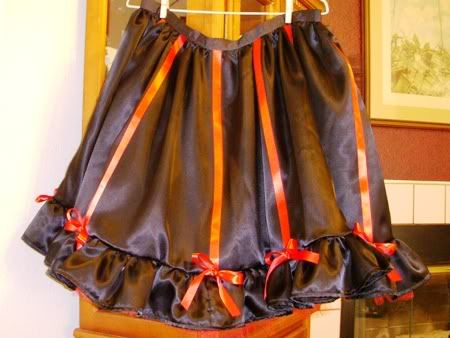
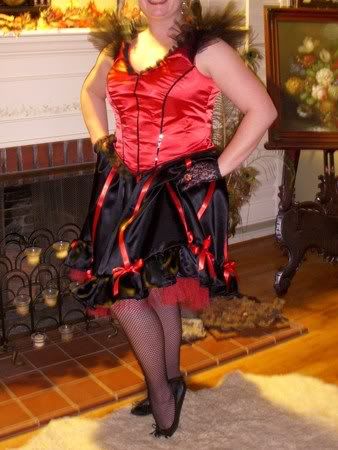
Project Name: Saloon Girl
Time Taken to Finish: 3 weeks
Pattern:
Simplicity 2851
What I Did: This was by far the most challenging costume to make. It was constructed from satinette which I have no experience sewing. That made the bodice very challenging because it was difficult to get the satinette to lay flat and match up with the lining pieces. I actually ended up throwing away my original pieces cut from the satinette and buying more fabric, which I then attached to some fusible interfacing before cutting out the pattern pieces. That made everything much easier!
...


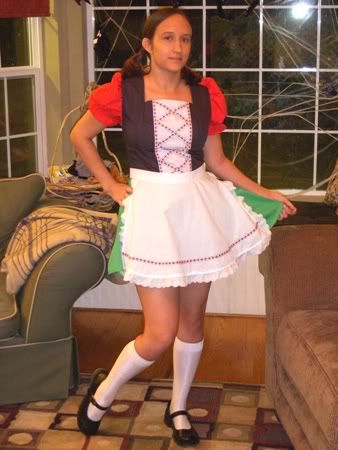
Project Name: German Bar Maid
Time Taken to Finish: 1 week
Pattern: Simplicity 2789 (Update 9/8/09: This pattern is now out of print. The closest I could find is Simplicity 4015, View B, Little Red Riding Hood. Take off the hood and change the colors and it would resemble this costume, though it doesn't have the bloomers).
What I Did: This costume was quick and easy (just what I wanted!). I followed the pattern and didn't have any major problems with it.
...


This is my husband as Chef Gordon Ramsay (or just a chef to those who don't know who Chef Ramsay is!). I had planned to sew the chef's jacket myself using this pattern but I ran out of time. Happily, I was able to find a reasonably priced jacket at Chefwear.com. Also nice was that 2 day shipping was only a couple more dollars than the standard shipping so I was able to have it well before Halloween.
...

And are some photos of the costumes from my last post being worn (I've also added them into that post):


Witch


Princess Leia


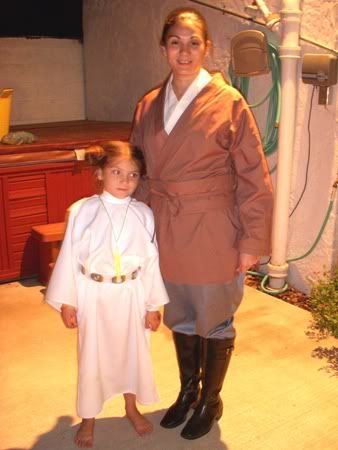
Princess Leia and Jedi

Tuesday, September 30, 2008

Halloween Costumes Update 1: Witch, Princess Leia, Jedi

Update 11/17: I've added in photos of the costumes being worn. You can see my second post about the Saloon Girl, Bar Maid, and Chef Gordon Ramsay costumes here.
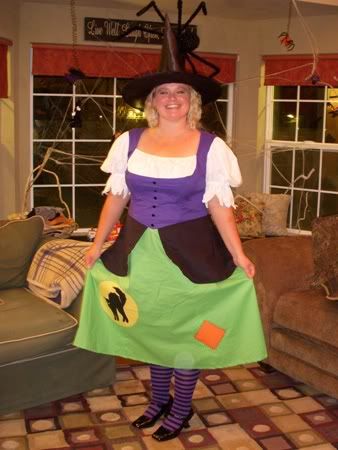
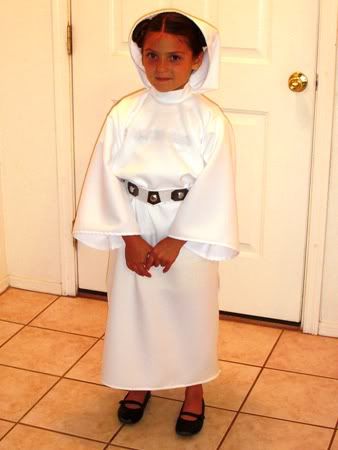
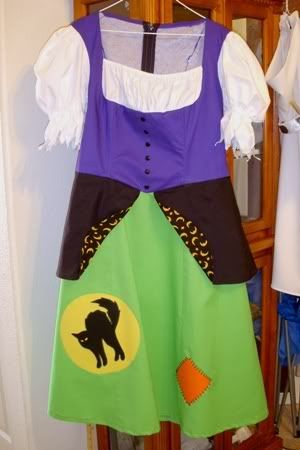
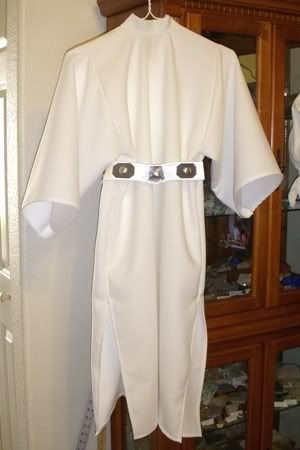
I've been a little busy lately because of my attempt to sew seven costumes for Halloween this year (only one is for myself, the rest are for friends and family). So far I've finished three, all of them for friends: a cute witch dress, a child's Princess Leia dress and belt, and a Jedi outfit. Here are some preliminary photos and descriptions of the projects (I'll have photos of the costumes on their wearers after Halloween).

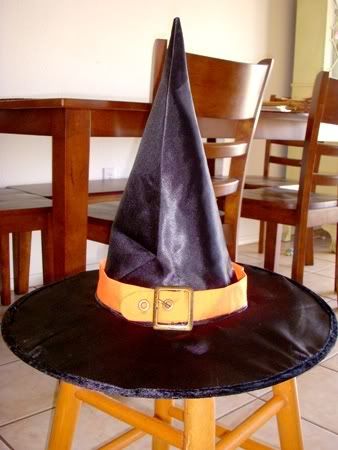
Project Name: Witch Dress and Hat
Time Taken to Finish: 1 week
Pattern: Simplicity 2803 (Update 9/8/09: This pattern number has changed to Simplicity 2521)
What I Did: This costume was sewn pretty much according to the pattern. For the peplum (the black thing around the waist) I ended up having to put an extra layer of black under the outer layer to keep the printed inner layer from showing through. For the hat I sewed a little orange belt and attached a buckle, then sewed it to a standard witches hat.
...
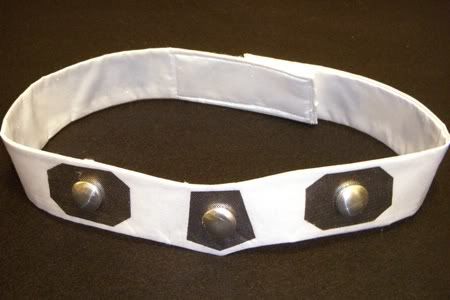
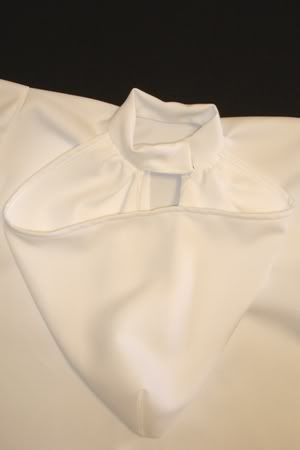
Project Name: Child's Princess Leia Dress and Belt
Time Taken to Finish: 4 days
Pattern: Simplicity 4797
What I Did for the Dress: I started with an angel costume from the Simplicity pattern to figure out the size. I altered it so that the body of the dress was all one piece with the only seams being under the arms (there were no shoulder seams). I altered the neck to add a Mandarin collar with a velcro closure and a keyhole opening below the closure to make room for it to go over the head. I made a hood and sewed it into the neck seam on either side of the closure. The sleeves had to be shortened a lot and the extra angel "flaps" were removed (I probably should've started with the standard sleeves, it would've saved me some time!). I left the side seams of the dress unsewn from the knee down to make slits (I did do a little hem on the raw edges).
What I Did for the Belt: I made a pattern out of newspaper for all the pieces based on the belt information at Obi-Wan's Jedi Academy. For the body of the belt I used two pieces of white costume satin with a thick piece of interfacing in between and velcro sewn at either end for closure. For the metal octagons and petagon I used silver fabric attached with fusible webbing. I then hot-glued 3/4 inch button blanks on top of the silver shapes.
...
Project Name: Jedi Costume
Time Taken to Finish: 1 week
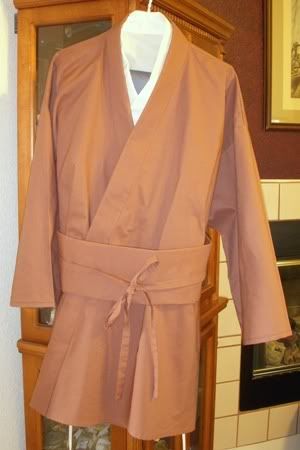
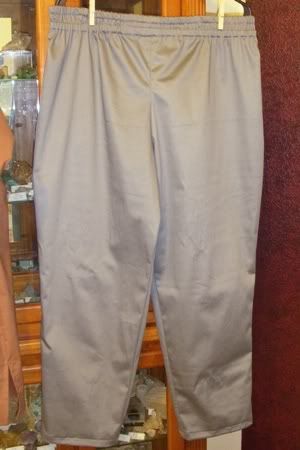
Pattern: tunic: Simplicity 5840 pants: McCall 2233
What I Did: This is sort of an "early Obi-Wan" costume (no robe!). The Simplicity pattern did not come with a pattern for pants so I borrowed one from a McCall pattern I had handy.
...
Sewing so many different costumes has been hard work but I'm also learning a lot. I have four more costumes planned: saloon girl, Chef Gordon Ramsay, Heidi/German bar maid, and Gary Cooper from High Noon. The last one is for my dad and might not get finished before Halloween, but he's said he can wait.

Friday, August 22, 2008

Crochet Pattern: Amigurumi Wolf


I've created my first original amigurumi pattern - a wolf. I wanted to crochet a wolf for a friend who was going off to school at the University of Nevada - Reno (their mascot is the wolfpack). But I couldn't find a wolf pattern online that I liked, so I decided to write my own.
Coming up with my own pattern was easier than I thought it would be - I just started crocheting and if I didn't like the way the it was going I just ripped the stitches out and started again. As I crocheted I kept a log of how many stitches I used in each round and made notes if I used any special increases or decreases. This type of pattern was easy for me to read, but when it came time to post it online I realized that many crocheters would have no idea what to do with my crazy list of numbers!
To find out how an amigurumi pattern should be written, I looked online at other free patterns created by bloggers and picked the three that I thought were easiest to understand: Ana Paula's, Planet June's, and Nimoe's. I then used the writing style of these patterns as a guide to how mine should be written. After writing up my pattern properly I tested it by using it to create another wolf.
I hope you enjoy this pattern and I'd love to see photos of any wolves you make using it. If you have any questions or find any errors please let me know in the comments section.
Update 8/16/09: Cissi of Amigurumi på svenska has translated this pattern into Swedish!


Wolf Amigurumi Pattern
Notes on this pattern:
  • My patterns are free and may not be sold. Please do not reproduce or repost patterns or instructions from CraftyCattery.com without my permission. For information on selling items created from my patterns, please view the FAQ.
  • Probably the most complicated parts of this pattern are the muzzle and tail. The head and body are the typical amigurumi "mushroom" shape and the paws and ears are pretty simple to crochet.
  • The finished size of the wolf is about 5 inches sitting, 7 inches standing.
Materials needed:
  • Bulky weight yarn in grey, white, and black (I used Bernat Softee Chunky)
  • Size H (5.00 mm) crochet hook
  • Yarn needle
  • Optional: Safety eyes and nose (if the item is intended for children over 3 years)
Abbreviations used in this pattern:
  • Rnd = round
  • sc = single crochet
  • st = stitch
  • sts = stitches
  • ch = chain
  • sc2tog = single crochet two stitches together, aka a decrease. (I recommend using falwyn's invisible decrease.)
The pattern:
Muzzle
Using white:
Rnd 1: 6 sc in magic ring (6 sts).
Rnd 2: 2 sc in each st around (12 sts).
Rnd 3: [2 sc in next st, sc 3] three times (15 sts).
Rnd 4: sc around (15 sts).
Rnd 5: sc around (15 sts).
Rnd 6: sc around (15 sts).
Rnd 7: [sc2tog, sc 3] three times (12 sts).
Rnd 8: [sc2tog, sc 2] three times (9 sts).
Bind off, leaving yarn tail to sew muzzle to head.

Blaze
The blaze is crocheted flat. Using grey:
Row 1: ch 2, 2 sc in second chain from hook, ch 1 turn (2 sts).
Row 2: sc across, ch 1 turn (2 sts).
Row 3: 2 sc in each st, ch 1 turn (4 sts).
Row 4: sc across, ch 1 turn (4 sts).
Row 5: 2 sc in 1st st, sc next two st, 2 sc in 4th st, ch 1 turn (6 sts) .
Row 6: sc across, ch 1 turn (6 sts).
Row 7: sc across, ch 1 turn (6 sts).
Bind off, leaving tail to sew blaze onto muzzle.

Sew blaze on top of muzzle, with short end of blaze positioned just above the point of the muzzle. Use black yarn to embroider nose over end of blaze or attach plastic safety nose. Stuff the muzzle.

Blaze - short end at the right

Blaze sewn to muzzle

Nose embroidered on muzzle
Ear
Make two using grey:
Rnd 1: 4 sc in magic ring (4 sts).
Rnd 2: [2 sc in next st, sc 1] two times (6 sts).
Rnd 3: [2 sc in next st, sc 2] two times (8 sts).
Rnd 4: [2 sc in next st, sc 3] two times (10 sts).
Rnd 5: [2 sc in next st, sc 4] two times (12 sts).
Rnd 6: [2 sc in next st, sc 5] two times (14 sts).
Bind off, leaving long tail. Use tail to sew open end of ear together so it is flat (do not stuff). Leave excess tail to sew ear to head.

Head and Body
Using grey:
Rnd 1: 6 sc in magic ring (6 sts).
Rnd 2: 2 sc in each st around (12 sts).
Rnd 3: [2 sc in next st, sc 1] six times (18 sts).
Rnd 4: [2 sc in next st, sc 2] six times (24 sts).
Rnd 5: [2 sc in next st, sc 3] six times (30 sts).
Rnd 6: sc around (30 sts).
Rnd 7: sc around (30 sts).
Rnd 8: sc around (30 sts).
Rnd 9: sc around (30 sts).
Rnd 10: sc around (30 sts).
Rnd 11: sc around (30 sts).
Rnd 12: [sc2tog, sc 3] six times (24 sts).
Rnd 13: [sc2tog, sc 2] six times (18 sts).

Sew the ears and muzzle to the head, using grey yarn to attach the ears and top of the muzzle and white yarn to attach the lower part of the muzzle. Embroider or attach plastic safety eyes. Stuff head then continue crocheting:

Rnd 14: [sc2tog, sc 1] six times (12 sts).
Rnd 15: [sc2tog] six times (6 sts).
Rnd 16: sc around (6 sts).
(Optional - Rnd 16a: sc around (6 sts). If you’d like a floppy head, do this extra row. If you don’t want a floppy head, leave this row out.)
Rnd 17: [2 sc in next st, sc 1] three times (9 sts).
Rnd 18: [2 sc in next st, sc 2] three times (12 sts).
Rnd 19: sc around (12 sts).
Rnd 20: sc around (12 sts).
Rnd 21: [2 sc in next st, sc 3] three times (15 sts).
Rnd 22: sc around (15 sts).
Rnd 23: [sc2tog, sc 3] three times (12 sts).
Rnd 24: [sc2tog] three times (6 sts).

Stuff body. Bind off and close hole.

Front Paw
Make two using grey:
Rnd 1: 6 sc in magic ring (6 sts).
Rnd 2: 2 sc in each st around (12 sts).
Rnd 3: sc around (12 sts).
Rnd 4: sc around (12 sts).
Rnd 5: [sc2tog, sc 2] three times (9 sts).
Rnd 6: sc around (9 sts).
Rnd 7: [sc2tog, sc 1] three times (6 sts).
Rnd 8: sc around (6 sts).
Rnd 9: sc around (6 sts).
Bind off, leaving long tail to sew paw to body. Stuff paw and sew opening shut.

Back Paw
Make two using grey:
Rnd 1: 6 sc in magic ring (6 sts).
Rnd 2: 2 sc in each st around (12 sts).
Rnd 3: [2 sc in next st, sc 3] three times (15 sts).
Rnd 4: sc around (15 sts).
Rnd 5: sc around (15 sts).
Rnd 6: [sc2tog, sc 3] three times (12 sts).
Rnd 7: sc around (12 sts).
Rnd 8: [sc2tog, sc 2] three times (9 sts).
Rnd 9: sc around (9 sts).
Rnd 10: sc around (9 sts).
Rnd 11: [sc2tog, sc 1] three times (6 sts).
Rnd 12: sc around (6 sts).
Bind off, leaving long tail to sew paw to body. Stuff paw and sew opening shut.

Tail
Note: The tail is crocheted with most of the increases on one side of the tail and most of the decreases on the other so that it will have a curve.
Rnd 1: 4 sc in magic ring (4 sts).
Rnd 2: sc across (4 sts).
Rnd 3: [2 sc in next st, sc 1] twice (6 sts).
Rnd 4: 2 sc in next st, sc 1, sc2tog, sc 2 (6 sts).
Rnd 5: 2 sc in next st, sc 5 (7 sts).
Rnd 6: 2 sc in next st, sc 6 (8 sts).
Rnd 7: 2 sc in next st, sc 2, sc2tog, sc 3 (8 sts).
Rnd 8: 2 sc in next st, sc 2, sc2tog, sc 3 (8 sts).
Rnd 9: 2 sc in next st, sc 2, sc2tog, sc 3 (8 sts).
Rnd 10: 2 sc in next st, sc 7 (9 sts).
Rnd 11: 2 sc in next st, sc 8 (10 sts).
Rnd 12: 2 sc in next st, sc 3, sc2tog, sc 4 (10 sts).
Rnd 13: 2 sc in next st, sc 3, sc2tog, sc 4 (10 sts).
Rnd 14: [sc2tog, sc 3] two times (8 sts).
Bind off, leaving long tail to sew tail onto body. Stuff tail.

Sew front paws on to body below the head. Sew back paws near the bottom of the body. Sew the tail on the back side of the body between the back paws. If wanted, use black yarn to embroider claws on to each paw.

My test wolf (left) and my prototype wolf (right - smaller because he was made with a lighter-weight yarn)

Tuesday, August 12, 2008

"The Office" Charity Fundraising Video


The United Way and DunderMifflinInfinity.com (aka DMI, NBC's online game for "The Office") are running a Summer Fundraising Initative to help bring in donations to a number of worthy charities.
Each branch of DMI is sponsoring a charity - my branch, Ypsilanti Michigan, has chosen St. Jude's Children's Research Hospital. St. Jude's is a world leader in researching and treating cancer and other diseases in children, so I think it's a charity that everyone can get behind (that's what she said!).
I made the above video hoping to inspire people to give as generously as they can. If you'd like to give to St. Jude's through our fundraiser, you can DONATE HERE. Thanks for your support - every little bit helps!

Monday, July 14, 2008

Chiltepin Plants Update


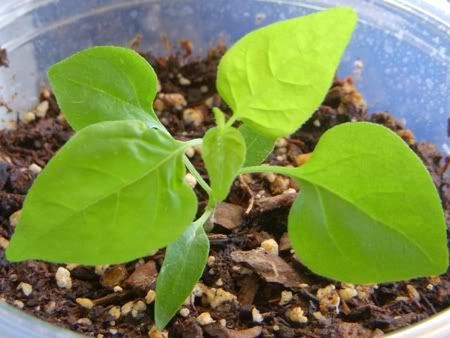
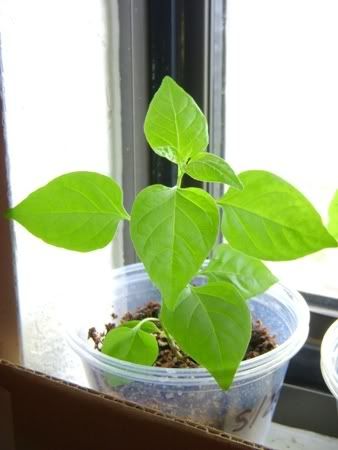
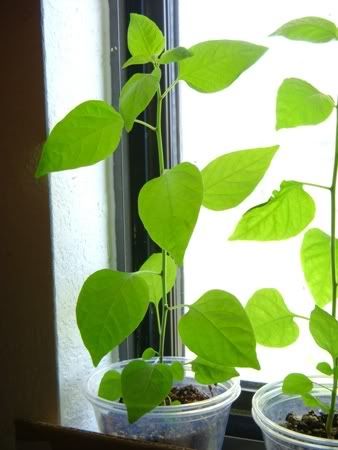
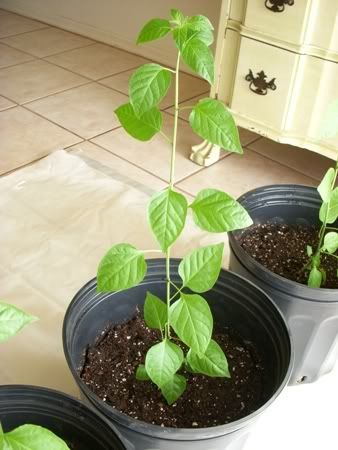
My chiltepin plants are doing surprisingly well! Out of the 32 I planted so far I've only lost one. Now some of them are outgrowing their tiny potting cups so I'm starting to replant them into large containers. Pots are expensive! I went to every garden center I could find to try to buy large containers that were less than $1 a piece but no luck. I was hoping someone would sell the cheap plastic pots that the nurseries use but I couldn't find them anywhere. I ended up having to order them online from GreenhouseMegaStore.com - they had a bundle of thirty 2.5 gallon containers for $17. Plus $15 shipping that ended up being $32, a little more than $1 a piece.
So far I've replanted eleven of the chili tepin plants in the 2.5 gallon containers today. Right now they're sitting inside my patio door - hopefully they'll get enough sun there. They probably would get more sun outside, but it's the monsoon season here in Arizona. So in addition to surviving the desert heat the plants would also have to make it through the strong winds and heavy rain of the monsoon storms. I think I'll try to keep them inside as long as I can so they can grow big and strong!

Here are some photos I took about once a week of one of the chiltepin plants to track it's growth:


May 31st


June 3rd


June 11th


June 21st


June 30th


July 9th (in the new big pot!)


Update 1/15/09: Unfortunately I had to leave my chiltepin plants outside while I was gone for two weeks over Christmas. We had several hard freezes (and one snow!) while I was away and since I wasn't able to cover them up, they didn't make it. I'm still watering them, hoping maybe they can be revived but it's probably a lost cause. :( I'll just have to start over once it gets warm.

Related Posts with Thumbnails