Monday, April 11, 2011
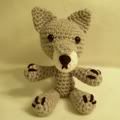
Big Blue Amigurumi Bear
Monday, April 04, 2011
A Quick Note: Writing Blog at CatCarlisle.com
I'm trying to get serious about writing so I've started a new blog that I hope will help motivate me at CatCarlisle.com. My plan is to alternate my posts between the two blogs - one week I'll do a craft post here and the next I'll do a writing post there. If you have an interest in books or writing, please take a look!
Monday, March 28, 2011
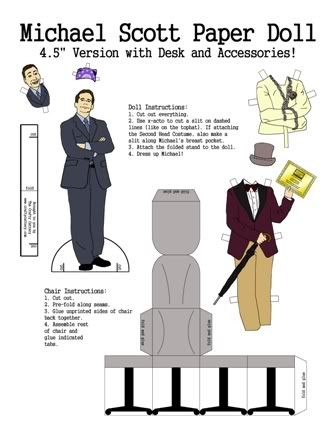
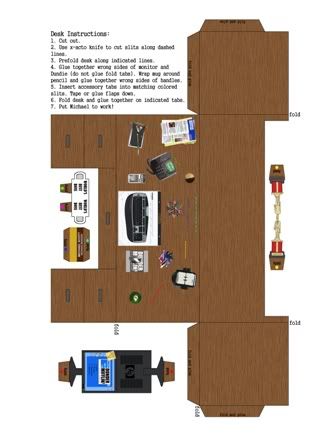
"The Office" Paper Doll: Michael Scott with Desk and Costumes
Costumes include Willy Wonka (from "Golden Ticket"), magician's straight jacket, Prison Mike doo-rag and Michael's second head Halloween costume. Michael comes with his chair and desk, complete with monitor, Dundie, nameplate and World's Best Boss mug. Click here to download the PDF (Note that the file is somewhat large so it may take a little while for it to load). Download it, print it on heavyweight paper, cut everything out and enjoy!
Monday, March 14, 2011
Fingerless Knit Gloves
I spend most of my time working on the computer and this time of year that means my wrists and fingers end up painfully cold. I've tried wearing gloves but they make it hard to type. I bought fingerless bike gloves but they only covered a tiny bit of my fingers and none of my wrist.
At the store today I saw a cheap pair of knit gloves with long wrists, So I bought them and decided to cut the fingertips off. This way they would keep my hands and fingers warm but would still allow me to type easily.
I found a great tutorial by Annie Spandex that was pretty close to what I wanted to do, though I ended up doing a few things differently. Here's what I did:
1. I put on the gloves and marked with pins where I wanted to cut them.
Since knit gloves are stretchy, always cut off less than you think you should. I marked them about a quarter inch above the top joint in each finger and after I cut them and tried them on again, they ended below that joint. If I could do it over again, I'd just cut off the very tip. Remember, you can always cut off more but you can't put back what you've already cut off.
2. I took off the gloves (carefully so didn't get poked by the pins). Using sharp scissors, I cut off each finger tip of the glove above the pin.
4. I stuck a marker in each finger then put each glove in a glass and arranged them so the fingers weren't touching. This is so the fingers won't stick together when I put the Fray Check on them.
Monday, February 28, 2011
How I Did It: The Office Ypsilanti Bobblehead Movie
This is a follow-up to my post of 2/18/11. Here's the film again in case you missed it (FYI it's 12 minutes long):
This project has been in the works for years. In 2007 I joined NBC's fansite for The Office, Dunder Mifflin Infinity (it's now called Dunder Mifflin Sabre). I met a bunch of cool people who loved the show as much as I did and we had fun geeking out and playing games on DMI.
In the spring of 2008 I created this puppet video for a contest on DMI. It made it in to the top 5 entries but didn't win. However, I had so much fun making it that I started to look for something else to film. I worked with a friend from DMI and we came up with a story idea then wrote a script. But it seemed too complicated for puppets so we ended up sitting on it for a few years.
In 2009 I ran across an animation program called Anime Studio Debut 6. It was cheap so I bought it and played around with it for a while. Once I had a general idea of how it worked, I picked our script up again and decided that it would be possible to use Anime Studio Debut to film it. Here's what I did.
Actors and Lines
The actors in this film are my friends from The Office fansite and are located all across the country (one is even in the UK!). So everything we did had to be done over the internet.
The first step was to get photos of my actors' faces. I went through the script and figured out all the expressions that the characters would need to make during the film. I then asked my actors to take photos of their heads making each of the expressions as well as a photo of the back of their head for when the character was facing away from the camera. Even if I wasn't sure if a character needed that expression, I had them do it anyway. This was a good idea since I ended up needing some of those expressions later.
At the same time, I sent each person a numbered list of lines for them to record. They recorded the lines and emailed them to me. This was actually one of the biggest headaches for me because there were so many different file types and often my computer didn't want to read them. However, my dad recommended GoldWave, a downloadable audio editing program (it's free to try, $49 to buy). Not only did it read all the file types and convert them into .wav files for me, it also allowed me to increase the volume in the clips and clean up a lot of the background noise.
Creating the Bobbleheads
I had the lines and the actor's photos so now it was time for me to make the bobblehead characters. I drew by hand a body for each character then scanned my drawing into Photoshop where I cleaned it up and colored it. I purchased a cheap USB tablet that was a huge help when it came to working in Photoshop. It made drawing, coloring, and cropping much easier.
Next I cropped out each head and put them in the same Photoshop file as the body, resizing them to fit on the body. I had a layer for each head and one for the body.
Now I needed a way for the mouths to move when the characters talked. In Photoshop I cut out the lower lip and jaw of each face that needed to talk then made additional layers and moved the mouths in to five different positions, from closed to open wide.
I saved each mouth, face, and body layer individually as a .png file then imported all the layers for a character into an Anime Studio Debut file. I rigged the figure and saved it so that I could import it in to any other Anime Studio Debut file and it would be ready to "act"!
Backgrounds
Most of the backgrounds are photos. I put them all through Photoshop's "Cut Out" filter so that they would look more cartoonish as well as to compensate for the fact that some photos weren't the same quality as others. If there was a piece of furniture or other object that a character would need to stand behind, I duplicated the background in to a new layer then cut out the object. In animating the character layer would be between the furniture layer and the background layer and thus would appear to be standing behind the furniture.
Props
Props were pretty easy, I just took a photo then I cut the object (such as a phone) out of the photo then put it through Photoshop's "Cut Out" filter. The hardest props weren't really props at all but characters - the animals at the petting zoo. It was not easy to get that goat to move!
Animating
Once I had the bobbleheads, backgrounds and props I could finally start animating. Though I had done a few test animations before starting, I went into this with almost no idea how to use Anime Studio Debut. Consequently there was a lot of frustration and more than a few tears before I was done. That's probably one explanation for why it took me ten months to animate this thing!
I wish I had the time to explain how to use Anime Studio Debut but it is so complicated that I don't think there is any way I could do it. I learned by fiddling around with it, using the tutorials provided with the software and going to the Anime Studio forum when there was a question I couldn't answer elsewhere.
While I can't go through everything, I will mention a few things I did to make the animating easier:
- Instruction Sheet. I made an instruction sheet for myself. If I figured out how to do something complicated I wrote it down so I wouldn't have to figure it out again the next time.
- Scene Chart. I created a spreadsheet with each scene listed. I broke down the scenes by shots (parts of the scene that require a different angle or background) then gave each shot a number (1-1 would be scene 1, shot 1). Next to the shot I copied from the script the description of the action and any lines spoken in that shot. I then named my animation files with those numbers so I could keep track of what I was animating.
- Keep Clips Short. Anime Studio Debut can slow down if a scene has a lot of layers and action so I tried to keep each clip to about twelve seconds. If the clip went longer, I often would break it up into two different clips.
- Use Sync Switch Layers Feature. The ability to sync switch layers to an audio file in Anime Studio Debut is awesome! I used it to make the characters talk. All I had to do was import the audio file then sync the mouth switch layer to it and the program would automatically make the mouths flap according to the loudness of the audio. It's not perfect, though, so I always had to go back and clean it up a bit.
- Mix Audio with Goldwave. Anime Studio Debut only allows you to have two audio files in the program at once. This wouldn't work for scenes where I had several people talking at once. I solved this by first pasting together the different audio clips in GoldWave then importing one big audio clip into Anime Studio Debut. I synced all the characters' mouths to that one file then went in and cleaned it up so that the characters only talked during their lines.
- Watch Out for Popping Audio. Be aware that if you have two audio files in Anime Studio Debut and they are producing sound at the same time, you may end up getting a popping sound. For example, in the raining picnic scene I originally had one audio file for the thunder and another for speaking, but I found that whenever there was thunder at the same time as someone was speaking I would get the popping sound. I solved this by removing the thunder audio file and adding it back in when the animating was done using Windows Movie Maker.
- Watch Out for Spatial Positioning. Another sound quirk that Anime Studio Debut has is called spatial positioning. It is turned on automatically for every audio file and changes the loudness of the file and which speaker the sound comes out of depending on where your "camera" is relative to the position of the audio clip. I didn't notice that this was a problem until one day when I was animating using my headphones and realized that sometimes the sound would come out one earbud but not the other. At first I thought something was wrong with my headphones, then with my sound card, then with my audio file...it took me forever to realize that it was all due to an annoying check box hidden in the audio file properties in Anime Studio Debut!
- Making it Rain. This wasn't easy. In the more expensive version of the software (just called Anime Studio, without the "Debut") there is something called Particle Effects which apparently make it much easier to animate things like rain. But I had the cheap version, of course, and Particle Effects doesn't come with it. What I did was draw some diagonal lines in a layer, then replicated them over and over using the Scatter Brush tool. I then animated the layer to move from top to bottom across the screen and when it reached the bottom, to jump back to the top and cycle back to the bottom again. I duplicated that layer and animation a couple times and moved their timing around so that there would always be rain on the screen.
Putting It All Together
By the time I was done animating, I had about 60 video clips of various lengths that needed to be edited together. To do this I used Windows Movie Maker which came free with my computer.
I got some flack from my husband for using Movie Maker. Apparently a lot of people find it lame, fit only for putting together vacation slideshows. But I liked that it was simple and would easily produce a file in the 16:9 widescreen dimensions that I needed for Youtube. I did take a look at another program, Adobe Premiere Elements, and while it had some neat stuff and would let me mix more than one audio track at a time, it was also extremely limited in the choices it gave me for what file types and sizes it would produce. It didn't have an option in the dimensions I needed so I chose not to use it.
Like Anime Studio Debut, Windows Movie Maker gets very slow and unwieldy with larger files so I first broke up my movie into four parts. I edited each part together, removing any extra footage, adding in scene transitions and extra audio files like the thunder. Next I published and saved each of the four parts in the highest quality format I could. Finally I put the four parts along with opening and closing credits in a new file and published the final file. I was done!
I hope this helps explain how I created this film. Though it was a lot of hard work I also had a lot of fun and enjoyed pushing myself to learn something new.
As I said, I'm no expert when it comes to animating but if anyone has a specific question about how I did something in the film, I'll do my best to answer it. Thanks for reading!
Thursday, February 17, 2011
The Office Ypsilanti Bobblehead Movie
Thanks for watching! In a few weeks I'll do a follow-up post explaining how this film came to be and how it was created. Update 2/28/11: Follow up post is here.
Monday, January 31, 2011
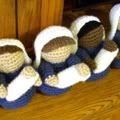
Amigurumi Nativity: Crocheted Joseph Pattern
Joseph Amigurumi Pattern
Notes on this pattern:
- My patterns are free and may not be sold. Please do not reproduce or repost patterns or instructions from CraftyCattery.com without my permission. For information on selling items created from my patterns, please view the FAQ.
- There are a few color changes in this pattern. Aside from that, the most complicated part of the pattern to crochet is the headband which is crocheted in the round (as opposed to in a spiral which is the traditional amigurumi way). There are also a few pieces that are crocheted flat.
- The finished size of the figure is 5 inches.
- Bulky weight yarn in a flesh color, blue (for headcloth and robe), red (for body and headband) and brown (for beard and hair). I used Lion Brand Jiffy.
- Size H (5.00 mm) crochet hook
- Yarn needle
- Stuffing
- Optional: Bean bag plastic pellets. Putting some of these in the bottom of the Joseph figure can help it balance better. Make sure the pellets are large enough that they won't work their way through the crochet stitches. Pellets are not recommended if small children may have access to the figure.
- Rnd = round, when doing continuous crochet
- Row = row, when doing flat crochet
- sc = single crochet
- st = stitch
- sts = stitches
- ch = chain
- slp st = slip stitch
- sc2tog = single crochet two stitches together, aka a decrease. (I recommend using falwyn's invisible decrease.) sc3tog = single crochet three stitches together.
Joseph's Arm
Make two using spiral crochet. Begin with flesh color:
Rnd 1: 4 sc in magic ring (4 sts).
Rnd 2: [2 sc in next st, sc 1] two times (6 sts).
Rnd 3: sc around (6 sts).
Color change to red:
Rnd 4: sc around (6 sts).
Rnd 5: [2 sc in next st, sc 1] three times (9 sts).
Rnd 6: sc around (9 sts).
Rnd 7: sc around (9 sts).
Rnd 8: sc around (9 sts).
Rnd 9: sc around (9 sts).
Rnd 10: sc around (9 sts).
Bind off, leaving tail to use to sew arm to body. Stuff arm.
Joseph's Head and Body
Using spiral crochet. Beginning with flesh color:
Rnd 1: 6 sc in magic ring (6 sts).
Rnd 2: 2 sc in each st around (12 sts).
Rnd 3: [2 sc in next st, sc 1] six times (18 sts).
Rnd 4: [2 sc in next st, sc 2] six times (24 sts).
Rnd 5: [2 sc in next st, sc 3] six times (30 sts).
Rnd 6: sc around (30 sts).
Rnd 7: sc around (30 sts).
Rnd 8: [sc2tog, sc 3] six times (24 sts).
Rnd 9: [sc2tog, sc 2] six times (18 sts).
Rnd 10: [sc2tog, sc 1] six times (12 sts).
Color change to red:
Rnd 11: sc around (12 sts).
Rnd 12: [2 sc in next st, sc 3] three times (15 sts).
Rnd 13: [2 sc in next st, sc 4] three times (18 sts).
Rnd 14: [2 sc in next st, sc 5] three times (21 sts).
Rnd 15: [2 sc in next st, sc 6] three times (24 sts).
Rnd 16: [2 sc in next st, sc 7] three times (27 sts).
Rnd 17: [2 sc in next st, sc 8] three times (30 sts).
Rnd 18: [2 sc in next st, sc 9] three times (33 sts).
Rnd 19: sc around (33 sts).
Rnd 20: [2 sc in next st, sc 10] three times (36 sts).
Rnd 21: sc around (36 sts).
Rnd 22: sc around (36 sts).
Sew arms to body underneath head. Stuff head and upper part of body (stuffing it partially now is easier than trying to stuff the whole thing as you are closing it up).
Rnd 23: [sc2tog, sc 4] six times (30 sts).
Rnd 24: [sc2tog, sc 3] six times (24 sts).
Rnd 25: [sc2tog, sc 2] six times (18 sts).
Rnd 26: [sc2tog, sc 1] six times (12 sts).
Stuff the rest of the body. Add plastic bean bag pellets if desired.
Rnd 27: [sc2tog] six times (6 sts).
Bind off, closing hole and weaving in tail.
Joseph’s Headcloth
See the pattern for Mary's Veil for photos on how the headcloth is crocheted. Crocheted flat. Using blue:
Row 1: ch 11. sc in second chain from hook. [sc in each chain] eight times (with first sc, a total of 9 sc). In 10th chain, 4 sc. Work back down the other side of the chain doing sc in each chain (total of 9 sc), ch 1 turn (22 sts).
Row 2: sc 9, 2 sc in next 4 sts, sc 9, ch 1 turn (26 sts).
Row 3: sc 9, 2 sc in next 8 sts, sc 9, ch 1 turn (34 sts).
Row 4: sc across, ch 1 turn (34 sts).
Row 5: sc across, ch 1 turn (34 sts).
Row 6: sc across, ch 1 turn (34 sts).
Row 7: sc across, ch 1 turn (34 sts).
Row 8: sc across, ch 1 turn (34 sts).
Row 9: sc across, ch 1 turn (34 sts).
You can stop there, but I like to run a chain of single crochet across the bottom to even out the edges. Here’s how to do it: After Row 9, ch 1 then sc across bottom (about 18 or 19 st). When you reach the end, ch 1 then slp st in first stitch on other edge. Bind off, weaving in tails.
Joseph’s Headband
Crochet in the round in red:
Rnd 1: ch 26. Join by slp st in the first st (so you will have a circle)
Rnd 2: sc all. There will be a gap at the end so close it by slp st in the first st in the round.
Bind off, leaving tail to use to sew on headband.
Crochet flat in blue:
Row 1: ch 11. sc in second chain from hook. sc in each chain 9 more times (for a total of 10 sts). ch 1 and turn.
Row 2: sc across, ch 1 and turn (10 sts).
Row 3: sc across, ch 1 and turn (10 sts).
Row 4: 2 sc in first st, sc 8, 2 sc in last st, ch 1 and turn (12 sts).
Row 5: sc across, ch 1 and turn (12 sts).
Row 6: sc across, ch 1 and turn (12 sts).
Row 7: 2 sc in first st, sc 10, 2 sc in last st, ch 1 and turn (14 sts).
Row 8: sc across, ch 1 and turn (14 sts).
Row 9: sc across, ch 1 and turn (14 sts).
Row 10: 2 sc in first st, sc 12, 2 sc in last st, ch 1 and turn (16 sts).
Row 11: sc across, ch 1 and turn (16 sts).
Row 12: sc across, ch 1 and turn (16 sts).
Row 13: 2 sc in first st, sc 14, 2 sc in last st, ch 1 and turn (18 sts).
Row 14: sc across, ch 1 and turn (18 sts).
Row 15: sc across, ch 1 and turn (18 sts).
Row 16: 2 sc in first st, sc 16, 2 sc in last st, ch 1 and turn (20 sts).
Row 17: sc across (20 sts).
Joseph's Robe Edging: Note that the stitch counts in parenthesis in this section are approximate and may vary. If you don’t end up using exactly the same number of stitches as I did, it’s okay.
1. Chain 1 and single crochet up the side, stopping about 2/5ths of the way from the top (9 sts).
2. To make the arm hole, chain enough stitches to be even with the top row (6 sts).
3. Use slip stitch to join the chain to the last stitch in the top row.
4. Chain 1, turn and single crochet back down the side (15 sts).
5. At the bottom corner, chain 1 and single crochet across the bottom row (21 sts).
6. At the end of the bottom row, repeat steps 1-4 for the next side. Then chain 1 and join it using a slip stitch into the first stitch in the bottom row. Bind off and weave in ends.
Here's a slide show showing how the edging on the robe is done:
Joseph’s Beard
Crochet flat in brown (leave long tail for sewing to face):
Row 1: ch 8. sc in second chain from hook. sc in each chain 6 more times (for a total of 7 sts). ch 1 and turn.
Row 2: sc across, ch 1 and turn (7 sts).
Row 3: sc2tog, sc 3, sc2tog, ch 1 and turn (5 sts).
Row 4: sc across, ch 1 and turn (5 sts).
Row 5: sc2tog, sc 1, sc2tog, ch 1 and turn (3 sts).
Row 6: sc3tog (1 st).
Bind off and weave in tail.
Final Construction
Put headcloth and headband on Joseph and sew them down. Sew beard to Joseph's face. Add hair if desired. Put on his robe by sticking the arms through the arm holes. If you want his arms to be down instead of sticking out, you can hold them down and use some yarn to sew them to his sides.
Pair Joseph with Mary and baby Jesus and enjoy your nativity!
Monday, January 17, 2011
Short Stories on the Droid Kindle App
I have not yet jumped on the Kindle/Nook/e-reader train, but I am warming up to the idea. I've played around with my friend's Kindle and while it's nice I'm not ready to buy one yet. I don't think I would prefer an e-reader to an actual paper novel - I can't take the Kindle in the bath with me, can I? Well I CAN but it probably wouldn't be a good idea!
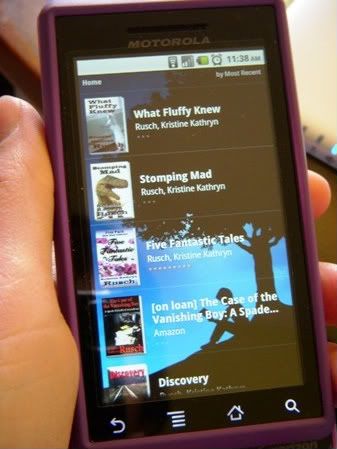
But what I do have is a Droid smart phone:
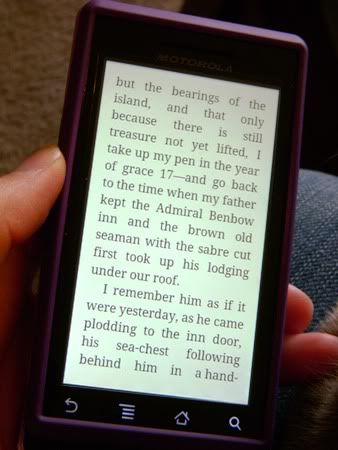
While I wouldn't want to read an entire novel using the Kindle app on my phone, I have found that many people are now selling short stories through the Kindle store and they are the perfect length for reading in those few minutes while I'm riding in the car or waiting at the doctor's office. And many of them are only $0.99!
This is great because, for the most part, you won't find these short stories anywhere else. Sure, some of them have been published in magazines or short story collections but many of them are out of print or hard to find.
My favorite short story Kindle author so far is Kristine Kathryn Rusch. She has lots of short stories, varying from mystery to fantasy to science fiction. My two favorites are The Case of the Vanishing Boy (a mystery set at a sci-fi convention!) and The Secret Lives of Cats (a mystery solved by cats!). She also has several collections, such as Five Fantastic Tales where you get five fantasy stories for $2.99.
These are short stories so most can be read in twenty minutes or so. Short stories don't often list page counts so it's hard to judge their length, but most of Rusch's stories are between 20-50 KB. Many will let you preview a certain percent of the story and that can give you a bit of an idea as to how long it is.
Again, I wouldn't want to read a whole book on my Droid (I think I'd go blind) but for short stories it's perfect!
Sunday, January 02, 2011
Books I Read in 2010 - Part 2
This year I decided to keep track of the books I read by listing them in the sidebar. Now that the year is over, I thought that I'd give some of the highlights and lowlights of the books I read this year. All books have an Amazon link. There were a lot of books so I've split it up into two parts - Part 1 is here.
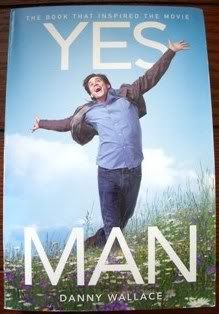
My Favorite Non-Fiction Books: Yes Man by Danny Wallace and Me Talk Pretty One Day by David Sedaris
Most of the non-fiction I read is humor. These two guys are at the top. Danny comes across as a bumbling, well-meaning idiot when he decides to say "Yes" to everything asked of him for a year. By the way, do NOT bother with the Jim Carrey movie, it is nothing like the book. Conversely, if you've seen the movie don't judge the book based on it! Danny's other book, Join Me, is excellent too (he accidentally starts a cult).I have never heard or read David Sedaris before this year. We picked Me Talk Pretty for book club and I ended up reading it while staying with my grandma as she recovered from a shoulder replacement surgery. I was laughing out loud almost constantly! Finally she asked me what was so funny and I read a portion of it to her. Thankfully it was one of the "clean" stories, about David and his non-French classmates trying to explain Easter to another classmate in French. We both laughed ourselves silly over it.Most Depressing Book: The Boat by Nam Le
First, let me say that I am the kind of person who likes a happy ending. Or at least a not-unhappy ending. I read to escape and have fun so I tend to avoid books that aren't fun. The Boat is a book of short stories recommended by a friend to a member of my book club and they are all very depressing. Every. Single. One. It's just my opinion, but it seems to me that some writers think that sad endings automatically make a story better. It doesn't. I was more than happy to put this book in my give-away pile.
Here are the rest of the books I read, each with a sentence or two summarizing my thoughts.
- The Girl Who Played With Fire by Stieg Larsson
- I've been sucked into this series like the rest of the country. Liked this one okay, liked the first one better.
- Brooklyn by Colm Toibin
- Irish girl moves to Brooklyn by herself in the 1950's. The main character was dull, she just did whatever anyone else told her and by the end hadn't changed. I don't recommend it.
- The Strangely Beautiful Tale of Miss Percy Parker by Leanna Renee Hieber
- I heard the author of this book speak at Phoenix Comicon. It sounded good (a Victorian fantasy) so I picked it up. I liked it, even thought the main character is a "damsel in distress" (she's always having to be rescued or protected) and I generally like my MC's a bit more independent.
- Wings by Aprilynne Pike
- Also heard this author speak at Phoenix Comicon. A teen discovers she's a fairy. Good, but it was written more for teens than for me so I think I'll skip the rest of the series.
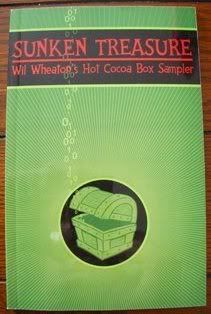
- Sunken Treasure by Wil Wheaton
- Enjoyed Wil's (Wesley Crusher, Star Trek) various short stories, though I wouldn't recommend the print version unless you are a big fan (it's print on demand so it's kind of pricey).
- Shanghai Girls by Lisa See
- Typical Lisa See, struggling Asian women in historical settings. Good but not my favorite.
- There's No Place Like Here by Cecelia Ahern
- Good, light, chick-lit fantasy. A woman ends up in the place were all lost things go.
- Plum Spooky by Janet Evanovich
- Honestly I don't remember the plot of this one - I can't keep the Stephanie Plums apart. I think there was the Jersey Devil, maybe?
- Remember Me? by Sophie Kinsella
- Another entertaining chick-lit book. Woman gets amnesia and has a chance to start her life over.
- Inglorious Basterds: A Screenplay by Quentin Tarantino
- I loved this movie. Loved loved loved it. So I wanted to read the screenplay to pick up a few tidbits that didn't make it into the movie.
- Self-Editing for Fiction Writers by Browne and King
- I'm sure this is a great book but for a first time novelist (I got it to help with my 2009 NaNoWriMo story) it was overwhelming and I gave up on editing my book.
- How To Write Mysteries by Shannon O'Cork
- Checked this out from the library and found it very helpful. Went back to check it out for 2010's NaNoWriMo and found that the library had gotten rid of it! Makes me feel less sorry for them when they complain that they have no money for books - if you can't buy new books, why are you getting rid of ones that people are still using? Ended up buying it used from Amazon.
- Ford County Stories by John Grisham
- My husband loves Grisham so I read this one on a whim. It was good but I wouldn't have bought it for myself.
- Rumpole and the Reign of Terror by John Mortimer
- Found this at the dollar store and got it more for my dad than myself. Having never read Rumpole before there were a few things I didn't follow but overall it was worth the dollar!
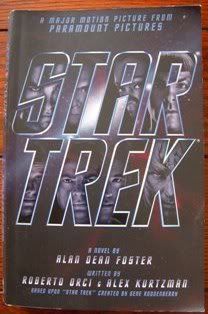
- Star Trek by Alan Dean Foster
- A direct novelization of the 2009 movie. Only recommend to obsessive fans like myself!
Saturday, January 01, 2011
Books I Read in 2010 - Part 1
This year I decided to keep track of the books I read by listing them in the sidebar. Now that the year is over, I thought that I'd give some of the highlights and lowlights of the books I read this year. All books have an Amazon link. There were a lot of books so I've split it up into two parts - Part 2 will be posted tomorrow (it's up now - here).
My Favorite Fiction Book: Storm Front by Jim Butcher
Lost items found. Paranormal investigations.
Consulting. Advice. Reasonable rates.
No Love Potions, Endless Purses, Parties, or Other Entertainment."
Yes! An urban fantasy series that's not a romance! No hot vampires! No sexy werewolves! And it's funny to boot - I want to read more!
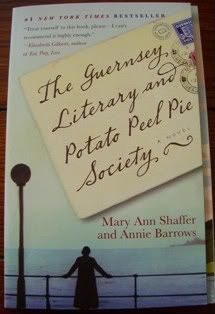
The Book I Wasn't Expecting to Like But Did: The Guernsey Literary and Potato Peel Pie Society by Mary Ann Shaffer and Annie Barrows
Two things made me think I would not like this book. First, it is completely written as letters from the characters to each other - when I started reading I thought that would be annoying but after a while I got used to it. Second, the title of this book reminded me of the cutesy books about ladies getting together over some sort of hobby (cooking, knitting, etc.), discovering themselves and whatnot but thankfully Guernsey is nothing like that! It's about the people on an isolated British island that was occupied by the Germans during WWII and what happens to them after war. But it's not dry at all - the characters are interesting and there is quite a bit of romance.The Book I Couldn't Finish: Then We Came to the End by Joshua Ferris
This book isn't officially on my list of books I read this year since I didn't actually finish it. It was another book club pick. It's supposed to be a workplace comedy which sounded perfect for us as we all met through a fansite for The Office television show. The book wasn't awful, exactly, but it was only mildly funny and the fact that the author writes page-long paragraphs made me give up on it before I came to the end (ha ha?).
Here are some of the other books I read, each with a sentence or two summarizing my thoughts.
- The World According to Clarkson by Jeremy Clarkson
- Somehow I have become a fan of Top Gear (a BBC car show) and Jeremy is the show's lead presenter. He can be rude and offensive but also very funny.
- Tongues of Serpents by Naomi Novik
- Dragons in Napoleonic England (or Australia in this book) - love this series!
- Her Fearful Symmetry by Audrey Niffenegger
- Interesting premise (ghosts), awesome local (Highgate cemetery in London), but the characters are dull and act unbelievably and the story just gets weird at the end.
- Unbearable Lightness by Portia de Rossi
- Portia gives interesting insight into eating disorders; enjoyed it though the anorexia stuff made me squirm and I would've liked to know more about her life after the disorder.
- Mysterious America by Loren Coleman
- About "cryptids" - stuff like Bigfoot and skunk apes - in the US. Interesting if you are in to that sort of thing, though it does get a bit repetitive (What? Someone claims they've seen something but no one believes them?).
- The Forgotten Garden by Kate Morton
- Another book club book, about a mysterious English family and their long-lost daughter. I'm middle of the road on this one, it was good but way too long.
- Nightschool Vol 1-3 by Svetlana Chmakova
- Did I only read one graphic novel series this year? Guess so. This one was okay but not as good as Svetlana's other series, Dramacon.
- Fearless Fourteen by Janet Evanovich
- Standard Stephanie Plum but that's not bad. A quick, entertaining read.
- One for the Money by Janet Evanovich
- Went back to read the first Stephanie Plum for book club. We all loved it - it's still as good as it was a decade ago. I'm not a Katherine Heigl fan so I'm not looking forward to the movie.
- Not a Girl Detective by Susan Kandel
- Got this for a dollar at Walmart. It was worth the dollar.