Sunday, November 29, 2009

Amigurumi: Crocheted Fruit Keychains

Ever heard of geocaching? It's a game where you use your GPS to find "caches" - containers of varying sizes - that have been hidden outside all over the world. Inside the container is a log where you sign your username to show that you've found it, and also sometimes there are trade items. You can take an item out of the cache as long as you leave another item of equal or greater value. Generally the items are small toys or random dollar store items. I thought it would be fun to come up with something different to leave in the caches that I visit, so I made these amigurumi crocheted fruit keychains.


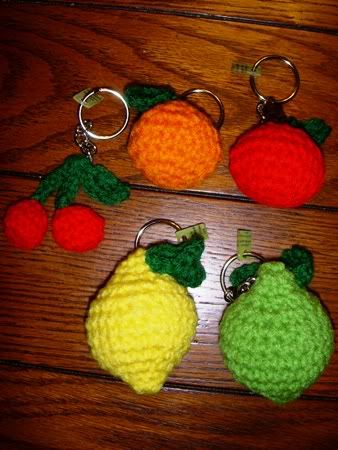
They were a little difficult to photograph, but the fruits are (clockwise from left): cherries, orange, apple, lime, and lemon. The shapes are so simple that you don't really need a pattern for them. The cherries, orange, and apple are all simple spheres and the lemon and lime are spheres with a few extra rounds in the middle and the first and last rounds of six stiches repeated to give their ends the points. I did use a pattern for the leaves, it can be found on the blog Crochet and Other Stuff. You will also find a pattern for a crocheted apple there; I didn't use that exact pattern (my spheres had 24 stitches in their largest round) but what can I say, a sphere's a sphere!

I couldn't find any keychains for sale in my area so I just ordered some online. I got 50 of them for $13.50 which was a pretty good deal.

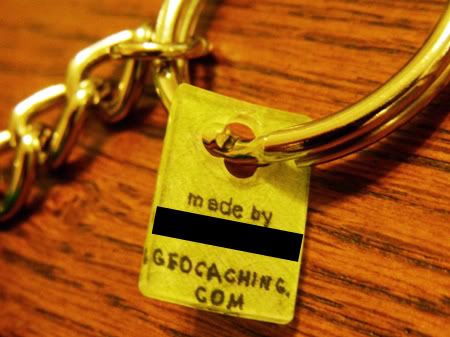
I also made little tags out of shrink plastic (aka Shrinky Dinks) to put on the keychains with the name of the website (geocaching.com) and my username (blacked out for privacy):


All in all, these were easy and quick to make and will hopefully be a fun thing to find for the next person who visits the cache!

Wednesday, November 04, 2009

Wicked Costume: Glinda's Yellow "Emerald City" Dress


My Halloween costume this year was one of Glinda's dresses from the musical Wicked. Specifically, the yellow dress she wears to the Emerald City during the song "One Short Day."


First off, I have to give a big thanks to Corbyjane at the blog Pink Goes Good With Green! for her detailed post about this dress. Her collection of photos of this costume was a huge help! If you're not familiar with this dress, check out her post to see what I was trying to replicate.


Of course many of the trick-or-treaters that visited us on Halloween didn't recognize the costume. At first I tried to explain who I was but after getting a few odd looks I just said that I was a fairy!

The costume isn't a perfect match for the "real" Glinda dress but I think it's a pretty good replica considering I only spent about $30 and two weeks on it. It's missing the rhinestone and flocking embellishments of the original. I did buy rhinestones but ran out of time to glue them on and I couldn't figure out how to do the flocking. Hopefully if I figure it out, I can go back and add the embellishments to it later.

I'll cover each part of the costume in detail below.

***


Project Name: Glinda's Yellow "Emerald City Dress" - Gathered Top
Time Taken to Finish: 2 days
Pattern: McCall 5380 Unfortunately this pattern has been discontinued, but I was able to find it on eBay for a pretty good price.
Materials Used: Yellow fabric with a sheen. I got lucky and found this fabric for $1.50 a yard in the clearance section at Wal-Mart. Here's a photo of the fabric up close:


You can see that the fabric has tiny little lines sewn into it. Cute!

What I Did: I followed the pattern closely (view A). The only change I made was to not connect the straps on the back - I tied them behind my neck instead. There is a zipper in the back of the dress, it continues down into the handkerchief skirt.
What I Liked About the Project: Having an actual pattern made this part of the costume easy to sew.
What I Didn’t Like About the Project: I really wanted the gathered part of the dress to be made of the same yellow organza that I used to make the outer layers of the skirt. I thought that was closer to how it was made in the original costume. Unfortunately after three attempts to make it with that fabric, I just couldn't get it to work. If I just gathered the amount of organza specified in the pattern it wasn't enough - the gathers were too far apart. I calculated that I would have to gather 8 yards of organza to get it the way I wanted and I didn't have that much fabric to spare! I made a few attempts at using an amount somewhere in between but it still didn't look right so I gave up and used the fabric I was using for the rest of the dress.

***


Project Name: Glinda's Yellow "Emerald City" Dress - Layered Handkerchief Skirt
Time Taken to Finish: 3 days
Pattern: I modified these instructions from the Weekend Designer blog
Materials Used: Three layers of yellow organza ($2 a yard at an odds-and-ends fabric store) and two layers of the yellow fabric that I used for the gathered top.
What I Did: Cut out the fabric into squares of different sizes and marked the center of each square. Piled them up with the smallest square on top and the largest on bottom, matching centers Rotated the layers around the center so they overlapped each other. Pinned the layers together at the center. Marked a circle on the top layer with a radius as suggested by Weekend Designer. Sewed a basting stitch through all the layers along that circle and then did it again about 1/2 inch outside that circle. Cut out the center of the circle, gathered the layers along the basting stitches and sewed it on to the gathered top.
What I Liked About the Project: This is a surprisingly easy skirt to make, it's just a lot of squares!
What I Didn’t Like About the Project: It's a little shorter than I would've liked but the length was limited by the width of the fabric I had (45 inches). If you wanted a longer skirt you would have to sew two widths of fabric together to make a bigger square.

***


Project Name: Glinda's Yellow "Emerald City" Dress - Underbust Corset
Time Taken to Finish: 4 days
Pattern: Hand-drafted using these instructions from the Necromancer's Palanquin blog
Materials Used: yellow fabric, middleweight interfacing, 3/8" cable ties for boning, 5/32" gold eyelets
What I Did: After drafting the pattern, I cut out pieces from the yellow fabric for both the outside and the lining. I used some fusible webbing to attach the outside pieces to the interfacing. I sewed all the outside pieces together and all the lining pieces together. With the right sides of the outside and the lining facing each other, I sewed the two vertical edges together (along the edge where the eyelets will be going) and then turned it right side out. Next I basted the edges and then sewed 1/2" channels around each of the seams between the pieces. I inserted the boning and then used bias tape (made from the yellow fabric) to complete the unfinished edges. Finally, I put 10 eyelets on each side at the back.
What I Liked About the Project: This is the first corset I drafted by hand. It was pretty easy, it only took me about two tries to get the pattern right.
What I Didn’t Like About the Project: Making the bias tape myself was annoying but it was the only way to get it to match. I would definitely recommend using starch if you can when you're ironing the tape - it makes things a lot easier!

***

Glinda's Yellow "Emerald City" Dress - Accessories

The Wig:


Originally I wasn't planning on wearing a wig, even though my hair is dark brown. But I got a haircut right before Halloween and my hair was way too short, I couldn't even curl it. I found this wig for sale for $6 at Wal-Mart. The color wasn't perfect (it was a little too white) but the price was right! I brushed it, cut it, and styled it with a curling iron on very low heat. You can see the difference this makes in the photo below. The hair on the right has been fixed while the hair on the left has not.


The Glasses:


I didn't have $20 (plus shipping) to shell out for the authentic Emerald City glasses from the official Wicked store so I picked these up at a costume store. They're not the greatest, the lenses are far apart so they look kind of odd when you're actually wearing them.

Other Accessories:

I looked hard for some light-colored Mary Jane heels like Glinda wears but fall is just the wrong time of year to look for light-colored shoes! Instead I wore some old ivory heels that I bought to wear to a wedding a long time ago. I also tried to find a necklace and a purse like Glinda's but couldn't find anything close enough. I'll probably keep an eye out for all these things so I can eventually complete the costume.

Related Posts with Thumbnails