Thursday, June 17, 2010

New Website Name: www.craftycattery.com

I've been meaning to get a real (non-blogspot) domain name for this blog for a long time and I finally broke down and did it today. Now the web address matches the blog name!

www.craftycattery.com

To celebrate, I've made a new banner starting one of my kitties (Sophie this time). I was hoping to put both Sophie and Lucy in the photo but couldn't get them to pose together.


You can still get here using the old web address (countingclocks.blogspot.com) if you need to. Why was it ever called Counting Clocks? I started this blog way before I got in to crafting and originally posted a couple of movie reviews and random rants about Dear Prudence and Dante Basco. I'm not sure why I decided to name it "Counting Clocks" then, I think it might've had something to do with liking that Coldplay song "Clocks". I think I wanted to name it "Ticking Clocks" after a lyric but that name was already taken, so I did "Counting" instead. When I decided to start a crafting blog, it seemed like a waste to create a new one from scratch so I just re-named it "The Crafty Cattery" but kept the original URL.

If you've been wanting to get a "real" domain name for your Blogger blog, I say go ahead and do it! Blogger makes it pretty painless, you can get everything done without even leaving the site and they took care of all the DNS pointing and other stuff I didn't understand. If you want to do it, just go to Blogger Help and search for "custom domain name".

Tuesday, June 15, 2010

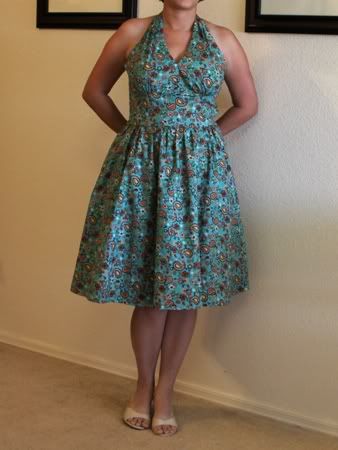
Simplicity 2884 Halter Dress


Project Name:
Halter Dress
Time Taken to Finish: 3 days
Pattern: Simplicity 2884
Fabric Used: Turquoise paisley cotton, orange cotton for lining.
What I Did: I followed the pattern pretty much to the letter. The only thing I did differently was use cable ties for boning instead of the featherweight boning the instructions called for, because I don't have easy access to the featherweight boning where I live.
What I Liked About the Project: The fabric was very cute. Actually it's the whole reason I made the dress - I saw the fabric and had to find a dress pattern for it!
What I Didn't Like About the Project: The zipper is on the side instead of the back. If you look in the photo above you can see a funny bump in the dress at the waist on one side. That's the zipper. I don't know if I attached it wrong or if it's just bulging because the zipper doesn't want to lie flat. Either way, that really bothers me and is keeping me from actually wearing this dress. The only way I can think of to fix it is to move the zipper to the back or add boning to that side of the dress to keep things straight.

Monday, June 14, 2010

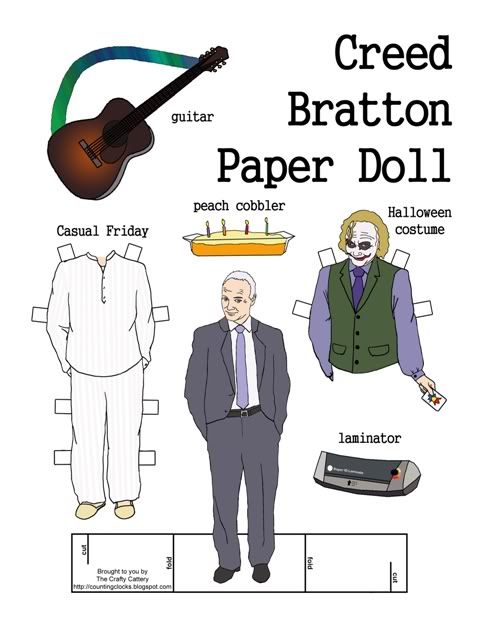
New "The Office" Paper Doll: Creed Bratton

Last year I made paper dolls based on characters from my favorite television show, NBC's "The Office" (go here to print out dolls of Michael, Dwight, Pam and Jim).


Now I've added a new doll: Creed Bratton! And unlike the other dolls, Creed has two alternate outfits (his Joker Halloween costume and Casual Friday clothes) as well as three accessories (peach cobbler, fake I.D. laminator, and guitar).

Here are the instructions for the doll:

1. Open the PDF file containing the paper doll (above) and print the page out (the stiffer the paper the better - cardstock would be the best).
2. Cut along the outline of the stand, around the paper doll and around the outfits and accessories (you may have to use an X-acto knife to get all the details). Cut two slits in the stand along the lines that say "cut".
3. Fold the stand back along both lines that say "fold" then slide the two slits into each other.
4. Stand the paper doll up. You may have to gently bend the figures and the stand so they'll stand upright.

Tuesday, June 08, 2010

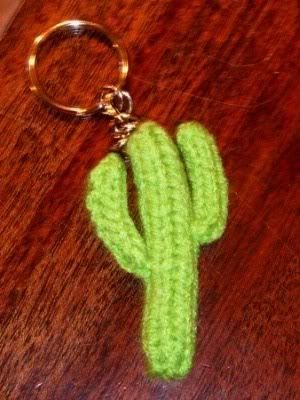
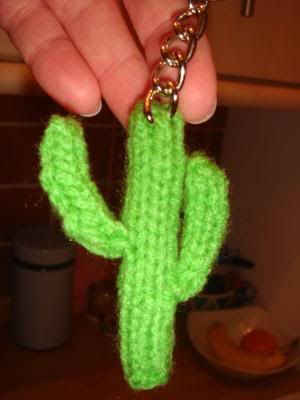
Knitted Saguaro Cactus Pattern for Keychain


I knitted up these saguaro cactus keychains to give out at a geocaching event held in my honor during a visit to London in May. They were a big hit and so was the event - I didn't make nearly enough for everyone! This very simple pattern can be found below.

Knitted Saguaro Cactus Pattern

Note: My patterns are free and may not be sold. Please do not reproduce or repost patterns or instructions from CraftyCattery.com without my permission. For information on selling items created from my patterns, please view the FAQ.

Yarn: Medium weight, green (You can use any size yarn, just make sure to adjust your needles accordingly. I used very small needles because I didn't want any stuffing to show between the stitches.)
Needles: US size 3 double-pointed needles

All pieces are knit in the round. All stitches are knit stitches.

Body of the cactus:

Cast on 3 stitches and divide them evenly between your double-pointed needles (3 stitches).
Round 1: Increase each stitch 2 times (6 stitches).
Rounds 2-21: Knit all stitches for 20 rounds, stuffing as you go (6 stitches).
Don't cast off. Instead, run the tail of the yarn through the remaining stitches and tie off. Weave in tail.

Arms of the cactus (make 2):

Cast on 4 stitches. I found it easiest to use only two double-pointed needles, with two stitches on each needle (4 stitches).
Rounds 1-7: Knit all stitches for 7 rounds (4 stitches).
Rounds 8: Knit 2 stitches together twice (2 stitches).
Don't cast off. Instead, run the tail of the yarn through the remaining stitches and tie off. Do NOT weave in tail.

Construction:

Using the yarn tail left on the arms, sew them to the body of the cactus. Tie securely and weave in tails. Attach keychain if desired.


Related Posts with Thumbnails