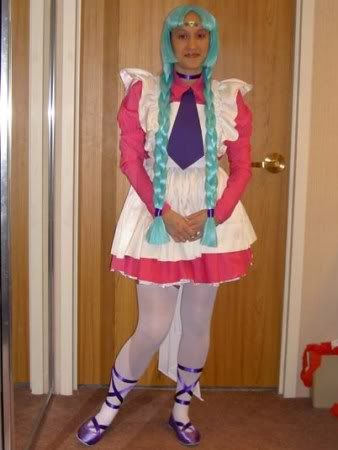
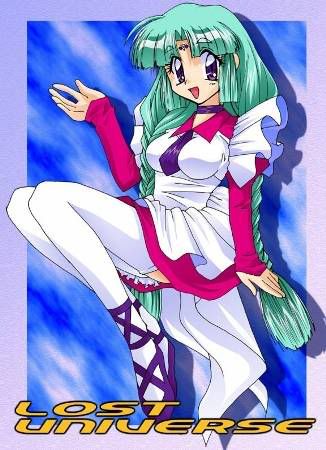
This is an older costume, I just finally got around to posting it here. I wore it to A-kon (a Japanese animation convention in Dallas, Texas) in 2005. It's based on the character Canal Vorfeed from the television show "Lost Universe":
While I designed the costume and helped find the patterns, I can't claim any of the sewing - my amazing mom did it all! Afterwards she said "Never again!" which is why I began sewing my own costumes. :) Overall it took us about four years off and on to complete it. Part of the reason it took so long was the wig. We actually had the rest of the costume ready to go for A-kon 2003 but I waited until the day before the convention to work on the wig and it was a disaster! I decided not to wear the costume until I had enough time to fix the wig properly.
Here are the details on the different parts of the costume (to the best of my recollection - it has been 4+ years since we worked on it).
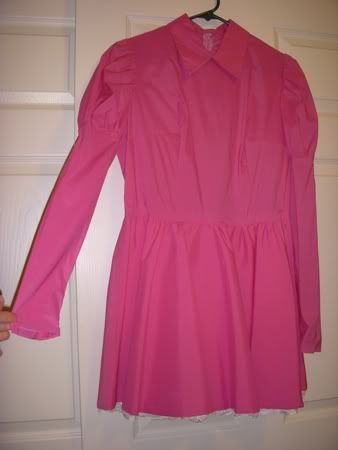
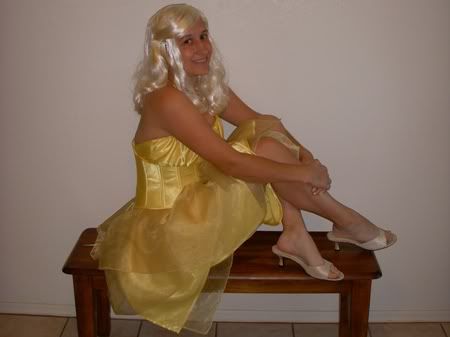
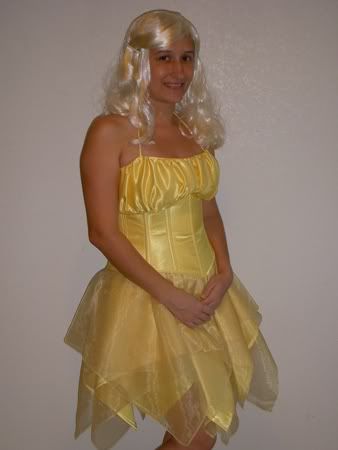
Dress - front
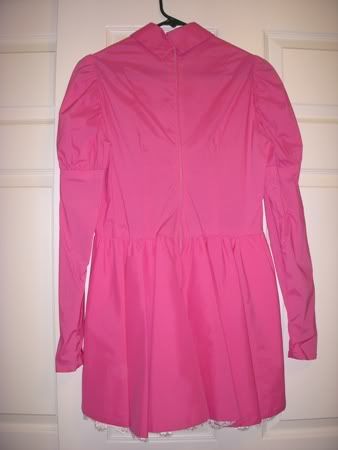
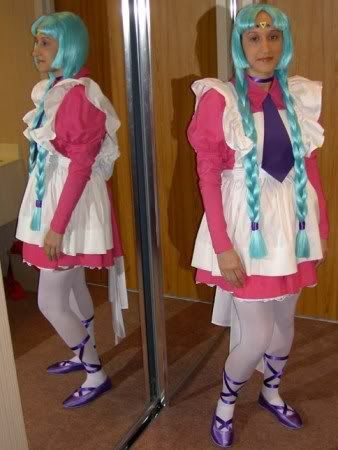
Dress - back
Project Name: Canal's Dress
Patterns Used: Top - Butterick 3187 (out of print); Skirt - McCall's 2890 (out of print)
Materials Used: pink fabric with slight stretch; white tulle; white satin/satinette
Notes: The top and bottom are one piece, though they were created from different patterns.
The top was created using Butterick 3187, a Victorian bathing costume. The only major alteration was to the neckline, which was modified to include a fold-down collar. Since this pattern is out of print, I suggest
McCall's 4948 for the top since it has long leg-of-mutton sleeves.
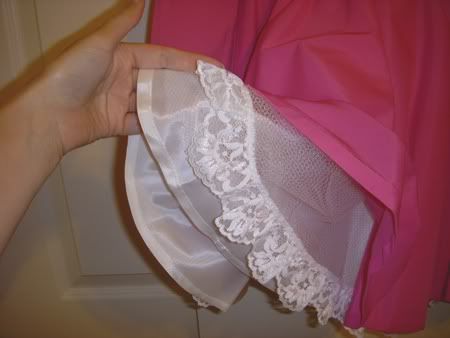
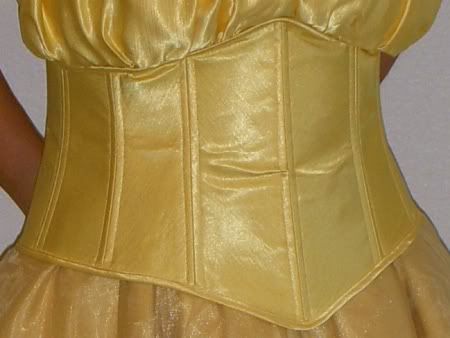
Dress - skirt detail
The skirt was created from McCall's 2890. As you can see in the above photo, there were four layers: an underskirt of white satin/satinette, a layer of white tulle, another layer of white tulle with some white lace stitched to the edge, and an outer layer of the pink fabric. Since this pattern is out of print as well, I suggest Simplicity
3618 or
4015 as substitutions (but any short poofy skirt pattern will do).
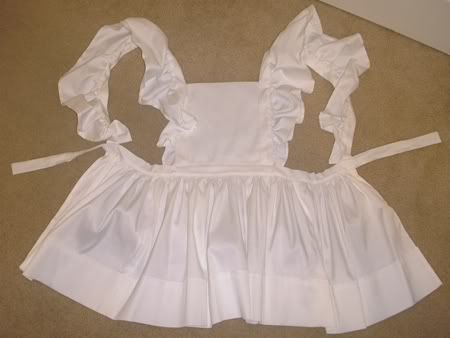
Apron
Project Name: Canal's Apron
Pattern Used: McCall's 2947
Materials Used: heavy weight white cotton
Notes: The apron was created using McCall's 2947 apron pattern. It follows view D pretty closely with a few alterations: the skirt was shortened and the bottom ruffle and pockets left off, the shoulder ruffles were enlarged, and the ties in the back were made smaller since we would be using a separate bow (see below). I added some small pieces of wire into the outer edges of the shoulder ruffles to help them stand up.

Bow
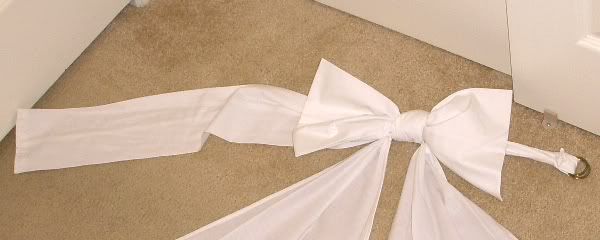
Bow detail
Project Name: Canal's Bow
Pattern Used: none
Materials Used: heavy weight white cotton
Notes: This was worn over the apron - the bow went in the back and the rectangular piece of fabric (on the left) wrapped across the waist and was tightened using the D-rings (on the right). The two large triangular pieces of fabric were the "tails" of the bow. They were folded into pleats and ironed down. Unfortunately I don't have a good photo of the bow being worn, you can sort of see it behind me in the two top photos.
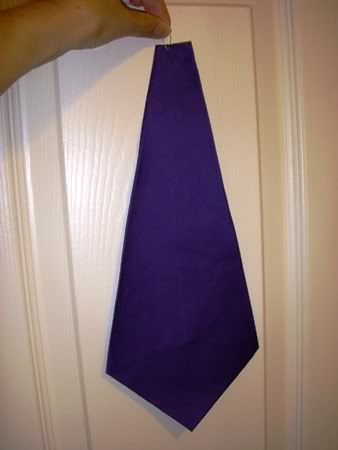
Tie
Project Name: Canal's Tie
Pattern Used: none
Materials Used: purple cotton
Notes: The tie is just a piece of purple fabric, sewn into a tie shape and pinned to the neck underneath the folds of the collar.
Here are some details on the other parts of the costume:
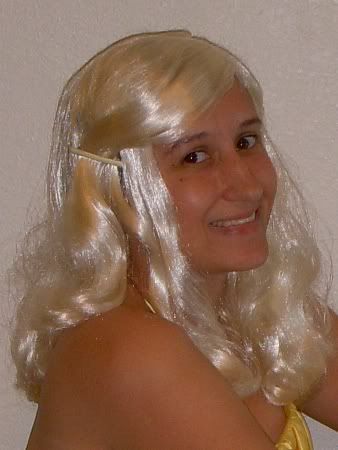
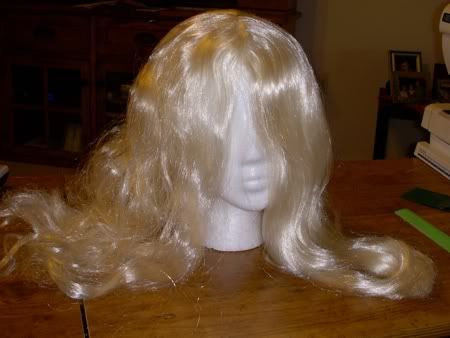
Wig - This was purchased from
Amphigory's Wigs. The style was "Enchantment" and the color was "Daydream" (sky blue). As it was the wig was too thin in the back to part and make into two braids - the mesh and elastic inside the wig showed through (this is what I unfortunately discovered the day before A-kon 2003!). To fix this problem, I purchased hair extensions in the same color and used a
tutorial from a wig artist named Katie Bair to add extra hair to the back of the wig. I then parted the hair into two braids and finished them off with rubber bands hidden under some purple ribbon. The whole thing was then coated with loads of hair spray to keep it all in place. The braids made the wig very heavy, after wearing it all day I had a massive headache! If you need some tips on how to put on and wear a wig, check out
this page on Katie Bair's site.
Garter and Stockings - It's difficult to tell in the photos but the opaque white thigh-high stockings I am wearing are being held up by a garter belt. I purchased the garter belt at Victoria's Secret and the stockings were pantyhose that I cut off at the thigh.
Shoes - These were probably one of the most expensive parts of the costume. The shoes were ballet flats that I purchased at a bridal store and had them dye to match the purple ribbon. I then sewed two pieces of ribbon into each shoe. The ribbon on my calves was attached to the stockings by a few small pieces of purple duct tape.
Neck band - Just a ribbon with velcro sewed at the back.
Forehead Decoration - I made Canal's forehead decoration using yellow craft foam and plastic rhinestone "jewels" purchased in the jewelry-making section of a craft store. They were attached to my forehead using eyelash glue.
A few final thoughts on the costume: Once I actually got to wear it to the anime convention it was a blast! I got asked to have my photo taken many times but unfortunately I hadn't thought to practice any poses beforehand so I don't think I did the costume justice! You might feel silly striking a pose for some stranger but it really does improve the photo.
The only major problem I had with wearing the costume was the heavy wig. By the end of the day it had worked its way back so that some of my hair was showing underneath. If I had realized that and had brought some extra hairpins I probably could've fixed it but unfortunately no one pointed it out to me! I guess the lesson is to find a mirror and check your appearance every now and then.