Friday, August 31, 2012
Beary Jackson Amigurumi Bear
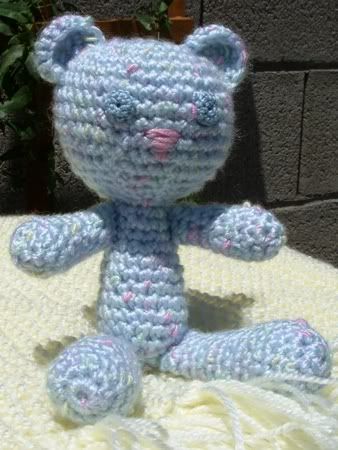
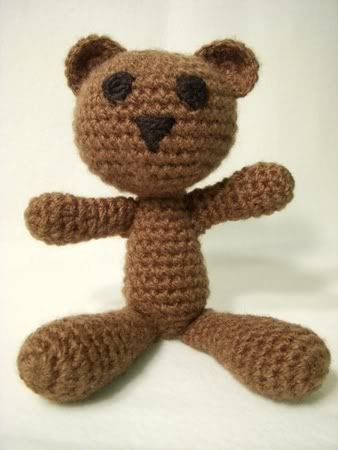
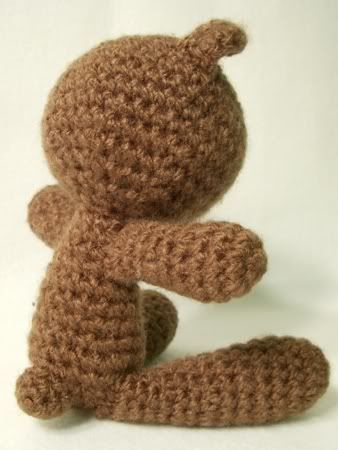
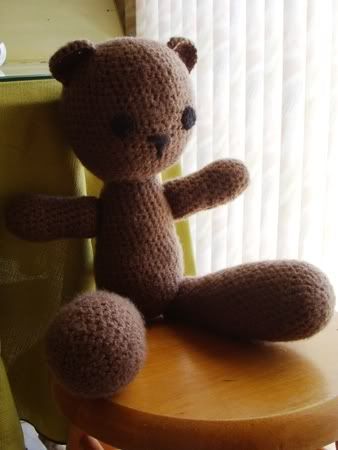
Here's the sixth bear I've made from the Beary Jackson pattern at Rheatheylia.com. I don't have the time or the patience to make baby blankets for all the babies in my life, so this is a great alternative that only takes me about a day.
This time I went with a chunky yarn in an off-white (I threw away the yarn wrapper already so I don't have the name). I guess I forgot since the last time I made Beary that using a heavyweight yarn makes for a very large bear. I had to redo the head to make it smaller so I would have enough yarn to finish! I would recommend using no heavier than worsted weight yarn. My favorite yarn I've used so far was the Red Hearts Baby Teri I used on this bear. Unfortunately it's no longer being made and I haven't found a good replacement.
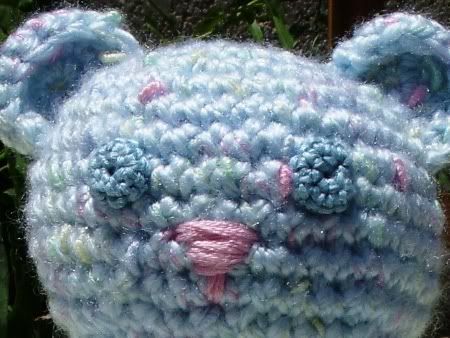
I'm torn about how to do the eyes and nose on the bear. On this bear and the one before it, I embroidered on a fleece nose and eyes because it seems the less dangerous alternative to buttons or even safety eyes, which can easily be pulled out between loose crochet stitches. On the first bears I did the eyes and nose with embroidery only, which seems to work better on smaller bears. I'm not sure which option looks better.
Saturday, February 25, 2012
What Am I Making?
Tuesday, August 16, 2011
How To Make Amigurumi Hair: Wig Method
Supplies needed:
- Your hairless amigurumi
- Yarn in the color you want for their hair (use same weight yarn as the amigurumi)
- Crochet hook (size depends on weight of yarn)
- Scissors
- Felt glue (or other non-washable fabric glue)
- Plastic yarn needle
- Sewing pins
- Sewing thread that matches the hair color
- Sewing needle
Rnd 2: 2 sc in each st around (12 sts).
Rnd 3: [2 sc in next st, sc 1] six times (18 sts).
Rnd 4: [2 sc in next st, sc 2] six times (24 sts).
Rnd 5: [2 sc in next st, sc 3] six times (30 sts). < last increase
Rnd 6: sc around (30 sts).
Rnd 7: sc around (30 sts).
Rnd 8: [sc2tog, sc 3] six times (24 sts).
Rnd 9: [sc2tog, sc 2] six times (18 sts).
Rnd 10: [sc2tog, sc 1] six times (12 sts).
Rnd 2: 2 sc in each st around (12 sts).
Rnd 3: [2 sc in next st, sc 1] six times (18 sts).
Rnd 4: [2 sc in next st, sc 2] six times (24 sts).
Rnd 5: [2 sc in next st, sc 3] six times (30 sts)
Rnd 6: [2 sc in next st, sc 4] six times (36 sts). < add one more increase
Unless you want your character to have a crazy-thick head of hair, don't put a loop of yarn in every single hole. Experiment by skipping one or two holes and see how you like the thickness. As long as you haven't glued or cut the hair, you can always pull it out and start over. Make sure that your skipped holes don't clump together or you might end up with bare patches on the wig.
It's a good idea to mark the front of the wig (see the red piece of embroidery floss in the photo above). Hair at the back of someone's head is usually shorter than hair at the front, so I made my loops longer when I was close to the marker.
After you've filled all the holes, do an extra round by pulling a loop through the outside strand of each of the outer stitches (see photo above). Do not skip any stitches.
When you're done, the wig will look like this:
| Inside |
| Glue the hair |
Let the glue dry.
Step 4: Cut the loops.
Once the glue has dried, take a pair of scissors and cut each loop on the outside of the wig into two strands of hair. Be sure to straighten out each loop and cut it at the longest point so both strands will be the same length.
For straight hair, skip to Step 6. For curly or bushy hair, go to Step 5.
Step 5: Separate the plies and brush if desired.
This is the part that will probably take you the longest. Each strand of yarn is made of several smaller strands twisted together. These smaller strands are called plies (3-ply yarn has 3 plies, 4-ply yarn had 4 plies, etc.). Start on one side of the wig and take each strand of hair and carefully separate the plies. I did this by using a plastic yarn needle to pick the strands apart. When the plies are separated, use a spare piece of yarn to tie them to the side so they won't get tangled or mixed in with the unseparated hair.
| Unbrushed hair |
| Hagrid's bushy hair |
You marked the front of the wig in Step 2, right? Line up the front of the wig with the middle of the amigurumi's forehead. Make sure it looks how you'd like it to then pin it in place. Use a double strand of thread on a sewing needle and sew the wig to the head. At the end, put the needle in the middle of the wig, tie off and trim the thread (that way the end bits are hidden in the hair).
Step 7: Cut and style.
Now that the hair is on your amigurumi character, it's time to cut and style it how you wish. Brush out the hair with your fingers (a real brush will mess it up) and trim any uneven ends. Cut the hair to the length you desire then style it. Congrats, your amigurumi has hair!
Beards
To create Dumbledore's and Hagrid's beards, I used the same method as outlined above except instead of creating a wig cap in Step 1, I crocheted a flat triangle , the bottom of which would become the top of the beard. After following Steps 2-5, I sewed it underneath the amigurumi's nose (or where their nose would be if they had one) and the whole thing was trimmed in to a beard shape.
Thursday, July 07, 2011
Harry Potter Amigurumi Dolls
Since I don't own the rights to Harry, I can't post a pattern. However, I will explain some of the basic techniques I used to create the dolls. I ended up doing a few new things for these dolls that I had never attempted before.
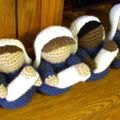
The bodies: I used a basic mushroom body shape, like the body I made for my Nativity dolls. Hagrid needed to be bigger so I added stitches to make him fatter and added extra rounds to make him taller. For Dumbledore, I didn't add extra stitches but I did add extra rounds.
The hair: This was my biggest challenge as I had never done hair on an amigurumi doll and it took a lot of experimentation. I think I will do a separate post with photos of the methods I used, but for now I will summarize by saying that for Hermione, Dumbledore and Hagrid's hair as well as the two beards, I crocheted a "wig cap" then threaded yarn through the spaces between stitches. I put glue on the underside of the cap so the hair wouldn't get pulled out. I pulled apart the strands of each yarn then used a wire brush to gently brush the yarn so it got fuzzy (except for Hermione, I didn't brush her hair out). I then attached the cap to the head. For Harry and Ron, I embroidered the yarn directly on to their heads.
The robes and Hagrid's vest: I started with my pattern for Joseph's robes and just added sleeves by picking up stitches around the arm holes and then crocheting in a spiral until they were long enough. Hagrid's vest was a short version of the robe without sleeves.
Scarves: I experimented with crocheting and knitting ties and scarves out of embroidery floss but when nothing turned out how I wanted, I switched to regular yarn and a homemade four-stitch knitting Nancy to make the i-cord scarves (this could also be done by using the double pointed knitting needle method, see this video).
Details: The faces and details were embroidered with embroidery floss. The eyes were safety eyes. Dumbledore's hat was a simple cone.
Monday, April 11, 2011
Big Blue Amigurumi Bear
Tuesday, February 16, 2010
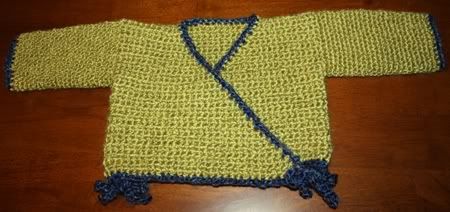
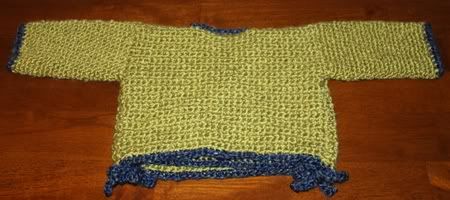
Single Crochet Kimono Style Baby Sweater


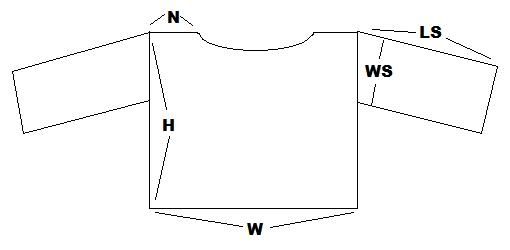
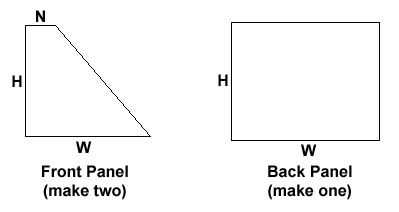
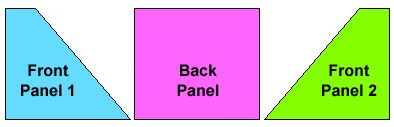
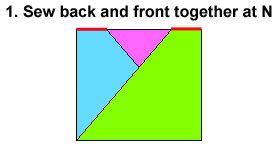
The body of the sweater consisted of three pieces: two trapezoidal front panels and one rectangular back panel.

I started crocheting the front panels at the shortest edge, N. I increased gradually every few rows, always on the same edge so that one side would slope and the other side would remain straight. I continued increasing until the width of the front panel was equal to W and the height was equal to H.
This is what I ended up with:


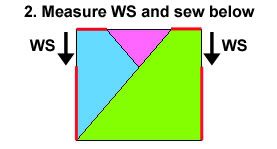
On each side of the sweater, I started at the shoulder seam and measured down the amount given by WS to determine how much space was needed for the sleeves. I marked that with a stitch marker and then sewed from there down to close up the side seam.

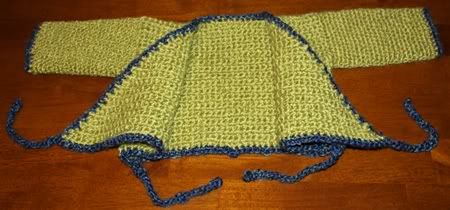
After finishing the ends, I turned the sweater right side out. Using a contrasting color of yarn, I added a row of single crochet to the ends of the sleeves. I did single crochet around the edge of the body of the sweater as well, and while doing that edging I made the four ties that keep the kimono shut. Whenever I reached one of the shoulder seams or the bottom corners of the front panels, I made a chain of about 20 stitches, slip-stitched back down the chain and then continued on the with the edging:

Sunday, November 29, 2009
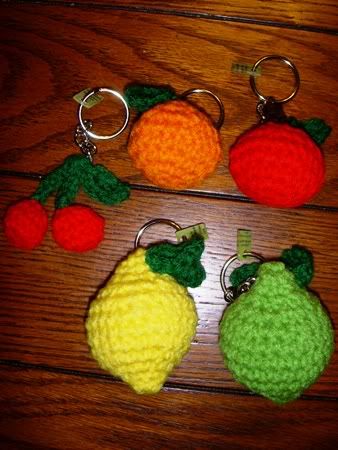
Amigurumi: Crocheted Fruit Keychains
Ever heard of geocaching? It's a game where you use your GPS to find "caches" - containers of varying sizes - that have been hidden outside all over the world. Inside the container is a log where you sign your username to show that you've found it, and also sometimes there are trade items. You can take an item out of the cache as long as you leave another item of equal or greater value. Generally the items are small toys or random dollar store items. I thought it would be fun to come up with something different to leave in the caches that I visit, so I made these amigurumi crocheted fruit keychains.

I couldn't find any keychains for sale in my area so I just ordered some online. I got 50 of them for $13.50 which was a pretty good deal.
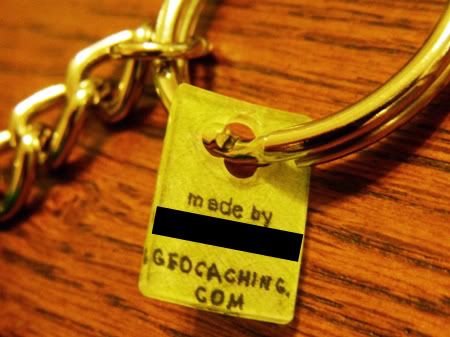
I also made little tags out of shrink plastic (aka Shrinky Dinks) to put on the keychains with the name of the website (geocaching.com) and my username (blacked out for privacy):

Monday, August 17, 2009
Yet Another Amigurumi Bear

Tuesday, May 19, 2009
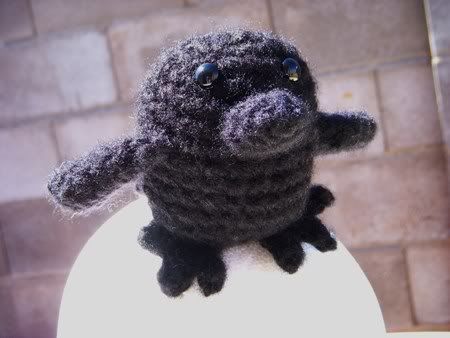
Amigurumi Raven


I crocheted this raven back in March as a birthday gift for my dad. Unfortunately I was in a hurry and I "freehanded" it so I don't have a pattern. If you want to make your own, the shapes I used were fairly simple (except for the feet):
Body: A pill shape - just an amigurumi ball with a few extra rounds thrown in the middle to make it longer.
Beak: I think I started out with four stitches in a circle, then increased twice in each round, putting the increases opposite from each other. I stuffed it a tiny bit.
Wings: Also started with four stitches in a circle. I then put all the increases on one side so that the wing would be curved. I didn't stuff the wings.
Tail: I did the tail a little different. I chained several stitches (6 or 8 maybe) and then started crocheting "in the round" up and down both sides of the chain. Once I had one round finished, I decreased twice in each following round, putting the decreases opposite from each other. I stopped when there were only a few stitches left in the round. This made a flat trapezoid shape. I did not stuff the tail. I sewed the open end (the less-wide end of the trapezoid) to the raven's body.
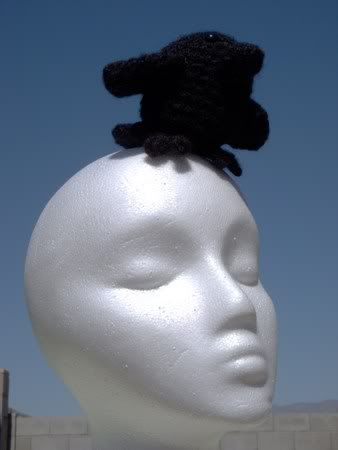
Feet: I'm a little unsure how I made them. I think I made a small circle (maybe 4 or 6 stitches) and then did the toes by making a few chains away from the circle then turning and stitching back down the chain until I hit the circle again. I repeated that for each of the three toes.
I hope this helps explain how I made it. If I still had the raven I would try to write up a pattern but it is now in Texas with my dad so I'd have to start from scratch and I don't have time for that at the moment. Please feel free to leave a comment if you have any questions and I'll do my best to help.
Friday, July 11, 2008
Two More Amigurumi Bears
I've crocheted two more Beary Jackson amigurumi bears. They're so cute! You can see the first Beary I made here and you can find the pattern at Rheatheylia.com.


Round 1: crochet 4 stitches in a ring (4)
Round 2: increase every stitch (8)
Round 3: stitch across (8)
(If you want the tail to be a little longer you can stitch across another round)
Stuff and sew to Beary.

Wednesday, June 18, 2008
Amigurumi: My First Attempts at Crochet
I haven't tried very hard to learn to crochet in the past, but last week I discovered something that made me want to pick it up: amigurumi! Amigurumi is the Japanese word for knitted or crocheted stuffed animals. I LOVE me some stuffed animals and they're great gifts for kids but I've only knitted one before and it was a pain. But it didn't seem like it would be that hard to use crochet to make an animal so I though I'd give it a try.

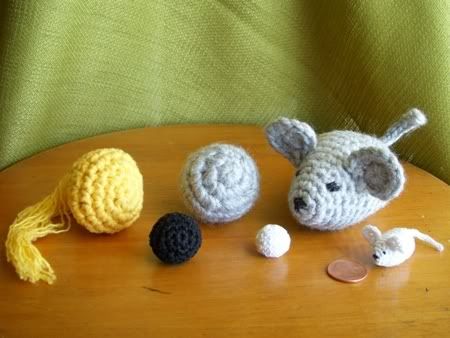
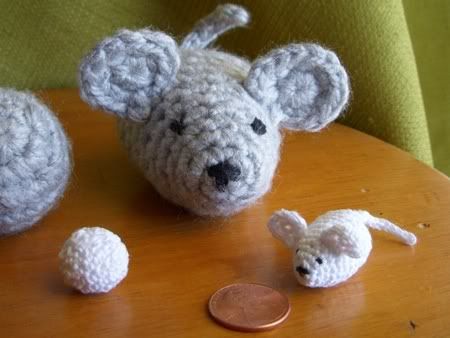
These are my first attempts. I started out crocheting plain balls using the instructional videos at hookandneedles.com. I experimented with different weights of yarn and various hook sizes. Next I tried my hand at following an animal pattern: a mouse designed by KristieMN of the Crochetville.org forums. I successfully made a large grey mouse and a tiny white mouse: