
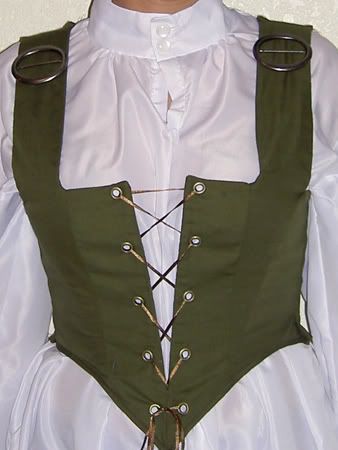
I've never been to a Renaissance festival before though I've always wanted to go. Luckily enough, I've I found out that a friend who just moved here would like to go and she already has a costume! I'm always one to take advantage of any opportunity to dress up so I jumped at the opportunity to make another costume. The first piece I've finished is the bodice/vest. In the photo I'm wearing it over my Jack Aubrey shirt but I'm planning on making a new shirt in a cream color. Right now the shoulder and side seams are just basted so that I can make sure the bodice fits over the new shirt before I sew the final seams.
Project Name: Scottish Wench Costume - bodice/vest
Time Taken to Finish: 1 week
Pattern: Simplicity 3623
Materials Used:
-olive 100% cotton quilting fabric (couldn't find any colors or textures that I liked or could afford in the garment fabrics)
-matching thread
-1/4 inch eyelets
-2 inch belt buckles (to attach a tartan shawl to the vest - that's where the Scottish part comes in!)
-brown ribbon or leather (for lacing)
-3/8 inch plastic cable ties (for boning)
-muslin (sewn to lining to hold boning)
Special Tools Used: Viking Platinum 755Q sewing machine, eyelet tool
What I Did: For the most part I followed the pattern directions. Here's where I strayed from it:
-Instead of real boning I substituted 3/8 inch plastic cable ties which can be found at home improvement stores. I found this substitution suggested many places online for people who don't have access to specialty sewing shops.
-The pattern said to sew the side and shoulder seams before putting in the eyelets and lacing but I ended up doing the reverse because there was no way to keep the bodice tight while fitting it without the lacing.
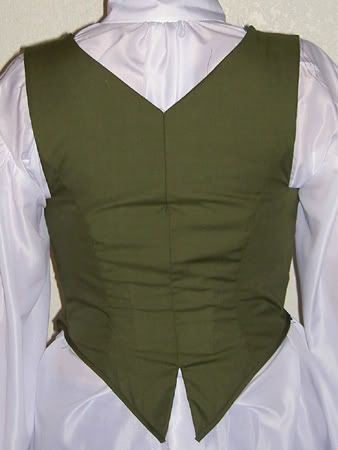
-After fitting the bodice I had to take in more at the shoulder seams than was suggested since they kept falling down, and I had to take in the back seam a bit because it kept gaping.
What I Liked About the Project: Substituting the cable ties for the boning worked out well. I think they're actually stronger than real plastic boning (which seemed flimsy when I finally found it in a store) and it's washable unlike metal boning.
What I Didn't Like About the Project: This is the kind of project that makes one see the necessity of a dressmaker's dummy or at least a competent fitting assistant! It took me two days to get the bodice properly fitted because I had trouble holding it in position and pinning it at the same time. I'm still unsatisfied with the wrinkles in the fabric on the back of the bodice but I'm not sure what's causing them. I also would like to use leather for the lacing instead of ribbon, but the leather I originally used smeared dye onto my Aubrey shirt (thankfully it came out) so I want to find some that will not make a mess.
Links to the Skirt and Shirt and the Completed Costume.


