
Note: This is the second of three posts about how I made my felt Advent calendar. For information on how I came up with the idea see Part 1; for instructions on how to make the calendar itself see Part 3.
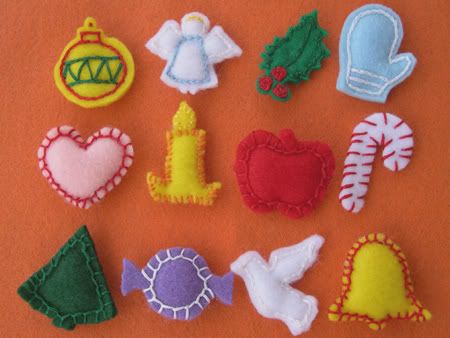
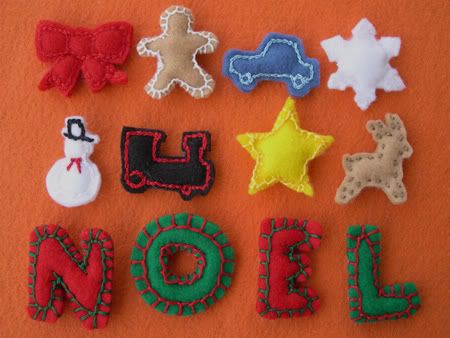
I finally finished all 24 ornaments for the Advent calendar!
Actually, since I'm making 3 identical calendars it was a total of 72 ornaments!
Supplies for the ornaments:
- sheets of felt (various colors)
- embroidery floss (various colors)
- sew-on Velcro (the fuzzy size)
- batting
- white thread
Tools for the ornaments:
- sewing machine (to attach Velcro to ornament - this could be done by hand)
- large embroidery needle
- scissors
Here's how I made the ornaments:
1. I first came up with a pattern for each ornament. They had to be smaller than 2 inches square so they would fit into the pockets on the calendar. For the easier shapes, such as the heart or the letters, I drew the pattern myself. For the harder shapes, I used Google image search to find a picture of a stencil or cookie cutter in the shape I needed. I downloaded the image and re-sized it so that it was smaller than 2 inches square. I then printed and cut out it out to use as a pattern.
2. I pinned the pattern to two stacked sheets of felt. I then cut out the pattern on both sheets at the same time, creating one front and one back of the ornament.
3. Using my sewing machine, I attached a square of Velcro (the fuzzy side) to the back side of the ornament. I saved the "prickly" side of the Velcro in a ziploc since I would need it later for the tree.
4. Next I used embroidery floss to sew the front and back of the ornament together (right sides out). Before I completely sewed it shut, I stuffed a small amount of batting into it. As you can see from the photos I used several different stitches. Since I don't know much about stitches, I just experimented until I found ones that looked good. The blanket stitch (see "NOEL" letters) worked fine for simple shapes. On more complex shapes I used a running stitch (see the reindeer) or a split stitch (best seen on the car or the mitten).
Next I'll be working on the calendar itself. I'm guessing the hardest part will be making the felt numbers for the 24 days. By my calculations that will be 117 individual numerals to cut out!
Update 11/18/07: I finished the entire calendar! For photos and instructions, please see Advent Calendar Part 3 - Complete Instructions.


3 comments:
Thank you so much for posting these detailed instructions and photos. I'm nearly finished with the calendar and now dd6 and I are working on the ornaments. Only 11 more months to Xmas 2009!
Glad I could be of some help! Good luck with the ornaments - for me they seem to take twice as much time as the calendar itself!
They look great.. and what a fun tradition for your family! If you ever want to make another one, I have links to quite a few on my website: http://www.craftlinky.com/advent-calendars.html
I have another site with great ideas for making homemade gifts. If you start now you could have quite a few finished before Christmas! :0)
Post a Comment