Friday, October 05, 2007

Ugly Blanket, Cute Kitty


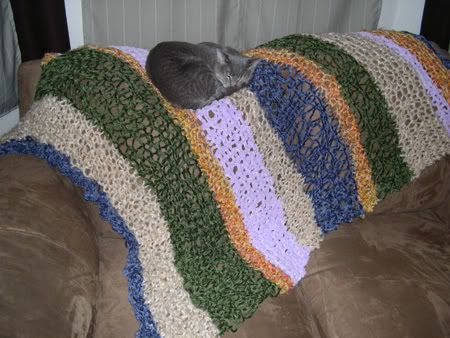
Project Name: Ugly Blanket
Time Taken to Finish: 4 days
Type of Yarn Used: All my bulky weight leftovers, mostly Lion Brand Chenille and Red Heart Light and Lofty
Amount of Yarn Used: Hard to say...probably the equivalent of 3 to 4 skeins
Needles Used: US size 35 needles
What I Liked About the Project: The big needles made it a very fast knit for the size - I had originally started out with size 13 needles and only managed to knit about 5 inches in two days!  At that rate I probably wouldn't have finished it before Christmas, so I bought some bigger needles and started over.
What I Didn't Like About the Project: The big holes in the Lion Brand Chenille rows (blue and green).  That yarn seemed to knit more loosely than the Red Heart Light and Lofty (cream and orange) and the Lion Brand Baby Chenille (purple).

I decided to make this blanket when I was trying to think of a project that wouldn't involve small needles (they give me hand cramps) and would use up some of my leftover yarn.  I think the mixture of clashing colors and its gaping holes make it obvious why I call it ugly.  But it's soft and (mostly) warm, and Lucy enjoys getting her claws into it.

Saturday, August 25, 2007

Garter Stitch Striped Baby Blanket


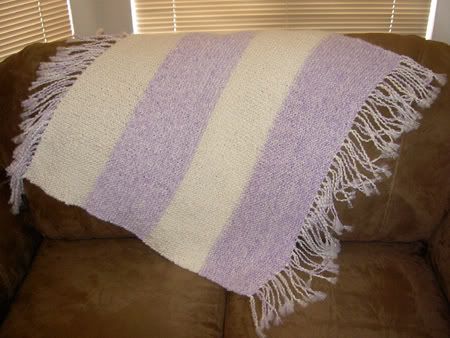
Project Name: Garter Stitch Striped Baby Blanket
Time Taken to Finish: 3-4 weeks
Type of Yarn Used: Lion Brand Homespun Baby in Soft Violet and Snow White (Homespun Baby may be hard to find in stores...it was for me, anyway)
Amount of Yarn Used: 4-5 skeins, one skein for each row (had to use a little more for some rows because one skein was not enough to have them match the width of the previous rows)
Needles Used: US size 10 needles
What I Liked About the Project: No purling.  My last baby blanket was in stockinette and each purled row seemed to take twice as long as a knit row.
What I Didn't Like About the Project: Even after knitting swatches to determine how many stitches to cast on, I miscalculated and made it way too wide.  I had to pull it apart and start over because I would not have had enough yarn to finish it at that width.  Also, because the yarn unravels very easily, I had to tie a knot at the end of each piece of fringe.  That took quite a while!

This project was knitted for my friends April and Mike, who are expecting.  I actually knitted it before the socks in my last post, but I wanted to make sure they received it before I put up any pictures. 

I wish the Homespun Baby yarn was more widely available.  From looking around on the web, it sounds like Lion Brand may be discontinuing it.  That's too bad, because there are no equivalent baby colors in their regular Homespun line.

Tuesday, August 14, 2007

My First Knitted Socks

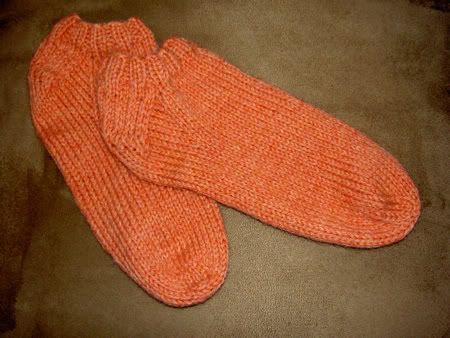
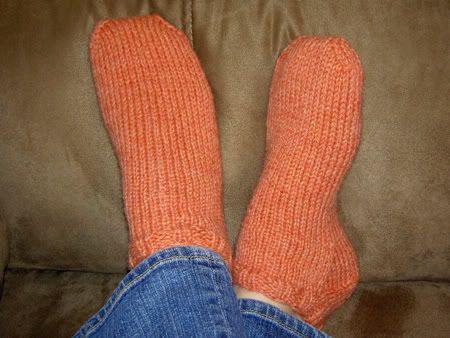
Here's my first attempt at knitting socks:


I used a pattern from a book called Charmed Knits - it's a book of Harry Potter themed knitting projects (see Currently Reading below).  I modified the pattern a bit to make them ankle socks and I used an orange wool yarn instead of Gryffindor colors.  So they're not really Harry Potter socks, but the pattern was easy to follow and it saved me having to find a sock pattern online.  They were much easier to knit than I thought - it probably only took me 3-4 hours of knitting per sock.

Speaking of feet, I managed to give myself a nice, deep cut on the ball of my left foot yesterday.  I had been sewing curtains for our living room and was standing on the couch to reach the top of the window to see how the curtains looked.  When I tried to step off of the couch, I slipped.  Unfortunately I had left several old curtain rods at the base of the couch and one had a sharp curved metal piece that was pointing upwards.  In my fall I managed to step on it and owww!  In addition to cutting my foot, I bruised it pretty good too so it's still hurting.  And I mangled the curtain rods so we had to throw them away.  Yippee!

Wednesday, June 27, 2007

Knitted Scarves and Lucy

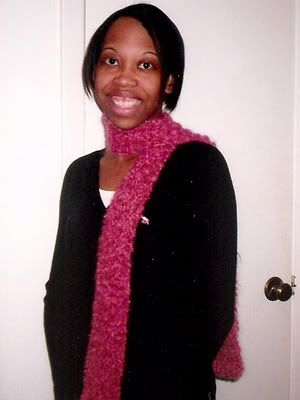
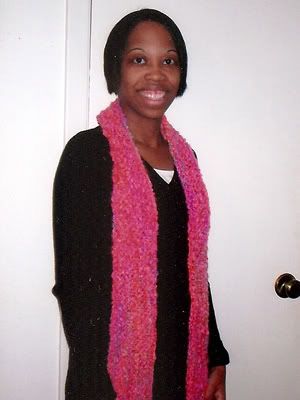
I know it's not really scarf weather right now, but I've received some photos of two scarves I knitted for a friend at Christmas.  I knitted them and gave them to her while I was on vacation, so I forgot to take any photos.  She did me a favor though and took some photos of herself wearing them.  The scarves look almost identical in the photos (she really likes pink) but I promise that they're different!


The first scarf was knitted from a mauve mohair mix.  The yarn feels quite a bit lighter than that in the second scarf.


The second scarf was knitted from a hot pink Red Hearts Bright n' Lofty yarn.  If you look closely you can see that there are bits of other colors mixed in.


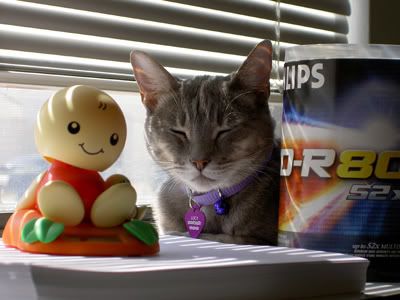
I was finally able to bring Lucy to Arizona (here she is hanging out near my computer).  For the past year she's been with my parents in Texas and I missed her so much.  It was quite an ordeal to get her here, though.  She doesn't do car rides well and the one time I had her in a hotel it was a disaster.  So to get it over quickly for her I decided that it would be best if she made the entire 12 hour drive in one day.  My plan was for me to drive half way to my parents house one day, then get a hotel.  Then the next day my parents would leave early with Lucy and meet me at my hotel and we would trade her off.  I would then leave immediately and drive back to Arizona.

That would have been a great plan if I had not overestimated my ability to do that much driving in 2 days.  Everything was fine until I got to the hotel, where I didn't get much sleep (there's also a 2 hour time difference between AZ and TX that confuses things).  I thought I would be okay, but I tried to drive down the street to get gas before my parents arrived and I felt myself starting to nod off within the first couple of blocks.  That was a little worrying!

But my mom and dad came to the rescue.  Once they figured out that I was not fit to drive by myself, my mom agreed to come with me back to Arizona.  It was a long trip, but Lucy and I survived.  Kevin and I took my mom to the airport to fly back to Texas the next day.  I guess it was pretty stupid of me to think I could do that by myself - every other time I've made the trip I've had someone else with me.  I have no future as a trucker!

Wednesday, May 09, 2007

Knitted Bunny


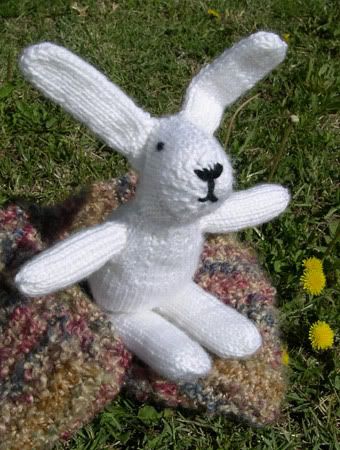
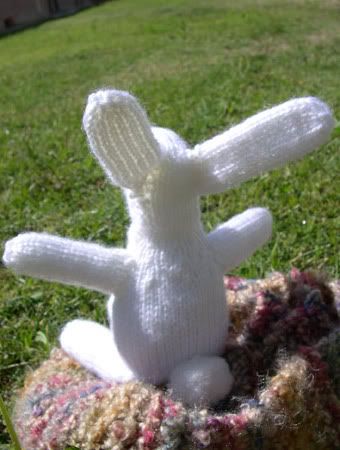
Here's a little bunny I knitted up a few weeks ago.  It's my first attempt at a stuffed animal, though I did do those little snowmen ornaments a while back.  But they were pretty basic, and besides snowmen aren't animals.

I used this pattern: Mr. Bunny.  My Mr. Bunny doesn't look quite like the original (he didn't end up quite as fat) but I think he's pretty cute.  I just used a plain cheap white yarn to knit him so he's not really fuzzy.  The hardest part was knitting his head and neck, which is knit like a sock (which I've never done either).

When I tried to knit the ears according to the instructions I must have done them wrong because the sides kept rolling up - they wouldn't lie flat.  So I ended up knitting them as a long thin tube instead.

Also, we've finally moved out of our apartment and are in our new house!  We haven't had any major problems yet.  I'm still busy trying to put things away and empty boxes.

Thursday, April 12, 2007

Knitted Bag


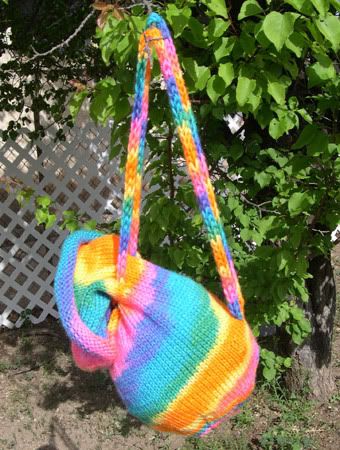
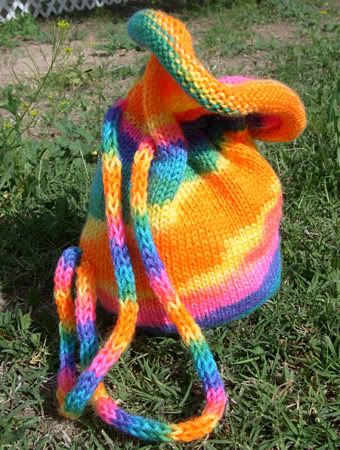
Here's my latest knitted project - a very simple bag knitted out of boredom.  Since I really didn't have any plans when I started knitting it I don't have specific instructions for it.  All I did was:

1. Cast on a bunch of stitches on a circular needle, join them and knit in the round.

2. Knit until the knitting is long enough to form the "lip" of the bag. 

3. Making the holes for the drawstring is the hardest part.  First, figure out how many holes are needed for the drawstring, and how far apart they must be to be evenly spaced.  There must be an even number of holes.  I chose 6, but I wish I had used more because there is too much space between them. 

For each hole, you will bind off a certain number of stitches on the first row, then cast on the same number of stitches in the same place in the next row.  I bound off 4 stitches for each hole, but that was really too many because it made the holes huge.  I probably should have bound off only 2 or 3 stitches. 

The hardest part of this for me was casting on the stitches in the next row.  I had never cast on in the middle of a row before.  A "backwards-loop" cast-on (also called single cast-on) is used and it took me a long time to figure out.  I had to watch the video for this technique at KnittingHelp.com several times before I could do it.  Note that the video just shows how to do the cast-on, not how to cast on in the middle of a row.

4. Continue knitting until the body of the bag is big enough.  Then begin decreasing stitches evenly until the bottom of the bag can be pulled closed (note: I decreased every other row so the bottom of the bag wouldn't get too small too fast).  Close the bottom of the bag and finish.

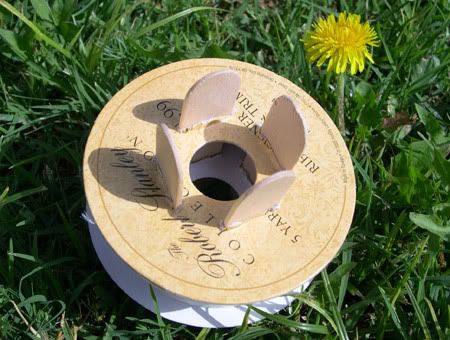
5. Knit a cord.  Mine was 3-4 feet long.  Cord can either be knitted on two double-pointed needles (called knitting "I-cord") or with a knitting spool (also called a knitting nancy).  I tried to knit my cord on the needles first, but my stitches kept falling off and I had to start over several times.  I have knitted with a knitting spool in the past so I knew how to do it, but I didn't have a spool anymore.  So instead of going to the store and buying stuff to make one properly, I fudged it:


I took a spool of ribbon and stuck four popsicle sticks in it.  It worked surprisingly well.

6. When the cord is finished, thread it through the holes in the bag.  The two long ends should exit the bag next to each other - tack each end to the side of the bag, and voila - straps!


I know this isn't the most attractively colored bag - I used a scrap ball of yarn to do it.  But I think some of my friends' children might find rainbow bags more attractive than I do, so I think I may give it to them to carry toys around in.

On another note, it looks like Kevin and I will "take posession" of our new house on April 17th.  We can't wait!

Tuesday, March 27, 2007

We're buying a house!

I haven't posted anything in the past few weeks - I went to visit my parents for a week and that threw everything off.  I haven't knitted anything new, though I think I'll go online and try to find a pattern for something I can knit with the yarn I already have.  I did paint two paintings, but they're pretty ugly so I don't really want to post them.  I am also working on another project, an anime-inspired fleece hat, but I am stuck on that one because no one around here carries black fleece (that's the main color for the hat).

But I do have some exciting news - Kevin and I are finally buying a house!  It's not as big as we would have liked and it costs more than we had hoped, but it's cute and fairly new.  We are going through all the inspection and appraisal stuff right now, so we will hopefully be moving in late April.  We can't wait!  No more sharing walls with neighbors, no more people parking in my spot, no more going to the post office every day (because they won't deliver mail to our apartment!), and no more landlords telling us "You can't put nails in the walls!" or "You can't have pets!" or "You can't put up a satellite dish!"  I know that owning a home has its own problems, but I think they'll be outweighed by its advantages.  Yay!
Friday, March 02, 2007

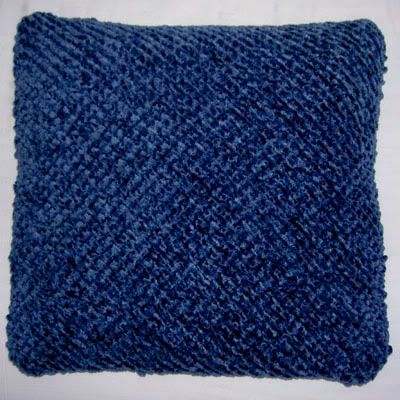
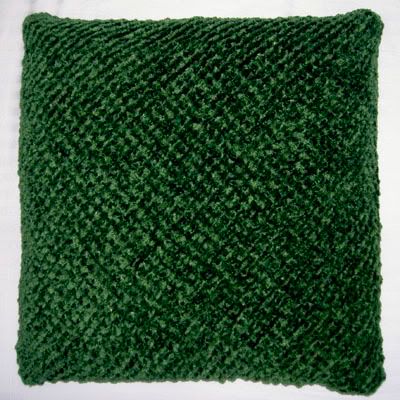
Knitted Pillow Covers


Project Name: Diagonally Knit Pillow Covers
Time Taken to Finish: 2 weeks
Type of Yarn Used: Lion Brand Chenille Thick and Quick in Periwinkle and Basil
Amount of Yarn Used: 6 skeins, 3 of each color
Needles Used: US size 11 needles
What I Liked About the Project: Easy garter stitch knitting.  Since it was knit diagonally, I didn't have to worry about calculating how many stitches to cast on.
What I Didn't Like About the Project: They took way longer to knit than I had originally thought.

Here's what I did to knit them:

Cast on 3 stitches.  Knit them (row 1).

Row 2 - Increase first stitch, knit second stitch, increase last stitch.

Row 3 - Knit back across without increasing.

Row 4 - Increase first stitch, knit middle stitches, increase last stitch.

Row 5 - Knit back across without increasing.

Rows 6 and onward - For even rows: increase the first stitch, knit the middle stitches, and increase the last stitch.  For odd rows: knit across without increasing.  Continue knitting until the triangle created is wide enough to cover half the pillow (make sure there is a little extra for a seam).

When the knitting is the correct size, note the number of stitches on the needle (I had 59 stitches).  Now, begin decreasing the first and last stitches on the even rows.  Continue knitting all stitches on the odd rows.

Knit until there are only 3 stitches left on the needle.  Bind off these stitches. 

The knitting will now be a square big enough to cover one side of the pillow.  Repeat the above instructions to create a second square (be sure to increase to the same number of stitches noted in the first square).  When finished, stitch the sides together and insert a pillow form.

Thursday, February 22, 2007

New Haircut


Not very exciting news, but I finally got a haircut.  My hair was getting pretty long and it was taking me 10 minutes to dry it.  I finally got fed up with it this morning and got it cut.  I think it turned out alright.  I'm not too happy with the picture (I think it looks like I'm trying too hard) but all the other photos I took make me look like a goofball.  Maybe I can get Kevin to take another photo this weekend.  He doesn't know that I've cut it, so hopefully he'll be surprised when he gets home!

Thursday, February 15, 2007

Knitted Tank Top


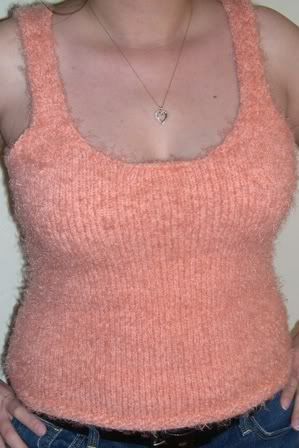
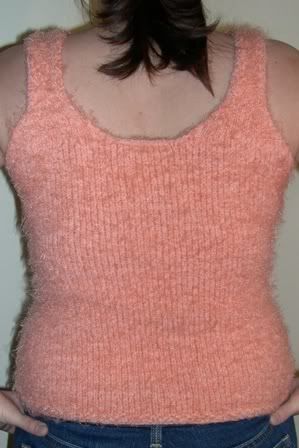
Here's my latest knitted project - a tank top I designed myself.  I finished it several weeks ago but I didn't post it because I wanted to write up detailed instructions for it.  I've been sitting at the computer for the past two weeks and I can't seem to do it!  It's not that it was that difficult to knit; it's just difficult to explain in writing.  When I sat down at the computer I would end up writing only one or two lines of instruction before I would get stuck and end up staring at the screen for an hour.  I finally decided that my time could be better spent actually knitting something!  So I'm not going to provide detailed instructions, just some general information on how I knitted it.


Front of Tank Top


Back of Tank Top


Project Name: Cathy's Easy Knit Tank Top
Time Taken to Finish: 1 month (I was knitting intermittenly - I was having eye trouble and couldn't knit much some days)
Type of Yarn Used: Yarn Bee Cameo in Seashell
Amount of Yarn Used: About 2 1/2 skeins (each skein was 142 yards/3.5 oz)
Needles Used: US size 7 circular needles (36 inches long)
What I Liked About the Project: Almost all of the knitting was in stockinette stitch, which is very easy to do when knitting in the round.  The tank is cute, fits well, and is very soft!
What I Didn't Like About the Project: I did not make the bottom border wide enough - it was only half an inch wide and the "curl" of the stockinette stitch causes it to flip up sometimes.  Even though it's a tank top, the yarn is so heavy it will probably be too warm to wear in the summer.  I'll probably end up wearing it to sleep instead.  I may even make a pair of shorts to match!

Here's what I did to knit it:

1. After knitting a gauge swatch, I cast on the number of stitches I needed at my hips and joined them in the round.
2. I knit a 1/2 inch border of knit one, purl one rib.  If I did it again I would knit at least a 1 inch border.  If you look at the photo you will probably notice that my border doesn't look like a knit one, purl one rib.  This is because I messed it up and purled one then knitted one on alternate rows.
3. I switched to stockinette stitch and began decreasing stitches evenly so that, by the time I had knitted 7 inches, I had the correct number of stitches I needed for my waist.
4. I then began increasing stitches so that, by the time I had knitted another 7 inches (for a total of 14 inches,) I had the correct number of stitches I needed for my bust.
5. I bound off the arm holes and the neck hole (front and back) and knit the four straps individually (right front and back straps, left front and back straps).
6. I used Kitchener stitch to connect the front and back straps, and then weaved in all loose ends.  Done!

By the way, I'm re-reading all the Harry Potter books in preparation for this July!  With the new movie and the final book due then, it promises to be an exciting month!

Related Posts with Thumbnails