Monday, August 17, 2009

Yet Another Amigurumi Bear


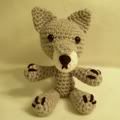
I've crocheted yet another amigurumi bear using the Beary Jackson pattern at Rheatheylia.com. I've made 3 bears prior to this one - they are awesome baby gifts and only take a few hours to make! You can see my first bear here and the other two here. This one was crocheted out of Red Heart Baby Teri yarn in Medium Pink. I love this yarn, it is so soft! The eyes and mouth are embroidered on with blue yarn and pink embroidery floss. I have several other friends who are expecting so I see more Beary Jacksons in my future...

Friday, August 14, 2009

Anime Cosplay: Canal From "Lost Universe"

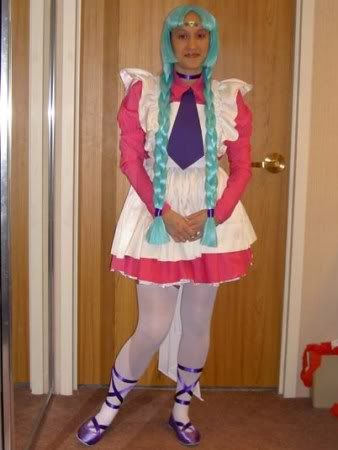
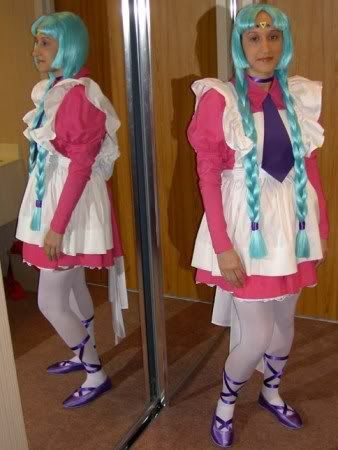
This is an older costume, I just finally got around to posting it here. I wore it to A-kon (a Japanese animation convention in Dallas, Texas) in 2005. It's based on the character Canal Vorfeed from the television show "Lost Universe":
While I designed the costume and helped find the patterns, I can't claim any of the sewing - my amazing mom did it all! Afterwards she said "Never again!" which is why I began sewing my own costumes. :) Overall it took us about four years off and on to complete it. Part of the reason it took so long was the wig. We actually had the rest of the costume ready to go for A-kon 2003 but I waited until the day before the convention to work on the wig and it was a disaster! I decided not to wear the costume until I had enough time to fix the wig properly.

Here are the details on the different parts of the costume (to the best of my recollection - it has been 4+ years since we worked on it).
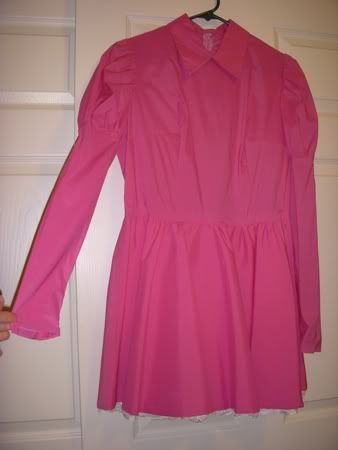

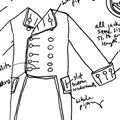
Dress - front
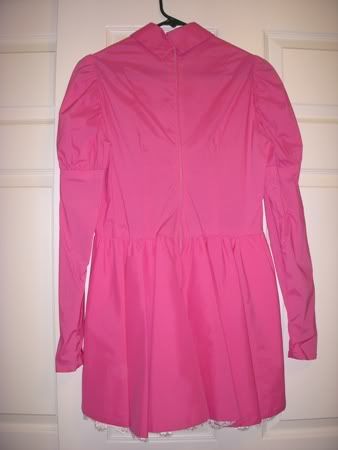
Dress - back
Project Name: Canal's Dress
Patterns Used: Top - Butterick 3187 (out of print); Skirt - McCall's 2890 (out of print)
Materials Used: pink fabric with slight stretch; white tulle; white satin/satinette
Notes: The top and bottom are one piece, though they were created from different patterns.
The top was created using Butterick 3187, a Victorian bathing costume. The only major alteration was to the neckline, which was modified to include a fold-down collar. Since this pattern is out of print, I suggest McCall's 4948 for the top since it has long leg-of-mutton sleeves.
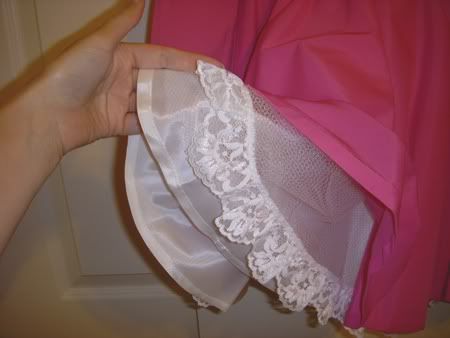
Dress - skirt detail
The skirt was created from McCall's 2890. As you can see in the above photo, there were four layers: an underskirt of white satin/satinette, a layer of white tulle, another layer of white tulle with some white lace stitched to the edge, and an outer layer of the pink fabric. Since this pattern is out of print as well, I suggest Simplicity 3618 or 4015 as substitutions (but any short poofy skirt pattern will do).
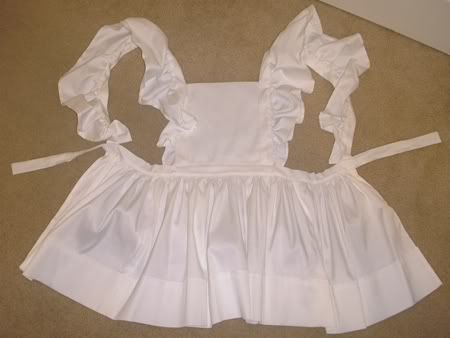

Apron
Project Name: Canal's Apron
Pattern Used: McCall's 2947
Materials Used: heavy weight white cotton
Notes: The apron was created using McCall's 2947 apron pattern. It follows view D pretty closely with a few alterations: the skirt was shortened and the bottom ruffle and pockets left off, the shoulder ruffles were enlarged, and the ties in the back were made smaller since we would be using a separate bow (see below). I added some small pieces of wire into the outer edges of the shoulder ruffles to help them stand up.
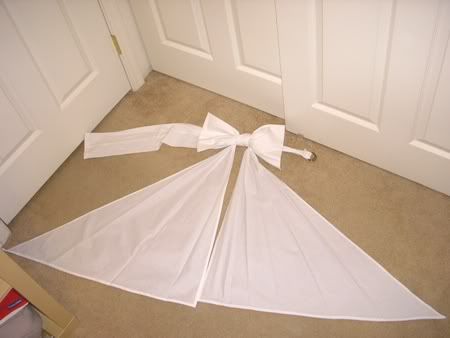

Bow
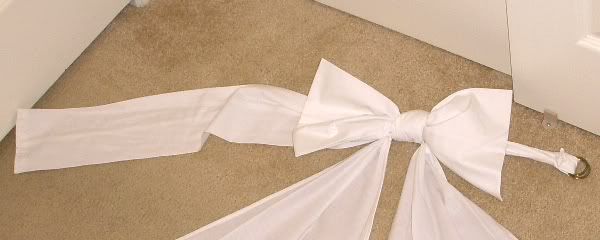
Bow detail
Project Name: Canal's Bow
Pattern Used: none
Materials Used: heavy weight white cotton
Notes: This was worn over the apron - the bow went in the back and the rectangular piece of fabric (on the left) wrapped across the waist and was tightened using the D-rings (on the right). The two large triangular pieces of fabric were the "tails" of the bow. They were folded into pleats and ironed down. Unfortunately I don't have a good photo of the bow being worn, you can sort of see it behind me in the two top photos.
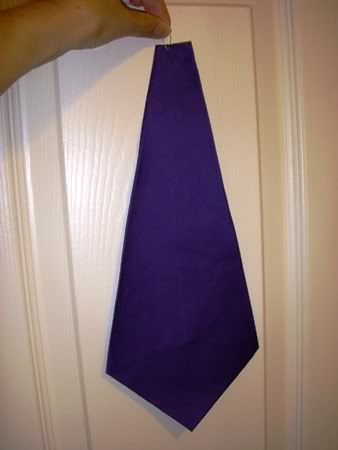
Tie
Project Name: Canal's Tie
Pattern Used: none
Materials Used: purple cotton
Notes: The tie is just a piece of purple fabric, sewn into a tie shape and pinned to the neck underneath the folds of the collar.
Here are some details on the other parts of the costume:
Wig - This was purchased from Amphigory's Wigs. The style was "Enchantment" and the color was "Daydream" (sky blue). As it was the wig was too thin in the back to part and make into two braids - the mesh and elastic inside the wig showed through (this is what I unfortunately discovered the day before A-kon 2003!). To fix this problem, I purchased hair extensions in the same color and used a tutorial from a wig artist named Katie Bair to add extra hair to the back of the wig. I then parted the hair into two braids and finished them off with rubber bands hidden under some purple ribbon. The whole thing was then coated with loads of hair spray to keep it all in place. The braids made the wig very heavy, after wearing it all day I had a massive headache! If you need some tips on how to put on and wear a wig, check out this page on Katie Bair's site.
Garter and Stockings - It's difficult to tell in the photos but the opaque white thigh-high stockings I am wearing are being held up by a garter belt. I purchased the garter belt at Victoria's Secret and the stockings were pantyhose that I cut off at the thigh.
Shoes - These were probably one of the most expensive parts of the costume. The shoes were ballet flats that I purchased at a bridal store and had them dye to match the purple ribbon. I then sewed two pieces of ribbon into each shoe. The ribbon on my calves was attached to the stockings by a few small pieces of purple duct tape.
Neck band - Just a ribbon with velcro sewed at the back.
Forehead Decoration - I made Canal's forehead decoration using yellow craft foam and plastic rhinestone "jewels" purchased in the jewelry-making section of a craft store. They were attached to my forehead using eyelash glue.


A few final thoughts on the costume: Once I actually got to wear it to the anime convention it was a blast! I got asked to have my photo taken many times but unfortunately I hadn't thought to practice any poses beforehand so I don't think I did the costume justice! You might feel silly striking a pose for some stranger but it really does improve the photo.
The only major problem I had with wearing the costume was the heavy wig. By the end of the day it had worked its way back so that some of my hair was showing underneath. If I had realized that and had brought some extra hairpins I probably could've fixed it but unfortunately no one pointed it out to me! I guess the lesson is to find a mirror and check your appearance every now and then.

Wednesday, June 10, 2009

Bisquick Caramel Apple Desert


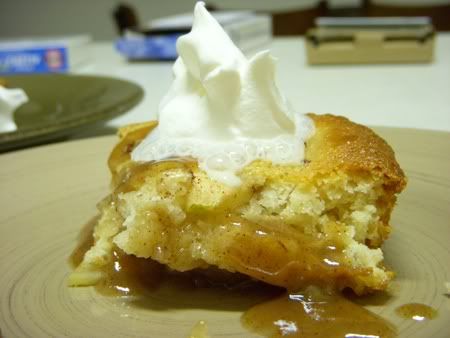
We had a few apples sitting around and I wanted something different for desert so I found this recipe: Bisquick Caramel Apple Desert. I liked this recipe because it doesn't have eggs - we don't eat them that often so I almost never have any in the house. It took a while to bake (nearly an hour) but it was worth it! It was great served right out of the oven with a little bit of Cool Whip.

Friday, May 22, 2009

American Idol Cake: Adam versus Kris


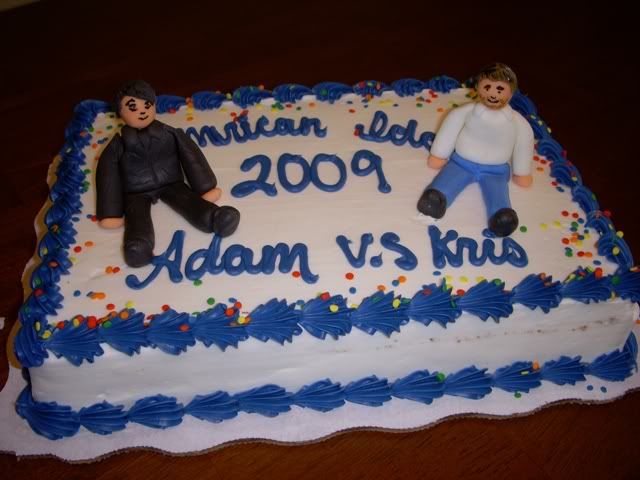
I wanted to do something special for the American Idol finale, so I made little fondant figures of Adam Lambert and Kris Allen to top a cake I ordered from the grocery store (my homemade cakes never taste nearly as good as store bought). This is the first time I've made fondant figures so they don't look much like the actual people but they were fun to make!

Tuesday, May 19, 2009

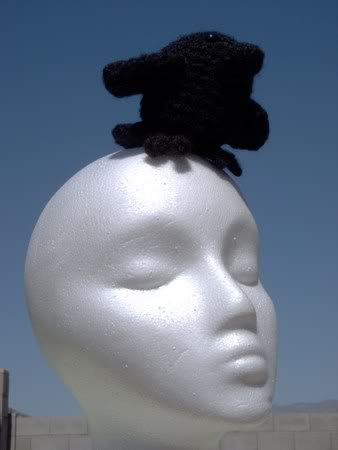
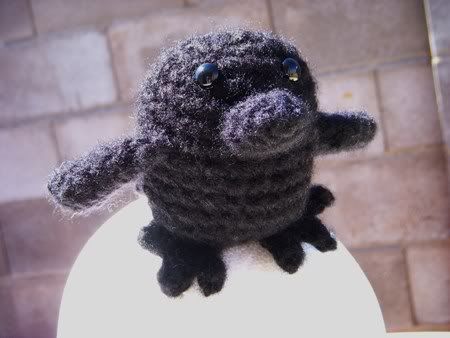
Amigurumi Raven


I crocheted this raven back in March as a birthday gift for my dad. Unfortunately I was in a hurry and I "freehanded" it so I don't have a pattern. If you want to make your own, the shapes I used were fairly simple (except for the feet):

Body: A pill shape - just an amigurumi ball with a few extra rounds thrown in the middle to make it longer.

Beak: I think I started out with four stitches in a circle, then increased twice in each round, putting the increases opposite from each other. I stuffed it a tiny bit.

Wings: Also started with four stitches in a circle. I then put all the increases on one side so that the wing would be curved. I didn't stuff the wings.

Tail: I did the tail a little different. I chained several stitches (6 or 8 maybe) and then started crocheting "in the round" up and down both sides of the chain. Once I had one round finished, I decreased twice in each following round, putting the decreases opposite from each other. I stopped when there were only a few stitches left in the round. This made a flat trapezoid shape. I did not stuff the tail. I sewed the open end (the less-wide end of the trapezoid) to the raven's body.

Feet: I'm a little unsure how I made them. I think I made a small circle (maybe 4 or 6 stitches) and then did the toes by making a few chains away from the circle then turning and stitching back down the chain until I hit the circle again. I repeated that for each of the three toes.

I hope this helps explain how I made it. If I still had the raven I would try to write up a pattern but it is now in Texas with my dad so I'd have to start from scratch and I don't have time for that at the moment. Please feel free to leave a comment if you have any questions and I'll do my best to help.

Tuesday, April 28, 2009

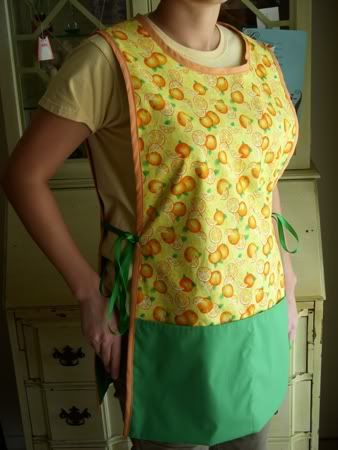
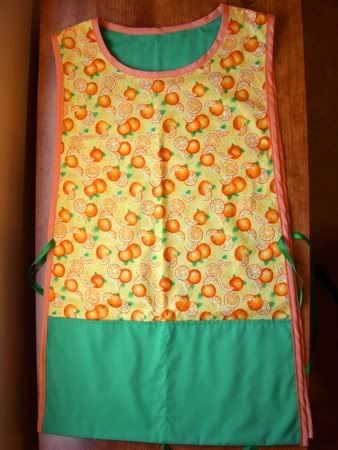
Simple Apron


I made this apron as a gift for a friend's bridal shower. I made a similar one for myself a long time ago (I think it was my first sewing project ever) and really love the style - it covers everything! The pattern is Simplicity 5525 which is unfortunately out of print but Simplicity 4987 and McCall 5690 are similar. The only modification I made was to leave out the elastic waistband - I don't like the way it looks and it works just fine without it.

Tuesday, April 14, 2009

Make Your Own Lawn Markers

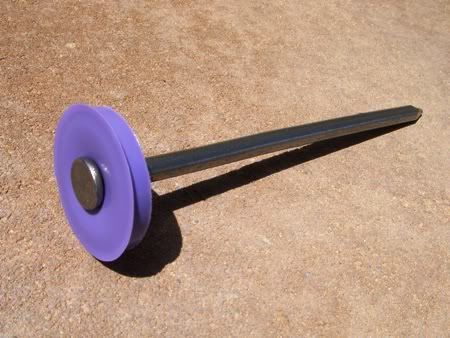
If you need a way to mark your lawn or garden that's cheap and won't interfere with a mower, try something like this:


It's a plastic cap from a milk (or water) container and a large 8 cent nail from the hardware store. I used an icepick to poke a hole in the center of the milk cap and pushed the nail through (if your nail is sharp enough you probably wouldn't need to use an icepick).

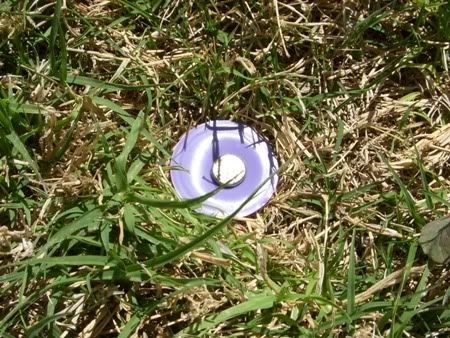
Then you can just push it into the ground to use as a marker.


We were looking for some way to mark where in our lawn we wanted to set our sprinklers so we don't have to figure out where to place them every time we set them out. Flags would be in the way when we mow but plain stakes or nails would be hard to spot when they're pushed all the way down. So my mom came up with the idea to use the milk caps and a nail - since they're brightly colored they show up in the lawn but they're flat so they won't get in the way.

Friday, April 03, 2009

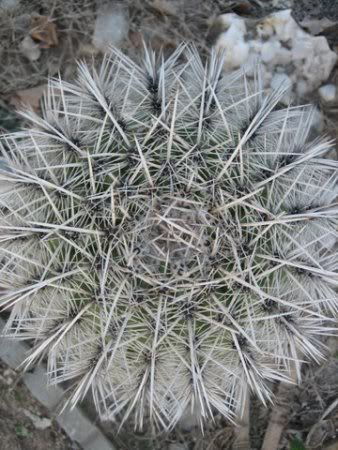
My Texas Saguaro


So I am 98% sure that this cactus is a saguaro (pronounced sah-wah-roh). If you don't know what a saguaro is, it's one of those giant cacti that have the big arms. I had no idea that they were called saguaros before I moved out here to Arizona. The saguaro is pretty much the mascot of Arizona and the southwest - there's even one on the Arizona quarter.

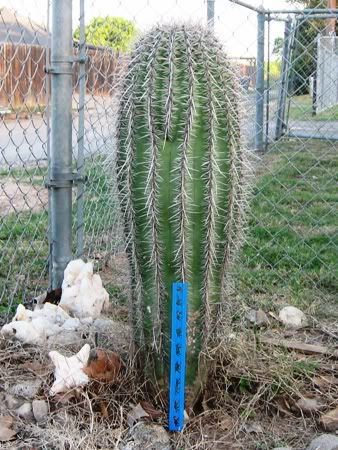
The interesting thing about my saguaro is that it is not in Arizona. It's at my parent's house in south Texas. Back when I was still in grade school I got one of those little greenhouse cactus seed kits while on vacation at Carlsbad Caverns in New Mexico. I'm not sure exactly when that trip was but I am guessing it was between 10 and 15 years ago.


This cactus was the only one to survive from the kit. It finally outgrew the little pot we had it in so we re-planted it in the back yard. I never really given much thought as to what type of cactus it was - I thought it was some type of barrel cactus until I noticed that it getting taller but not wider as a barrel cactus should. It's shape made me think of a saguaro, so I started researching them online.

After a few days of searching, I was almost convinced that it wasn't a saguaro because many sources said that a ten year old cacti would only be 1.5 to 6 inches tall. As you can see from the photo above, mine is between 2.5 to 3 feet tall! But after doing some more research I found that those heights were for wild cacti in the desert. Since Texas is slightly wetter than Arizona (and since my parents probably watered it occasionally) my saguaro probably grew faster than it would have in the wild.


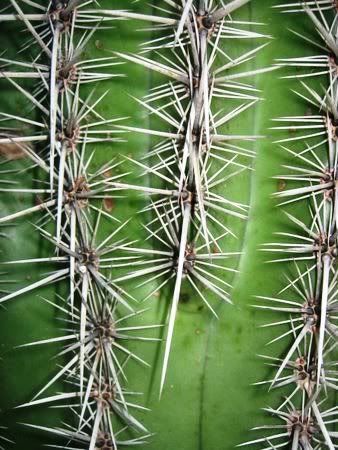
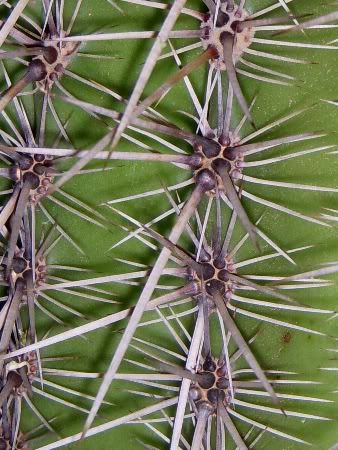
I compared my cactus to pictures of saguaros and to saguaros I've visited in real life here in Arizona - I couldn't find anything that made me think that my cactus wasn't a saguaro. The main identifying trait that I found mentioned online was that in each group of spines, there is one spine that is much larger than all the others and points downwards. You can see this on my cactus here:


So all these things together have led me to the decision that my cactus is a saguaro! After living here in Arizona where saguaros are a big deal (a full grown one can cost thousands of dollars), it's fun to know that I grew one without really trying! And that's even more special since it's in south Texas, which is not really it's native habitat (there are no wild saguaros in Texas or even in New Mexico). It's kind of cool to think that my parents are probably the only people in my hometown with a saguaro in their yard!

(By the way, if anyone who has some cacti knowledge thinks that this might not be a saguaro, please let me know why not and what you think it might actually be. I'm no expert so it's very possible that I'm wrong!)

Update 9/29/11: I've posted an update with photos of how the saguaro has grown over the past two years.

Wednesday, March 25, 2009

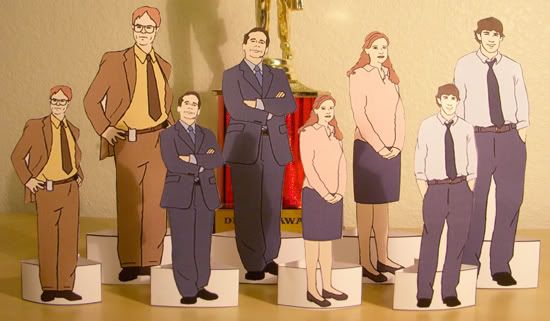
"The Office" Party Decorations and Activities: Throw a party themed around the TV show!

As part of (another!) task at DunderMifflinInfinity.com, my branch (Ypsilanti) came up with a bunch of printables that can be used by anyone wanting to throw an "Office" themed party. We won the task so I guess our items must be worth something! Here they are:


Jell-O Mold Placecards and Butt-Kisser Game


"The Office" Paper Dolls: Dwight, Michael, Pam, and Jim

Not pictured: Who Said That? "The Office" Quotes Game and our Party Recipes.


- Jell-O Mold Placecards (PDF) To decorate your table.
- The Butt-Kisser Game (PDF) Played like Pin-the-Tail-on-the-Donkey, but with Michael's butt as the donkey and Dwight's lips as the tail!
- Who Said That? "The Office" Quotes Game: Questions (PDF) and Answers (PDF) Quiz yourself or your friends by identifying quotes from "The Office".
- "The Office" Paper Dolls (link) I posted these here before, they can be used as decorations or party favors.
- Party Recipes (link) These were also posted here before, there are 14 party recipes submitted by the members of DMI Ypsilanti.

Thursday, March 05, 2009

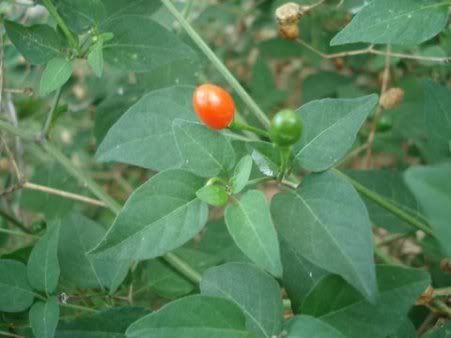
Chiltepin Plants Update 2


I've been trying to grow some chiltepin plants (a tiny pepper) from seeds taken from a plant that has been growing at my parent's home in Texas for more than 20 years. Unlike most pepper plants, their chiltepin stays alive during the winter so they don't have to re-plant it every year. My goal is to also get a chiltepin to survive year round here at my home in Arizona. I started growing my plants indoors last May and ended up with 31 seedlings (all the seeds were from one tiny pepper, I might add!).

Eventually they started to attract pests so in early fall I moved them outdoors. They grew much faster outside and were just beginning to develop peppers when it started to freeze. I worked hard to cover them up when it got too cold, but I had to leave for two weeks over Christmas and, well, they didn't make it. Since I had been working on them for 8 months I was pretty upset (I have to admit I cried a little). I couldn't bring myself to pull them up and throw them out so they've been sitting in my backyard for two months.

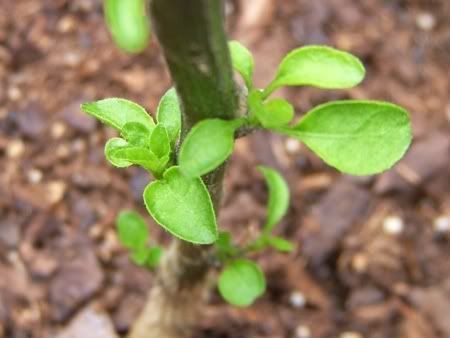
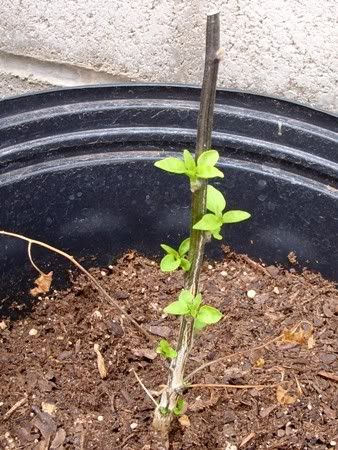
I was making plans to have my mom send me some more seeds when I happened to look at the plants and I was surprised to find that there were tiny green leaves shooting from the bases of many of my "dead" chiltepin plants!


I guess they were just hibernating! The chiltepin seeds can take a month or more to germinate so I was very happy that I didn't have to mess with trying to get them to sprout again. Since I had let them grow too tall while they were inside (they had to be held up by stakes) I decided now would be the best time to prune them a little. Even though they looked pretty dead it was still hard for me to cut them back. I left them all at about 6 inches.


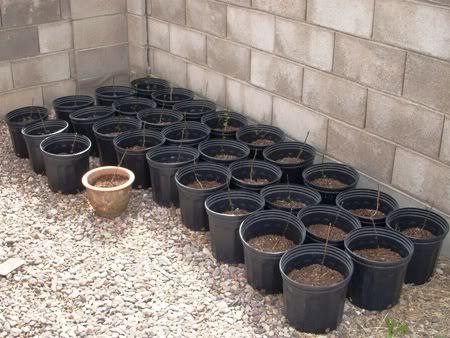
There are still about 1/3 of the chiltepin plants that don't have any new leaves, but the stems of all the plants were green on the inside when I trimmed them so I'm hoping that those will come back too. And as soon as the plants have recovered enough, I'm going to put them in the ground - no more messing around with plastic buckets! Hopefully they'll have enough time this year to make some peppers so I can try cooking with them.

My 31 chiltepin plants, still looking nearly dead

Related Posts: Quail Nest and Chiltepin Seeds, Chiltepin Plants Update 1

Related Posts with Thumbnails